Friday Favorites and Freebies

Happy Friday!! Enjoy these great Freebies and Favorites for this week!

If you love to make cupcakes as much as I do, you will love having this cute wrapper template on hand from Domestic Goddess Adventures.

If you are lucky enough to travel with your kids again before school starts, check out these great (free!) downloadable travel games from Prepared Not Scared.


Here's a fun site for kids to explore and learn all about the weather.

I love the idea of this make-in-a-day kids picnic table!

And finally, here is a great line-up of online ways for your kids to practice those typing skills (and have fun!) from Five J's.

Have a WoNDerFuL WEEKEND!

Learning to Tell Time


spiral-clock


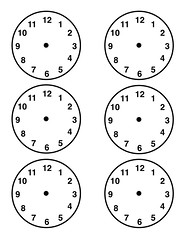
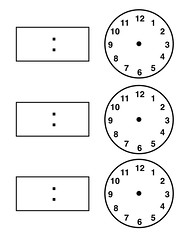
Right now Joci is learning to tell time. She loves to wear her watch around the house and continually checks it to see if it's time to go do the next fun thing. To help her with her time telling, I made a few worksheets to practice with her. I really appreciate it when other mom's share their worksheets and templates as I get to enjoy their Little Projects with the click of the button and a little printer ink. If you're working on telling time too, you can give these a try and let me know how it went.


.

Time for a {Little Project}!
e_signature

Super Flavors for Homemade Ice Cream

For easy ice cream flavors, I recommend buying several different bottles of extracts or flavorings at the grocery store and mixing it up to see what you like.

My favorite is Mint Chocolate Chip
To the basic ice cream recipe I add
3/4 tsp mint extract
1/4-1/3 cup chocolate chips I've chopped up into little pieces in my food processor
wait until the last 10-15 minutes to add the chocolate chips. Store leftover chips in your freezer.

My husbands favorite is orange creamsicle
add 1 tsp of orange extract - yum!

Another favorite is banana coconut
add 1tsp each of banana and coconut extract

You can get creative and put ice cream toppings in your ice cream rather than on top. Add chocolate syrup, caramel sauce, sprinkles, food coloring, etc.

I love peanut butter so I'll make peanut butter ice cream by adding 1/2-2/3 cup peanut butter to the milk and then stir until dissolved. (Don't add the cream until after you've added the peanut butter or the extra stirring could give you buttery ice cream). You can also add Nutella or chocolate sauce to make it chocolaty.

I have two suggestion for people who are in the mood for ice cream, but have no cream in the fridge:
1) put chocolate milk in your ice cream maker.
It will make a Wendy's-type Frosty
2) make sherbet

Basic Sherbet Recipe
3 cups milk
1/2 can of juice concentrate, thawed
1/4 cup sugar
This is very good with limeade as it makes a very tasty lime sherbet.

When fruit is in season, we'll make fruit ice cream. Before making the ice cream, (several hours before you make the ice cream is best although it works if you just do it first too) slice fruit and put in a bowl with 1/4 cup lemon juice and half of the sugar. Stir together and let macerate in juices. Add to ice cream in the last 5 minutes of freezing. Depending on the fruit you may need to adjust your sugar to up to a cup.

If you LoVe to make ice cream treats too-please SHARE your ideas with a comment. We love to try new flavors!
e_signature

National Ice Cream Month


Did you know that July is National Ice Cream month? There are still plenty of days this summer to enjoy this treat-we eat it pretty much EVERYDAY around here (including homemade three-berry tonight)!

In honor of celebrating, Elspeth and I will share some of our favorite ways to make homemade ice cream. It's one of our YUMMIEST Little Projects!

We both have this ice cream maker that has a freezable bowl.

It's great because it makes 1-1/2 quarts of ice cream in about 30 minutes and you don't have to keep salt on hand (so you don't have to plan ahead.) You just keep the bowl in the freezer and pull it out when you want to make your ice cream. With ice cream I guess I tend to be impatient. I want to enjoy it as soon as possible!

The basic ice cream recipe we use is:
2 cups milk
1 cup cream
1/2-3/4 cup sugar
1 tsp vanilla
You can replace about 1/2 cup of milk with yogurt to get a thicker ice cream. It's also softer to scoop if you freeze your leftovers.

After the basic recipe it's fun to use your imagination and see what flavors you can dream up!

We use whatever milk that we drink and have on hand rather than whole milk in the ice cream. Also, Elspeth likes to use table cream rather than whipping cream because if you stir the heavy cream too much it gives the ice cream a buttery texture. (Also, table cream is cheaper).

Jay doesn't handle milk well, so we also make sorbet. It's heavier on the sugar though than ice cream is :( We start by making a special sugar syrup (see below).

To make Sorbet:
Use your blender to puree about 4 cups of fruit in the blender along with 1/4 cup of this special sugar syrup.

add 2 Tablespoons of orange juice and 1-1/4 cups more of special sugar syrup (depending on desired sweetness) to ice cream maker-and freeze according to manufacture's directions.

special sugar syrup recipe for sorbet: 2 cups sugar, 2 cups water. Bring to boil in saucepan. Reduce to simmer about 5 minutes until sugar has dissolved. Cool to room temperature. You can use this syrup immediately or store until needed (makes 2.5 cups)
If anyone has great sorbet recipes, please share!

We make mostly fruit flavored ice cream at our house, but Elspeth makes all kinds of fun flavors. She will be back to share her favorites tomorrow. In the meantime, chip in a comment if you have a favorite flavor or would like a tip on making homemade ice cream. Enjoy making your own ice cream!


Friday Favorites and Freebies

It's time for more FAVORITES
to celebrate it being FRIDAY!

If you have a little one who loves to play in the kitchen, check out this FREE pattern for an apron and oven mitts (I can't wait to make these!) at Living with Punks.

Make a sailor's knot bracelet for a friend with this tutorial from Etsy.

We all know that ruffles are super cute on babies-check out this tutorial for adding them onto your favorite baby onsie at the Homemade Diva.

I want to put these vintage labels on everything! Print them out and pretty up and organize something-pantry jars maybe?

And finally, I LOVE tetris and so when I found a way to work on geography too I was thrilled. Here you can play states and countries too-tetris-like. It's different but fun-and great for kids!

Happy Friday! I hope your weekend is Fantastic-and that you find time for all your Little Projects!

Passing on the Crafting Bug

IMG_1131

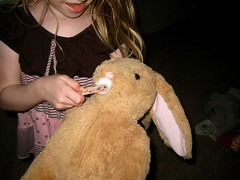
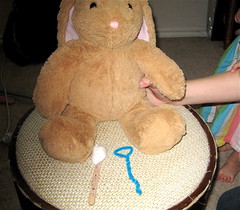
A lot of our projects and crafts we do around the house start out with a request or idea from my daughters. When Joci asks me to make a cape for her cat, I go to my fabric and ribbon scraps excited to see what will emerge. Apparently Joci has caught on and last night after we brushed her teeth she requested a toothbrush for her bunny. We were getting ready for bed so I declined, telling her I'd do it tomorrow. She then asked if she could make a toothbrush out of her toys. I wanted to see what she came up with so I let her run into her play room. She came out with a popsicle stick and requested a cotton ball and a piece of tape. I was impressed.

She then decided she needed a flosser for her bunny, and this time excitedly informed me she was going to find something from her toys to make a flosser. She ran into the other room and a few minutes later came back with a chenille stem requesting a little help shaping it into a flosser. I'm definitely going to include her in my brainstorming next time she asks for a little project!

What little projects do your little ones do?

IMG_1133
e_signature

Frog or Toad?

Have you ever wondered:
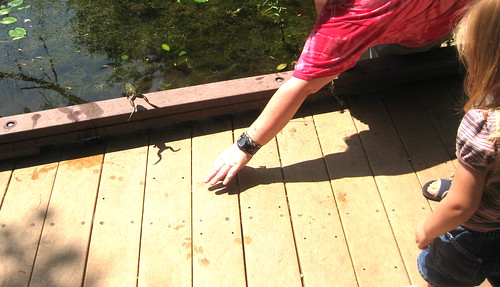
We found out this week because we caught some of each! We are lucky to live in a place that has so much wildlife. Here is a lucky snap of the camera as he got away!


Here is a printable about the life cycle of frogs. Kay is really into making "books" of everything right now. So we cut ours and made it into a book ;)

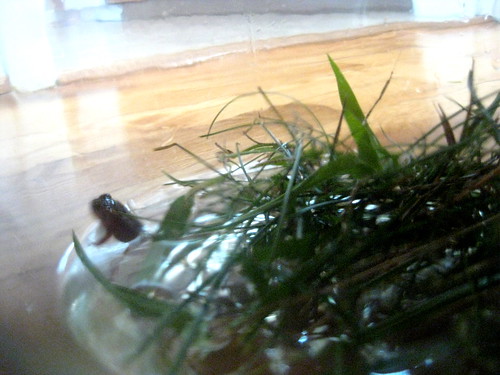
We've learned a lot about habitat since the toad lived with us for a day.
There are some other great frog science ideas here too.


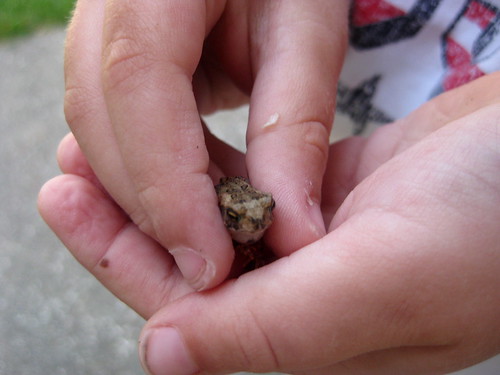
In case you are wondering, the first photo is a frog, and just above is the toad! Jay has been in heaven "playing" with his little friends! I love these kind of summer projects!

Thanks Tip Nut!

Thanks to Tip Nut for featuring my Tiara in their round-up of fun projects for July! Go here to see the other great projects on the list! You can also subscribe to have great tips right in your email in box each day-everything from organic bug spray to how to get the ring off your bathtub :)

Sunroom to Playroom

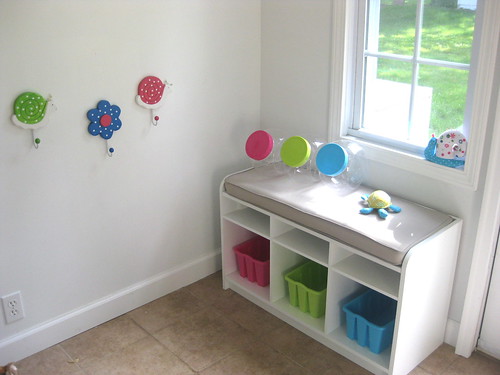
In our new home we have a sunroom that is totally enclosed and we are turning it into a playroom for the kids.

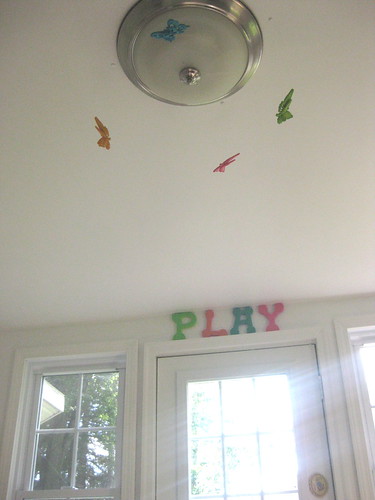
Since it tends to be pretty cold where we live for a good part of the year I wanted to use "happy" colors. I ended up basing the whole room off of the colors of letters of "P-L-A-Y" that I saw at Michael's just before we moved here.
They happened to be the perfect colors to use this year because I've been able to find all kinds of coordinating accessories for the room too!
Here's a sneak peek of what I have done now. I'm excited to share how it continues to evolve with the {Little Projects} that are in the works. (The hanging butterflies are felt from Hobby Lobby's Easter collection. )

I love the idea of a storage bench. You get seating and storage all at once! This storage bench is from the Martha Stewart line that Home Depot carries. I plan to keep books and papers for drawing in the upper shelves. Toys in the bins below. Two of each color will stack in the lower part.

I was thrilled that Hobby Lobby was clearancing their garden line that MATCHED my color choices. The hooks on the wall will hold coats in the winter and umbrellas now. I love the clear "candy-styled bins" for toys on the shelf and the little stuffies around the room are all from there.

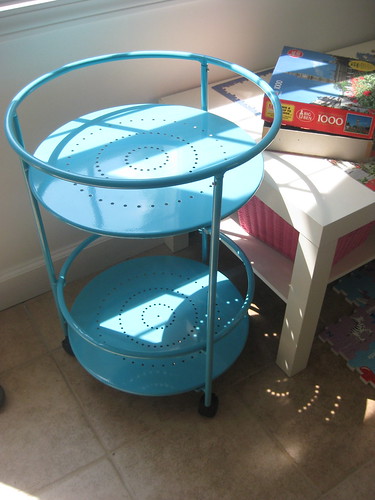
I am so excited for this garden cart (from JC Penney.) It will be a few more weeks before the rest of the {Little Project} for the cart is ready to share....

I remember a friend saying that rather than just rush into finishing every touch in your home to get it all finished, you should enjoy the process. Since once it's done you can't dream it up anymore. I've been trying to remember that. These {Little Projects} all take time, but soon they'll add up to the finished product. It will be nice to be done, but it's fun to build it and imagine it right now too!


Expanded Calendar Time


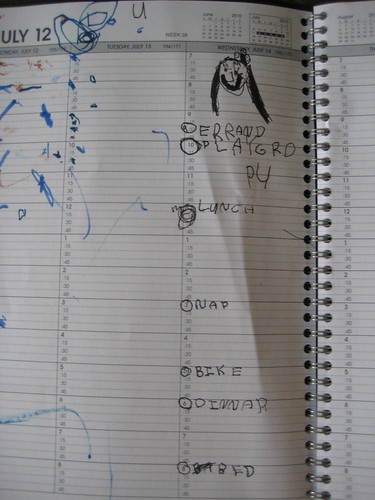
Like many of you we are spending time with the calendar everyday. We're learning numbers, days of the week, months, years, seasons, and more. Last week, my husband brought home a free appointment calendar which is not hard to find this time of year. Today after our normal calendar time, we sat down with this one. We wrote down what we'd be doing at which time.

One of the things we're working on right now is learning to tell time. This was a great way to combine the two. Today, my daughter will be checking the clock throughout the day to see if it's time to do the next activity. It was also good writing practice. She was able to sound out many of the words hence dinner is spelled "dinnar."

What will end up on your calendar today?
e_signature

Refashion to Doll Clothes

IMG_1096 IMG_1116
Doll Clothes From Baby Clothes
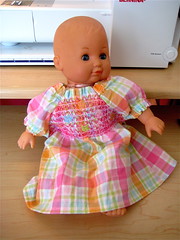
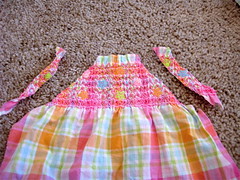
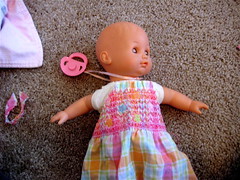
Hi, I'm Elspeth and I'm excited to share This fun Little Project with you! I have too many baby clothes and not enough doll clothes. We won't be needing these baby clothes any time soon, and they are taking up a lot of storage room. I decided to turn a 0-3 month baby jumper into a dress for my daughter's baby doll. I've been reading a lot of refashioning blog posts and always find it easier and safer to do for my kids rather than for me. If you haven't tried refashioning yet, starting with doll clothes is a great way to start because even if it doesn't turn out the way you planned, it will still get used. This Little Project took me a little less than an hour to do with my two little helpers "helping", so it would be an easy project for someone with sewing experience, or a great first try for beginners.

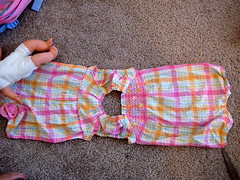
When turning your baby clothes into doll clothes, and when refashioning in general you won't be using a pattern. Before cutting spend a minute looking at how it's put together. You'll want to cut along the seams, cut the pieces down keeping the angles the same, and sew them back together. I included a lot of pictures, not because you're baby clothes will be the same, they probably won't, but to show you the process so you can try it.


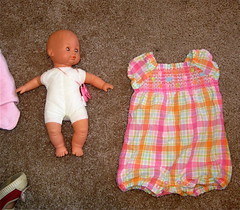
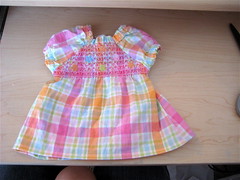
Here is my before and after. I started with a pretty standard 12 inch baby doll and a 0-3 month baby jumper. I would stay near the smaller end of baby clothes as it can be harder to resize if the clothes are significantly bigger than the doll.


IMG_1096 IMG_1116


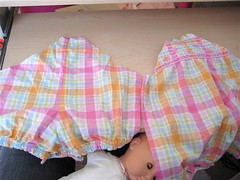
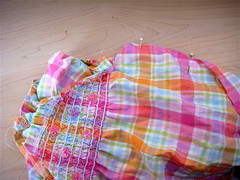
I cut up the side seams and then cut off the back at the bodice.
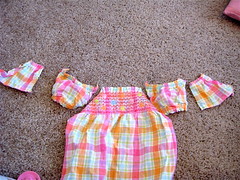
I then cut the sleeves off and cut them in half so they would be about the right size for the doll.


IMG_1097IMG_1101


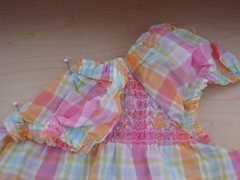
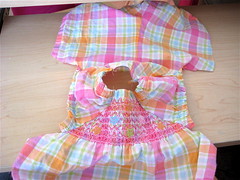
The front of the dress was too big, so I cut it down so that it would fit the doll. As you are cutting different pieces down to fit your doll, you want to keep the lines and angles the same so that the pieces will all fit together again when you sew it back together.


IMG_1102IMG_1103


I cut the back piece out to the match the front.


IMG_1110


I sewed the sleeve onto the front of the dress by putting right sides together and then sewed the sleeve onto the back piece.

IMG_1108 IMG_1112


Putting right sides together, I sewed the sides together and cut off the bottom and hemmed it.


IMG_1113 IMG_1114

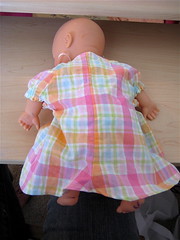
When you're done you'll have a new dress for you doll! I enjoy seeing my daughter dress her doll in an outfit I thought was so darling on her.


IMG_1116 IMG_1117


Happy Sewing!

e_signature


Sisters Unite!

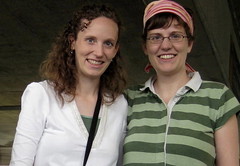
I want to introduce you to my sister, Elspeth. She lives many states away but loves to do Little Projects too! We have kids very close to the same ages and have so much fun bouncing ideas off of each other. Whenever she tells me about one of her Little Projects I think, I want to SEE it! And I'm sure that others would too! So I have invited her to join me here at This Little Project and share her Little Projects with us. She is very talented and I know you will love her ideas too!
This is the only photo I could find of the two of us-Jay took it :)
IMG_3109
Welcome Elspeth!

Watermelon Stamping (TrEAT!)

For the July 4th holiday I had fun using star cookie cutters to make fun-shaped watermelon slices. We will definitely do this again-any shape would be fun and kids LOVE to help make and to EAT them!

For {This Little Project}, simply cut the watermelon into slices no thicker than 1 inch.

To get the most shapes out of each slice, use a variety of sizes of cookie cutters. This set had 4 sizes of stars.

Arrange your shaped cookie cutters on the slice and then push them down to stamp out the shape.

Trim the extra bits from and save to eat later.
Share and Enjoy your Summer TrEAT!

Patriotic Project

I needed to create something fun to display for the 4th of July but with {This Little Project} I challenged myself to:
-use only supplies I had on hand
-make it meaningful; nothing just "crafty"-if you know what I mean.

{This Little Project} is what I came up with:
What you see is the patent for the the statue of liberty
and the original drawing that went with it.

It's got history, a meaningful decoration for the 4th, and it was free to create!

Want to make one too?

Here's how to make {This Little Project}:

Print both onto brown paper and trim to the size you would like. Here is the link for them (courtesy of Meggiecat.)

Initially I wanted to put them onto wood blocks that would stand up. The problem was that I didn't have any on hand that were the right size. Since I challenged myself to use only what I have on hand, I trimmed some heavy chipboard to the same size and mounted each to that. It worked out great.

The final step is to distress the edges with ink. I used a dark brown ink pad that I already had. Luckily it doesn't have to look "perfect." This is my first time trying it (as you might be able to tell!) But it gives it the "historically aged" look that you want for {This Little Project}.

The chipboard is nice and sturdy and stands just fine. The other great thing about {This Little Project} is that it only took 10 minutes to complete!

Since we just finished painting this room after moving in, it's my first chance to put something fun on the mantel :)
Have a Happy 4th of July!!!


Here's another fun freebie for the 4th that's perfect for cupcakes! Find it HERE

enjoy!
LinkWithin Related Stories Widget for Blogs Add to Technorati Favorites Share/Save/Bookmark