Showing posts with label dolls. Show all posts

Play Doctor Kit for Kids {Handmade Holidays}

 
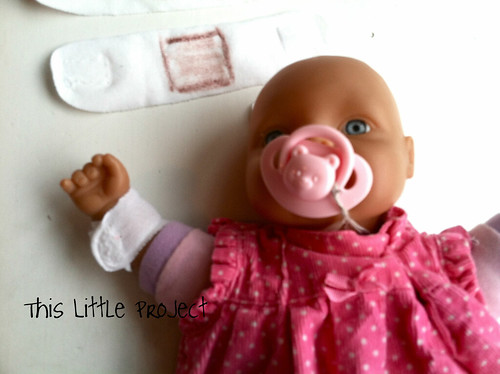
This doll has an owie--with a doll-sized bandaid on it.  

I can't wait to watch Jay, Kay and Ellie with these {little} bandaids and the rest of the play Doctor kit that I've been working on for Christmas.

I made people sized and doll/stuffed animal-sized bandages.  Everyone has the chance to be healed.

To make {this little project}
I used a white cotton/lycra fabric so there is plenty of stretch in the bandaids. 
 It makes them more of a one size fits all.
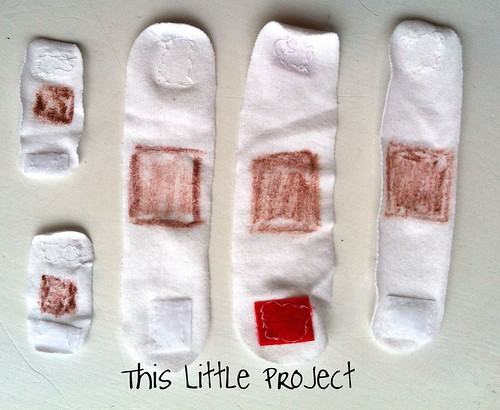

I sewed velcro to the ends and used a brown fabric marker for the middle.  I started with red velcro but it looked too much like an owie and I switched to white.

Really, these aren't anything special and I wondered if the kids would even know what they were.  But somehow Ellie got a peek when I was making them and asked if they were bandaids.  
So I guess they look close enough, lol.

I think I might make some colored ones too--you know, like the princess and ballerina and star wars ones we have up in the closet!
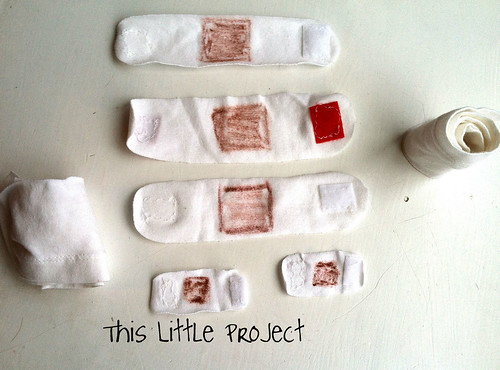


The rolled bandages are from the bottom of a white T-shirt.  I just cut off about 3 inches from the bottom of the shirt, chopped it into a couple of strips, and sewed some velcro to the ends.  The kids will come up with a fun way to use them, I'm sure.


Playing doctor will be so much more fun!

And the bonus is the chance we will have to talk about the Great Healer that we celebrate at this special time of year.  


 click here for more handmade gift ideas!

Leprechaun Land (in the village)


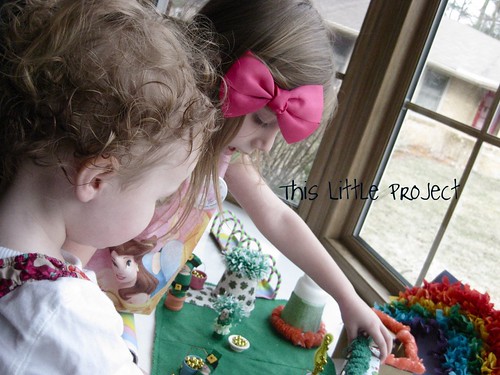
We've been playing with {little} people this week: the leprechauns have been at our house!


Jay has 2 leprechaun traps set in our house but those sneaky {little} leprechauns keep escaping when the traps go off (The traps he made at his art class are darling and I'll try to get some photos to share.)

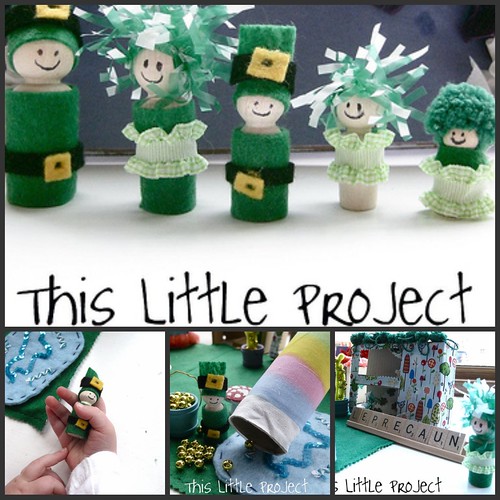
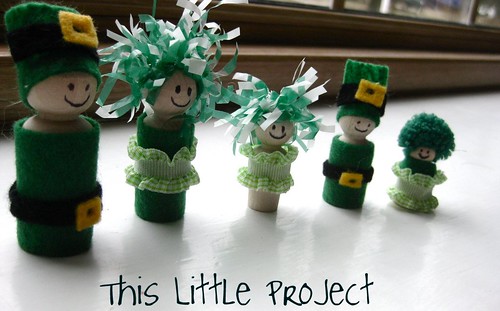
Since we haven't had much luck catching them, we made our family into leprechaun peg dolls instead!


We have had so much fun with other {little} building projects in our village and playing with our pilgrim peg people in our Thanksgiving Village.   

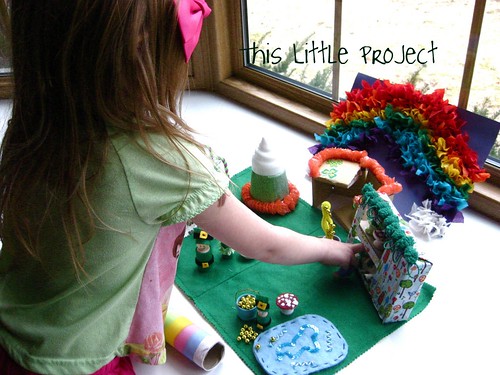
So, naturally, we had to make a Leprechaun Land to add into our village.  For those of you who haven't seen our other village projects, it's kind of like a doll house, made into many houses.  There's so much more fun to have that way!

Want a tour of {this little} magical land?

You got it.

There's quite a bit of dreaming up that you can do with some felt and the invention box.

Here's how the leprechauns get from our land to theirs...
This magical lane was made from the side of a cereal box, and chenille stems, and then covered with some rainbow fabric.

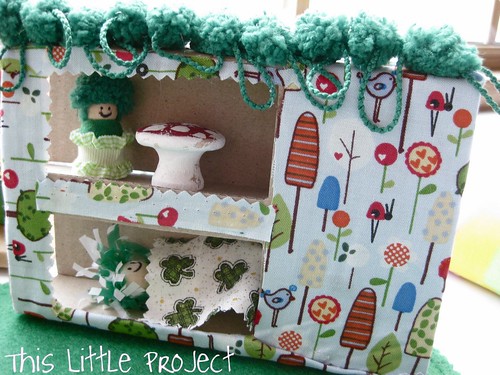
This is a leprechaun apartment (cardboard covered with fabric).  
Here's a close-up:  leprechaun Ellie has a toadstool table, leprechaun Kay is taking a {little} nap.


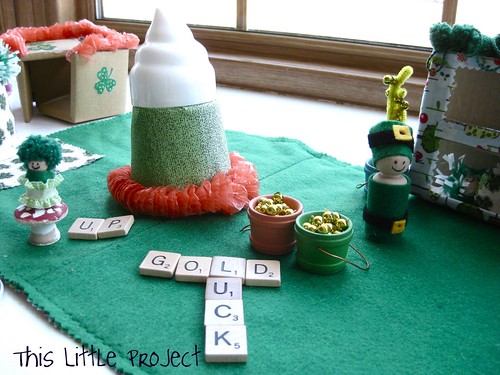
Our toadstools (on the left) were drawer pulls painted by Jay and Kay.  The top of this house in the middle is from a top of a spray cool whip can.  Under that is a yogurt cup with part of a lei glued around the bottom of it.  The leprechauns like to hid in there with their gold!

We like to use scrabble tiles to practice spelling words while we play in our {little} land.

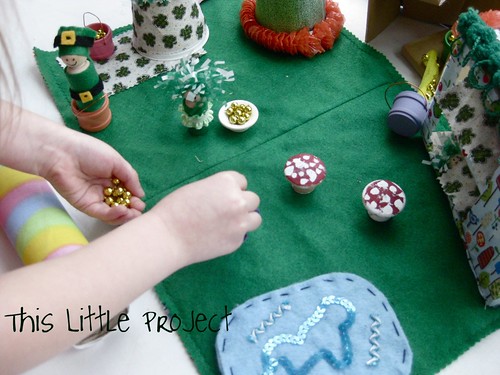
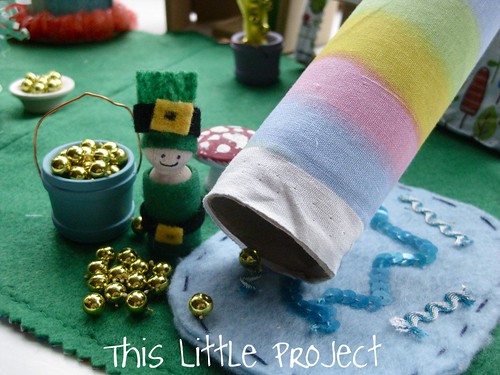
Are you wondering where all of the leprechaun gold came from?  It was a gold colored bead necklace that Jay and Kay cut up to put in their {little} buckets.  It's perfect!


Kay likes to count the gold...

And Ellie likes to dump it...and gather it....and dump it...

We made a paper towel tube into a rainbow that they can slide down.  Right now it looks like they land in the swimming pool when they come out!  But there's gold there too, as promised!


Here's our family turned into {little} leprechauns.  

Jay told me that he read in a book that there are no girl leprechauns--it's strictly a guy thing.  Whatever.  As if girls always have to be pretty little fairies....
So I'm on the lookout for a book that includes the female gender in the leprechaun tales.  Let me know if you know of any!


 I love seeing {little} minds and hands busy imagining and learning.  So {this} was definitely a lucky {little project}. 


Leprechaun Peg Dolls

We've caught some leprechauns at our house!


These cute {little} leprechauns have been found all over our house!  

I'll try to catch them at work and show you their leprechaun land tomorrow ;)


Pin It  

p.s. if you want to make your own peg people, check out {this little project} from the archives for more details.


Invention Box: Hair Clip Keeper (Rupunzel Princess)

One of my New Year Resolutions is to do an Invention Box 
{little project} with my kids each week. 

  If you want to make an invention box of your own, 
here's how we did that {little project}. 

  Our motto for {this little project} is:

"To invent you need a good imagination 
and a pile of junk." 
~Thomas Edison.

I love seeing their minds go crazy with all the possibilities of inventing.


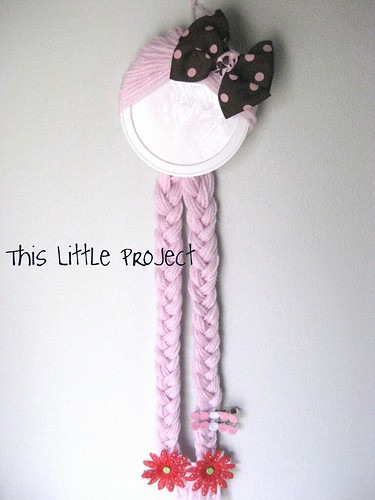
One of our favorite invention {projects} has been the Rupunzel Hair Clip Keeper.

My little Miss Kay is really into long hair.  
Many {projects} (like these headbands) have been for her.  


I'm soaking in her little girliness because I know it won't last forever.
Right now she's a little girl that loves princesses.  

So this invention was just her style.

Meet the Rupunzel Hair Clip Keeper:
( in pink!)


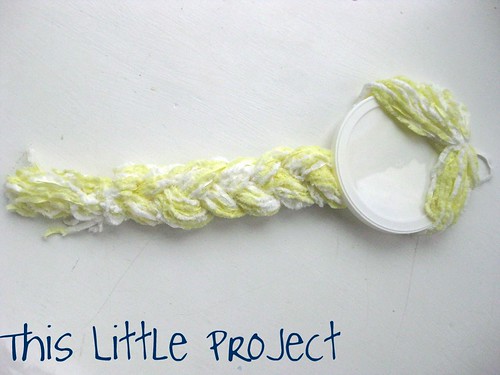
 And here is the yellow-haired version:


You need 3 things to make {this little project}
scissors
yarn
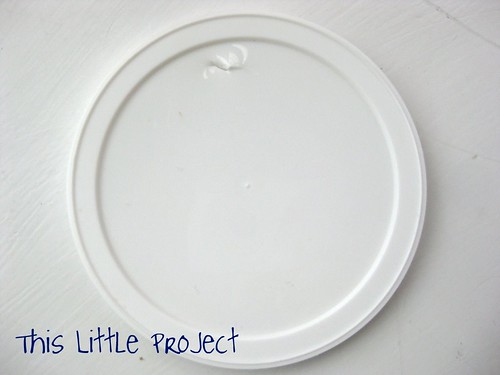
a plastic lid
(optional: a sharpie marker to draw a face on with)


To start off, you need to punch a hole in the top of your plastic lid.  This is a parent job :)
 
 
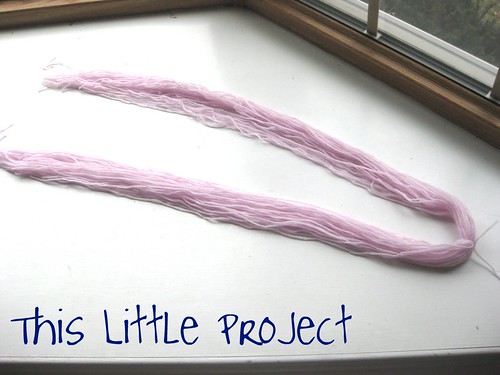
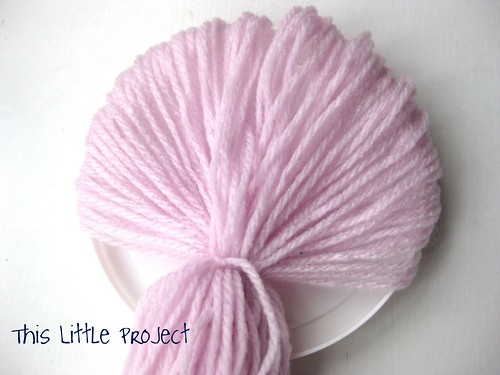
Next you need to decide how long you want the "hair" to be.  Remember that the longer her hair is, the more clippies she can wear (hold).  And also that braiding the hair will shorten it a little.  

The number of pieces of yarn you cut will determine how thick her "hair" is.

You will lay out her "hair" like this regardless of whether you do one braid or two. 

Two braids uses more yarn because each side becomes a braid.  You will combine the two sides if you want one long braid.
 
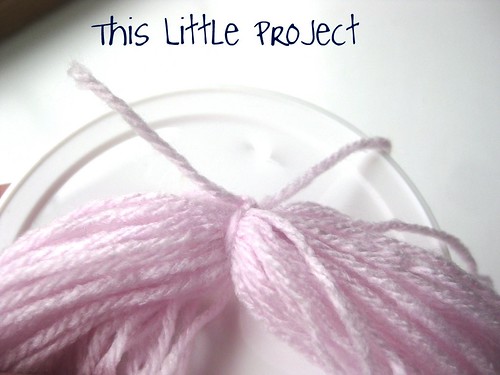
Then cut a LONGish piece of yarn to tie ALL the long pieces together in the middle at the top--see the knotted piece on the right side of the photo.
You can use the rest of this piece of yarn to hang it up when you are done.
 
Then take that knotted piece of yarn and use it to tie the hair to the plastic lid, through the hole you made.


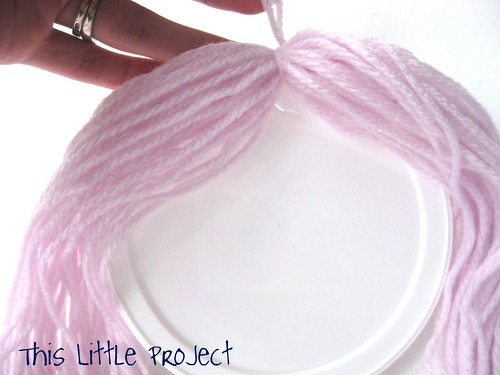
So it looks like this.  
 
Then pull the hair down around the front of her face like this:


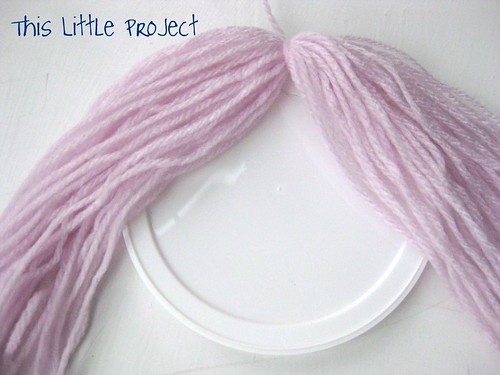
Next pull her hair around the the back.  It will start to look like she really has hair now!

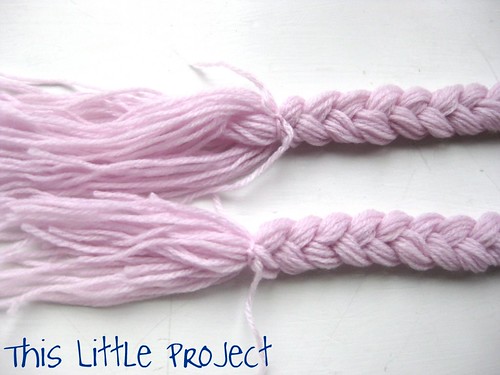
Use a small piece of yarn to tie her hair into a pony tail.


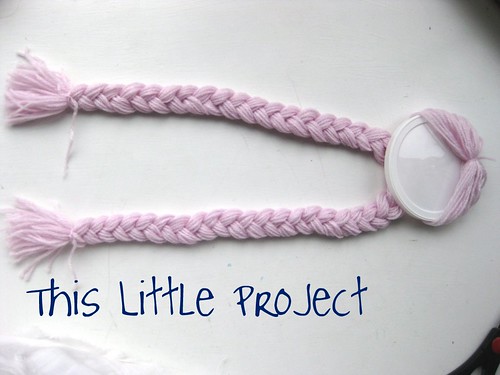
Then just braid the yarn into one or two braids with the yarn. 
If your little girl is old enough, she might like to do the braiding.


When you get to the end, tie each braid off and give her a little hair cut to trim the ends.


 Remember the first knot you tied?  The rest of that piece of that yarn can be used to hang her up. 


 Now is also the time to add a face (self portrait!) with a sharpie if you want to.


And there you go, a {little} invention to keep your princess's clippies organized.  
She's all ready to be decorated!


p.s. these are fun gifts too!

Refashion to Doll Clothes

IMG_1096 IMG_1116
Doll Clothes From Baby Clothes
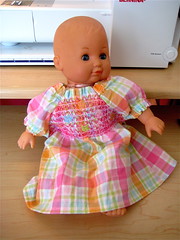
Hi, I'm Elspeth and I'm excited to share This fun Little Project with you! I have too many baby clothes and not enough doll clothes. We won't be needing these baby clothes any time soon, and they are taking up a lot of storage room. I decided to turn a 0-3 month baby jumper into a dress for my daughter's baby doll. I've been reading a lot of refashioning blog posts and always find it easier and safer to do for my kids rather than for me. If you haven't tried refashioning yet, starting with doll clothes is a great way to start because even if it doesn't turn out the way you planned, it will still get used. This Little Project took me a little less than an hour to do with my two little helpers "helping", so it would be an easy project for someone with sewing experience, or a great first try for beginners.

When turning your baby clothes into doll clothes, and when refashioning in general you won't be using a pattern. Before cutting spend a minute looking at how it's put together. You'll want to cut along the seams, cut the pieces down keeping the angles the same, and sew them back together. I included a lot of pictures, not because you're baby clothes will be the same, they probably won't, but to show you the process so you can try it.


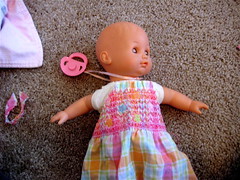
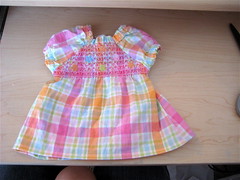
Here is my before and after. I started with a pretty standard 12 inch baby doll and a 0-3 month baby jumper. I would stay near the smaller end of baby clothes as it can be harder to resize if the clothes are significantly bigger than the doll.


IMG_1096 IMG_1116


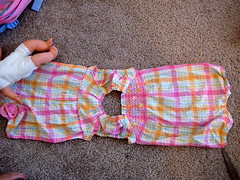
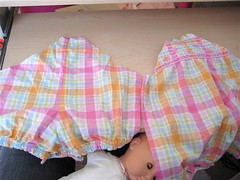
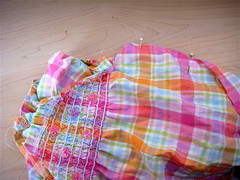
I cut up the side seams and then cut off the back at the bodice.
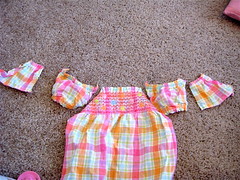
I then cut the sleeves off and cut them in half so they would be about the right size for the doll.


IMG_1097IMG_1101


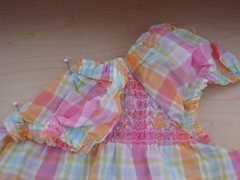
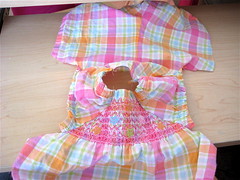
The front of the dress was too big, so I cut it down so that it would fit the doll. As you are cutting different pieces down to fit your doll, you want to keep the lines and angles the same so that the pieces will all fit together again when you sew it back together.


IMG_1102IMG_1103


I cut the back piece out to the match the front.


IMG_1110


I sewed the sleeve onto the front of the dress by putting right sides together and then sewed the sleeve onto the back piece.

IMG_1108 IMG_1112


Putting right sides together, I sewed the sides together and cut off the bottom and hemmed it.


IMG_1113 IMG_1114

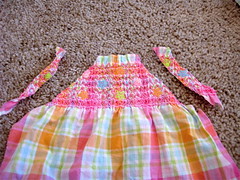
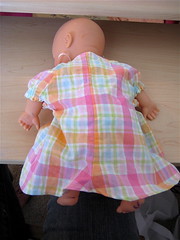
When you're done you'll have a new dress for you doll! I enjoy seeing my daughter dress her doll in an outfit I thought was so darling on her.


IMG_1116 IMG_1117


Happy Sewing!

e_signature


A Fun Little Project for Little Girls!


I remember having a lot of fun playing (very carefully) with paper dolls when I was little. They had such fancy clothing. I came across this fantastic vintage paperdoll set from Bella Dia. She even has nice winter clothes to keep her nice and warm!

The doll on the front cover is the right size to fit the clothing. You will need to think of a way to attach the clothing, but she will be lots of fun to play with. I am thinking of using contact paper and then putting a little bit of that tacky putty stuff on the back of the pieces. If you have any great ideas, do share :)

These vintage sewing cards are fun too. Just print them on heavy paper and laminate, then punch holes for lots of sewing fun!

It is so cold outside that I think I will stay inside and have fun making this fun Little Project today :) Remember that these are JUST for PERSONAL use. Click HERE for the Free Download (you have to log in, but it is easy and free).
LinkWithin Related Stories Widget for Blogs Add to Technorati Favorites Share/Save/Bookmark