
I work with the young women at our church and they wanted to have a jewelry-making night. We decided to go with something less traditional and it turned out to be a ton of fun!
These {little} bracelets are fun gifts too (think Mother's Day or birthday).

My favorite part was seeing the girls' personality come through in their creations and choice of buttons and colors. I even sneaked a {little} sewing lesson in with {this little project}. They all know how to sew a button on now!

And really, sewing a button on is pretty much all you need to know for {this little project}. It's that easy!
Here's what you need for {this little project}:
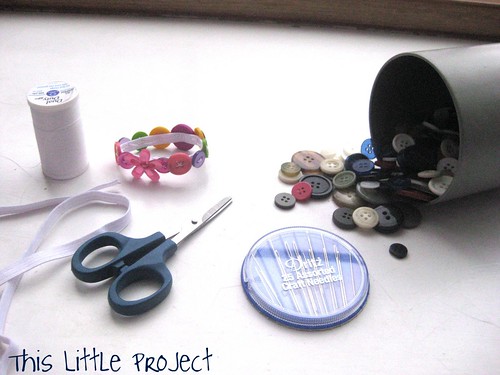
thread (color of your choice)
needle
1/4" elastic
scissors
Buttons!! The more the merrier!
--First measure your elastic to fit around your wrist. You'll want the elastic about 1/2" longer for the overlap when you sew the ends together.
--Mark where your overlap is and then where the center is.
--Then lay the elastic flat and lay the buttons out and play with how you want it to look.

--Be sure to stitch through each button a couple of times before going to the next button so it's nice and secure. You will want your buttons to overlap just a bit so the elastic doesn't show.
--Sew the ends together and cover with the last button to finish it off.
Ta da!
Fast! Easy and cute!

The young women had a lot of fun with their bracelets and it was also a really fun mother/daughter activity with my girls at home.
Ellie and Kay both love wearing theirs!


3 comments:
These are adorable!
Michelle
Apples and ABC's
My DIY for the day! xxx
Your kids are surely having good sense of creativity and I am sure that you have been doing a good thing to share about them. If you are having more to share about your kids I am here to listen.
Post a Comment