Showing posts with label Hearts. Show all posts

Heart-Healthy Learning Games


We've been indoors a LOT this winter.  And that means we have needed a few {little projects} to channel some energy!

So today I'm sharing some Valentine's games have helped us hone some learning skills as well as give us some healthy exercise for our hearts--perfect for a month focused on the heart!


I try to get more than one use out of each game because it's more fun, and so it can be used with more than one age.  Some are variations on the same game too. Hopefully you can find one that's a good fit for you below :)

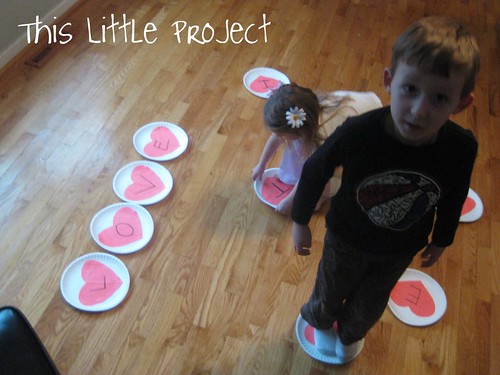
{this little project} was easy to make because all the pieces on the floor are just white paper plates with red paper hearts glued to them (elmer's).  
Then just write the letters on them with a black marker.
These are the letters you need to play:
V A L E N T I N E, and then H R O.  
With those letters you can spell: love, heart, valentine.

Letter Walk: This game is fun to do with music playing.  Music always is good for inspiring movement!  
Each person stands on a letter and then moves to from one letter to another letter (walking, skipping, dancing, jumping) until the music stops.  Then each person tells: the letter they are on, and/or what sound it makes, and/or names something that starts with that letter.  This is a great game for preschoolers.  There aren't winners or losers-everyone likes getting a new letter to think about and getting there quick when the music stops.


This Spell-a-Heart game takes the last game to the next level.  This time you tell the group what word you are going to spell.  When the music stops you say the word and ask what letter the word starts with, or give the sound the next letter in the word makes.  Ask the kids who is on that letter.  


The lucky child gets to bring the letter up to help make the word.  Continue until the word is spelled.

The next game is a Spelling Obstacle Course.  Give them the plates (2 teams if there are many kids) and see if they can help you make an obstacle course with a word.  For instance, for the word "love" you would space the letters out on the floor, and when you get to the L you do 4 push-ups to "lower" yourself to the ground, then go to the O and "open" and close your hands doing jumping jacks 7 times, V could be balance on one foot while holding a "vollyball", etc... A timer checks to see how fast they can do it.

When you are done, give each team all the letters and see how many words they can form out of the plates so their hearts can take a rest :)


Have fun keeping those minds and bodies active!

Sweetheart Hair clips


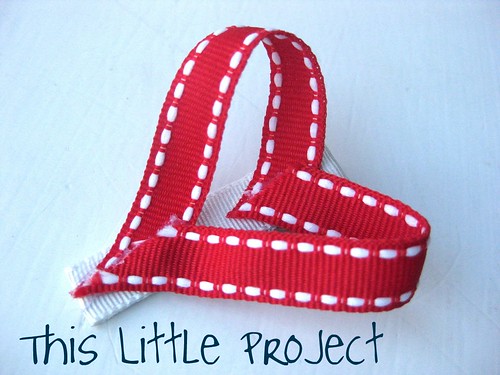
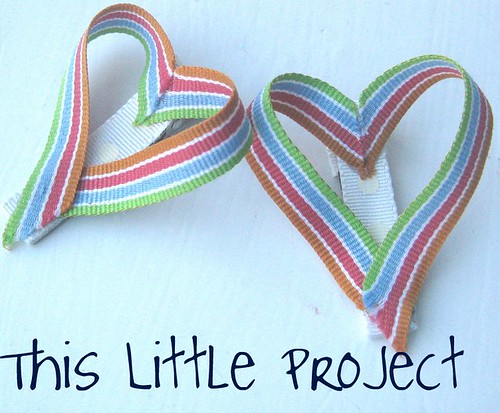
I made {This Little Project} in 2 minutes.  
Yes, really!

And what little girl wouldn't want to dress up her hair with heart clippies 
this time of year?


Kay wore these little red "sweetheart clippies" to church on Sunday.  I would have loved to take a picture of her in them, but I made the mistake of waiting until after church to take a photo.  The first thing she did when we walked in the door was undo her hair!  That girl doesn't appreciate them, but yours might :) 

 I'm making a few more to go with a little outfit I'm making for Kay and Ellie for Valentine's Day.  So I thought I would show you how I did them.

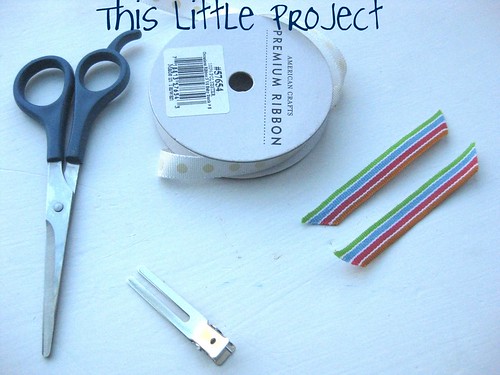
To make {This Little Project} you need:


Ribbon of your choice for hearts
scissors
alligator clip
Ribbon of your choice to cover clip
hot glue gun

First, cut your 2 "heart" ribbons to the shape seen in the photo above.  Mine are about 3.5 inches long.  You need to trim them at the end to make the bottom of the heart.

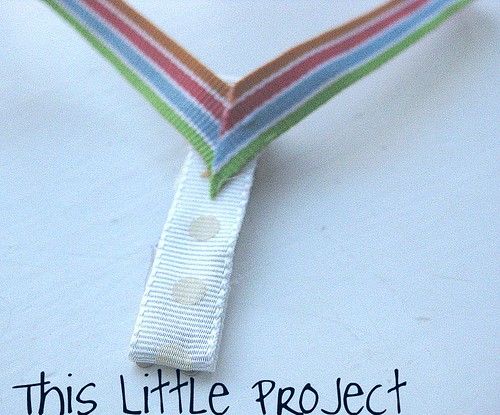
Next, cover your alligator clip with ribbon using your hot glue gun.   I like to wrap the ribbon down and around the high part of the clip and secure it underneath with glue so the part you pinch is also covered.  You will want to heat seal the ends of your ribbon so they don't fray.

Then, glue two corners of the "heart" ribbon together like this, at the end of the alligator clip.  I put this part on the tall end of the clip that you pinch to open it.


Now fold the two ends down to the other end of the alligator clip and overlap them a little.   Play with it a little to see how it looks best and then trim any extra ribbon off.


You may want to heat seal the ends with a match.  I played with these a little too much and they frayed a little before I heat sealed them.  Your hot glue gun is actually pretty good for heat sealing too, if you just run it along the edge.  

Now you've got some cute sweetheart clippies!


See, that was a quick {Little Project}!  


Valentine Countdown!

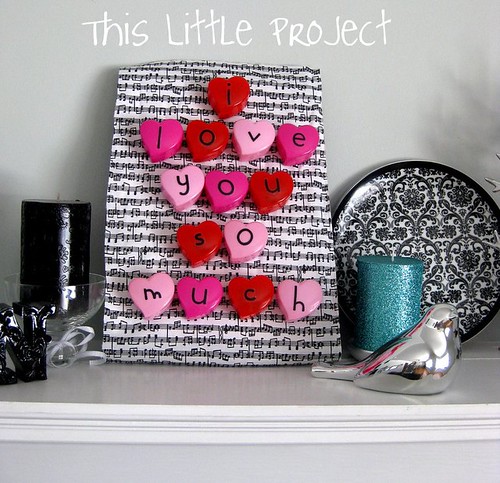
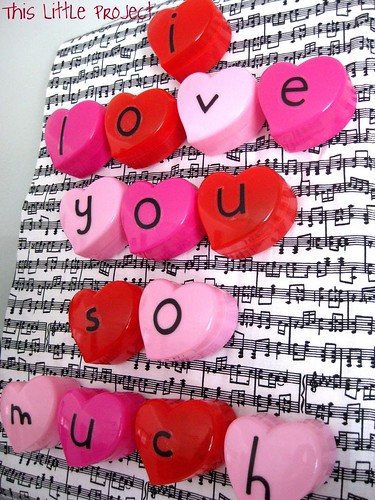
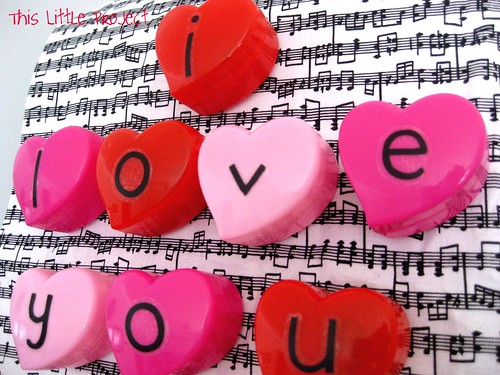
We're starting {This Little Project} at our house to countdown to Valentine's Day.  The words, "I love you so much" are 14 letters long-just right!  And the bonus for {This Little Project} is: it was all of $3 to make!  Seriously!  Gotta love that!


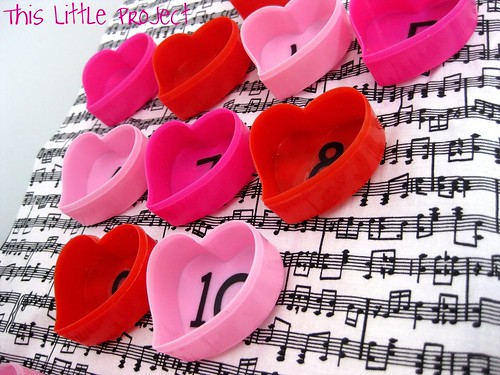
Each heart opens up and is the perfect size for a little "love note" or treat.


Want to make {This Little Project}
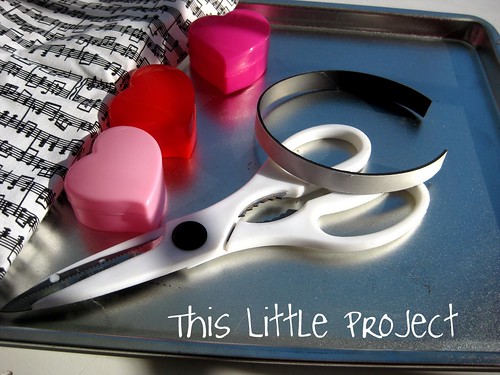
Here's what you need:


scissors

2 packages of plastic hearts (10 in each from Dollar Tree)

metal cookie sheet (it's kinda small-from Dollar Tree)

sticky-backed magnetic strip

A scrap of fun fabric (thin) or cute scrapbook paper

alphabet stickers (or vinyl)

number stickers (or vinyl)

First, arrange your hearts in the color pattern you want.  These 3 colors all came in the same package.  Attach the letters (I used stickers) to the outside of each heart box.


Then cut pieces of magnetic tape and attach them to the back of each heart.

Cut your fabric piece to be just a tiny bit bigger than the cookie sheet.  That way-no one will know that it's just a cookie sheet back there!  

The boxes are attached to THE BACK of the cookie sheet.  Since {This Little Project} is going in my music studio, I chose a scrap of music notes for the background.

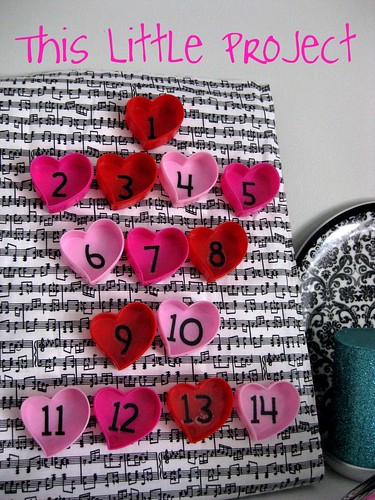
Attach the numbers to the insides of each box for the countdown.

{Little Project Tip} If you use sticker numbers, keep in mind you'll need quite a few "1's"


Now arrange your fabric over the cookie sheet on a flat surface and then "stick" all the magnetic heart boxes in place.


Now is also the time to put something sweet in there.  A love note or quote for each day. 

 I'm putting a scripture about hearts and love in each one with an idea of how my kids can show love for someone or each other.  We'll open it each morning and have a fun challenge for showing love that day.

However you use your countdown, you'll probably be the only one that knows that-for how cute it turned out-it's only attached to a cookie sheet!  
Unless your friend makes one too :)

Enjoy, and spread some love!


Love Letters: Stamps and Envelopes


Worried that you don't have any great Valentine stamps at your house? Think again! Cookie Cutters make great stamps. Our latest Little Project of stamps and envelopes is below.

We used (washable) finger paint on a plate for our "stamp pad." If you do, be sure to let them dry completely. It takes longer than regular ink.


Did you know that an HEART makes a great envelope? I made these out of wrapping paper.
1-Started with a regular-sized paper.
2Folded it in half and cut out a valentine that is a little wider than you would normally do.
3-Then trace it onto wrapping paper and cut it out.

How to Fold it:
1- Start by folding the sides in.
2- Fold the rounded part up.

3- The point of the heart makes a perfect close for the envelope.

Since Valentine's Day is about sharing the love with others, I wrote a little poem to add to mine for my church class.  I'll post it here (for my sister) and in case anyone else can use it.  I gave extra treats to share with the valentine so they could practice sharing and loving others.  (at least that was the idea :)

"Of you there’s just one. And these treats, there are many.
Is there someone else at your house that you think would like any?

With whom could you share? With a sister or brother?
Remember that Jesus said, “Love One Another.”

Something special happens when you share your treat.
Inside you will feel happy and kind. It’s neat.

Sharing is the kind of love that seems small.
But it’s not, for showing love brings happiness to all.

Happy Valentine’s Day!"

Enjoy stamping and sending your Little Valentine Projects!

LinkWithin Related Stories Widget for Blogs Add to Technorati Favorites Share/Save/Bookmark