Showing posts with label December. Show all posts

DIY Nativity Costumes: DONKEY and CAMEL

I have been working on Nativity Costumes for our family over the past three years.  Each year we have one or two more "official costumes" instead of just whatever we can find to make it work. 
The Nativity is what Christmas is all about for our family.  Each year we read the story as a family and act it out with the kids at least once.   It's a Christmas Eve tradition.
 
 All of the costumes are a EASY to make but I find that I don't have time to make them all during such a busy time of year.  So I am pacing myself and in another year or so we'll have a nice set ;)

  And since this is what Christmas is about for us, it's worth it to me to make the effort to make the costumes for us to use each year.  
Plus, the kids LOVE IT!

This past year I added a donkey costume and a camel costume.  

I try to make the costumes work for a variety of sizes.  Our little ones will grow up :)  
Plus, sometimes we switch up parts and Mom and Dad wear it instead of the kids.

Here is the Donkey Costume:
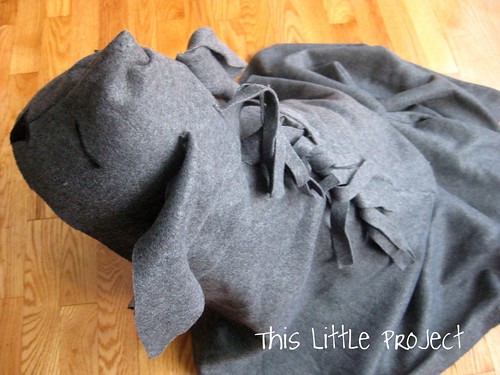
 

I made it in the same way that I made the sheep costumes the year before

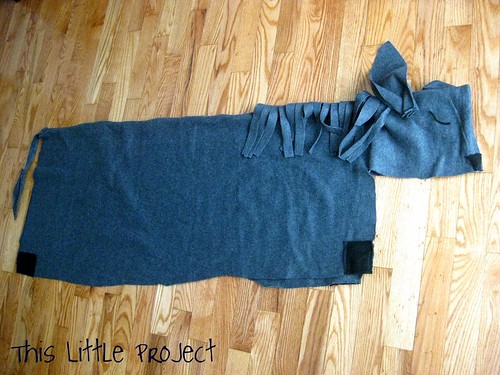
There is very little sewing to these costumes, so a beginner can easily make them.  I like using fleece so I don't have to hem anything.  The body of the donkey is one big rectangle piece.  The head is a rectangle of fleece sewn to the middle of the body.  I sewed some ears on each side and a mane and tail to the middle of the "back" of the donkey.  

Then I just used some black felt for feet, eyes, and a nose.  

I was actually just using scraps from another {little project} for the donkey, which is why it's not straight across the bottom ;)

Kay when she was 4 years old.
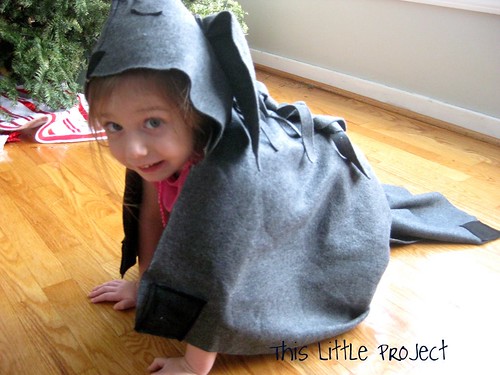
For the camel I used the same idea, just different colored fleece.  You can stuff something inside the back for the hump(s).  
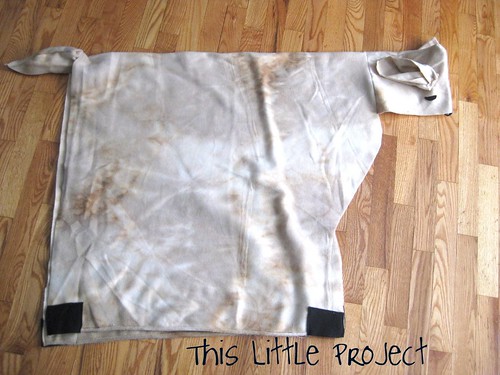

I love how versatile this pattern is.  Not to mention how cute everyone looks in them!  
Well be able to use them for years to come :)

 
Wishing you a wonderful Christmas!


click here fore more handmade fun!

DIY Nativity Costume: Angel (and swaddling clothes)

Some of the best projects for me are the ones I can get done in a snap.  This Nativity Angel costume is that kind of {little project}.

I made our Angel Nativity Costume from a white sheet.  You can use an old one you have on hand.  I've also come across lots of sheets at the thrift store that are fun to cut up.  With the leftover sheet I cut strips for "swaddling clothes" to use with a baby doll.

To make 
{This Little Project} 
I just:

1- Laid a white sheet on the floor, 

2- Doubled it over (so there would be a font and a back)

3- Had my son lay down on top of the sheet.

4- Cut the white sheet around him with scissors (plus extra so there is growing room too).

5- Pinned the edges.

6- Sewed around all the edges except the neck and the bottom.

7- Turned it inside out so the seam is inside now.

8- Tried it on.

9- Added a gold belt to give it some shape.

Done!

Sewing for Baby: Car Seat Canopy and Baby Sling

We're still waiting for our {little} one to arrive and I have been having so much fun sewing for him.  Maybe because it's a {little project} I can do sitting down!

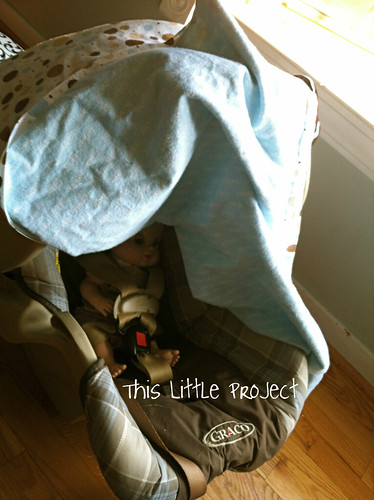
This past week I made a car seat canopy.  This is an upcycling {little project} I've made before, but gave it away last time.

With a winter baby, a car seat canopy is almost a must-have.


I upcycled this time too: the brown rings at the top are from a discarded pair of pants and the buttons are from another {little project} too.  I love upcycling!  And I have a few more {little projects} in the works to share with you for Christmas that use upcycling :)


I followed these instructions to make {this little} car seat canopy.  They worked great, except that the canopy dragged a little on the front corners.  To solve it, I tacked them up just a little on each side.  I think it still looks fine (see photo at top too).

Here's a peek inside.  Ellie has had her dolls in it constantly!


I also made a couple of baby slings this week in the hopes of avoiding carpel tunnel this time from holding baby constantly. 
 mamasmilk.com

I used these instructions and a cotton/lycra blend for the fabric because these photos of a snugly newborn looked so comfy. (I did alter the measurements due to the stretchiness).  

I made a couple of extra slings for the kids to use too.  I know Ellie will especially love using hers with her baby dolls!  She is such a {little} mother!

Both of these {little projects} are easy enough for a beginner.  In fact, using the cotton/lycra fabric meant I didn't even have to hem the baby sling-yay!

Just counting down now for our {little} guy to arrive and try them out :)

DIY Reusable Gift Wrap {Happy Earth Day!}

When you think back, do you ever just laugh at how some of your traditions got started?

It seems like some of our favorites traditions happened totally unexpectedly.
Our reusable gift wrap is a {little project} I started 2 years ago and it has turned into one of our FAVORITE TRADITIONS.
Go figure.

With Earth Day coming up this week, it's a perfect {little project} to try out.


Our reusable gift wrap is one of husband's favorite {little} things at Christmastime.  Since we still have {little} people at our house we don't wrap anything until Christmas Eve.  
(No matter what gift wrap we use it gets opened early, otherwise!)

And, since wrapping gifts isn't his favorite thing to do, he really loves these {little} bags that he just has to stuff and tie it closed!  Reusable gift wrap is super quick too!

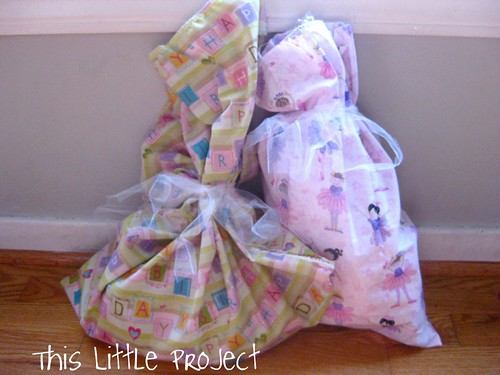
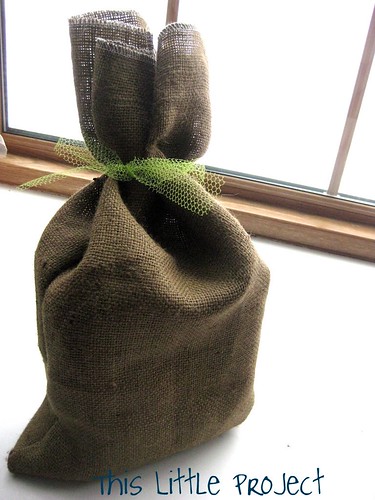
Speaking of tying them closed, I love how {this little project} looks with tulle as the tie.  I'm a big fan of tulle.  It's cute, gives it a special look, and is so inexpensive.  You can use it again and again too.

The reason my kids love our reusable gift wrap is that they have their own special birthday bags.
Each birthday they choose the theme they want for their party and we pick out a special fabric that matches the theme to make a special bag with.
Here is Kay's choice from her "ballet birthday" this year.  It's fun to use the birthday bags from past years too and relive memories of previous events too.


We love that this reusable gift wrap lasts from year to year and we aren't throwing tons of waste away anymore.

And one of the best things about this reusable gift wrap is that it's a cinch to make!

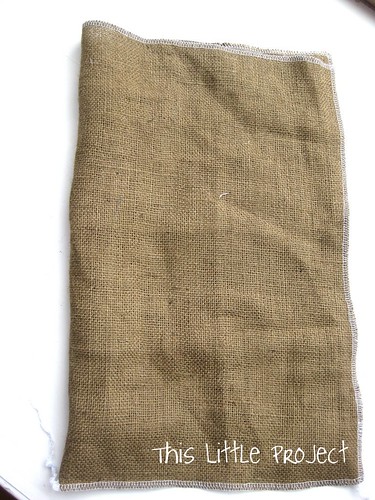
Here's a burlap one I did (it's inside out in the photo)

 
I just used a serger across the top and then folded it and half and went down the 2 sides.
You don't have to use a serger, but burlap frays otherwise. I use the same steps with the other bags.  And of course, you can make them any size.

Sometimes I hem the top instead.  If I'm not being lazy :)

This really is a {little} project.  
It takes 5 minutes or less!


But you get to enjoy it for a long time. 
And the Earth will thank you for it!

Happy Birthday...or...Earth Day!


Advent Adventures


OK, so I have something to admit: I don't have a single advent calendar. Why? How did this happen? Good question. But this year it is going to happen. Now, I know that today is December 1st, the day that you start USING your advent calendar. But I have just decided to make one. I am thinking that I will make a new piece of it each day and will have a complete advent calendar by the 25th!

Now, only to decide WHICH one to make...this has been more difficult than I thought. Treats, or not? To put something up, or take something down? Sacred or secular? Cutesy or not?  And for now...I'm not telling!!!

The end of my Advent Adventure is going to be a surprise. Yup. Pure Suspense for the next 24.5 days!

In the meantime, if you are trying to decide which ones to make, I'll share a few that I have come across. Can you have too many of these fun little calendars? Even if you already one, you will probably want to make another one after you see how awesome some of these are!

The tutorial to make this one is from The Purl Bee.

This gum one is just sooo cute and minty too! The tutorial is courtesy of my little mochi. She is so creative!


These are SUPER Kid-Friendly Christmas Advents.

I am thinking about putting magnets on the backs of this one and putting it in the bag for the kids to do at church. LINK

My son LOVES puzzles. This one could act as a puzzle or advent. We may use it for both. I cut the pieces out and put them in a page protector with the back sheet to keep everything together. LINK

These made me LAUGH-who thinks of using toilet paper rolls for advents?! But I have started to save my toilet paper rolls since the kids would love it... :) There are two! LINK and LINK

This one looks pretty easy to make. LINK

I think this is one I am going to have to try out too:

There are family photos on the back of each one. My friend Tanya made this-she's so talented!. She said she used:
a 16X20 frame (everything is attached to the cardboard that came in the frame)
Seasonal Scrapbook paper
Brads
Eyelets
family photos
photo corners (so you can change out the photos if you want to)
sounds like a FUN Little Project :)


Here are a couple of Origami advents LINK


And just in case that didn't give you enough ideas, whipup has a great big list with more ideas you can check out, and there are a bunch of cute ones HERE on Flickr too. I hope you feel inspired to have fun with your Little Project!
LinkWithin Related Stories Widget for Blogs Add to Technorati Favorites Share/Save/Bookmark