Showing posts with label Earth Day. Show all posts

Peace on {Earth Day} Cupcakes

Each year we have an Earth Day party at our house.
Which means that we need cake.  Of course.  


These yummy cupcakes were preceded by a lesson about the creation of the earth (what more persuasive way is there to talk about why we should take care of the earth than to talk about Who made it and Why it's for us?)

  We also made a "creation art project" and "creation party mix" before the cupcakes, which I will have to share on a later post...
 
Inspired by these, we decided to make "Earth" cupcakes for our party.  

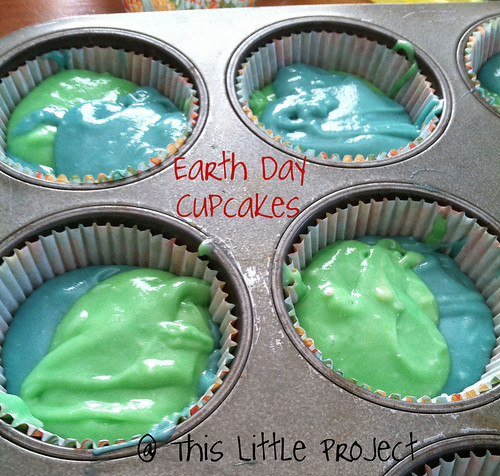
 I started out with a white cake mix (since the kids were helping with {this little project}.  We divided the batter in half and put blue in half and green in half.
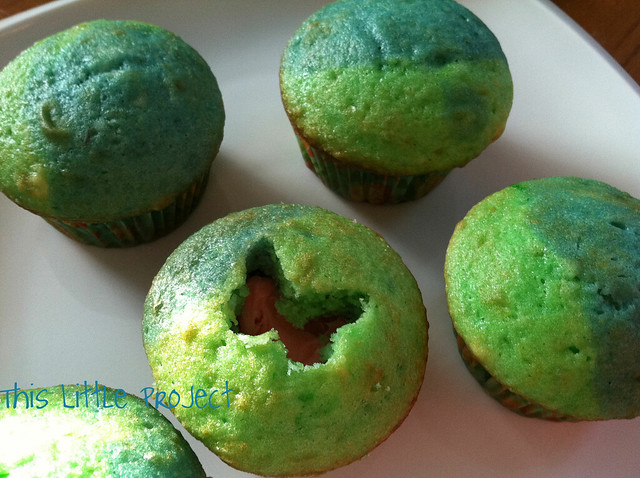
 
Then we dolloped each color into cupcake liners.
 
 
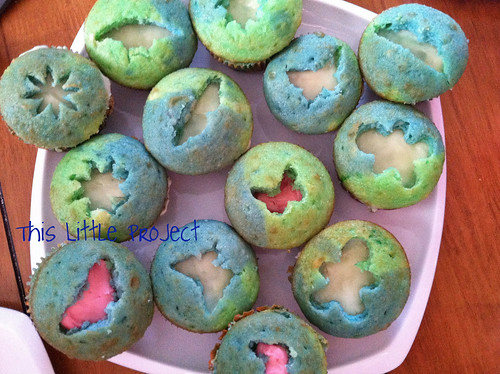
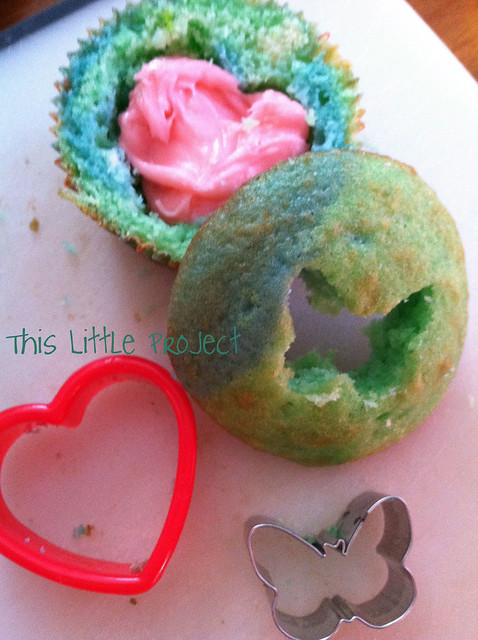
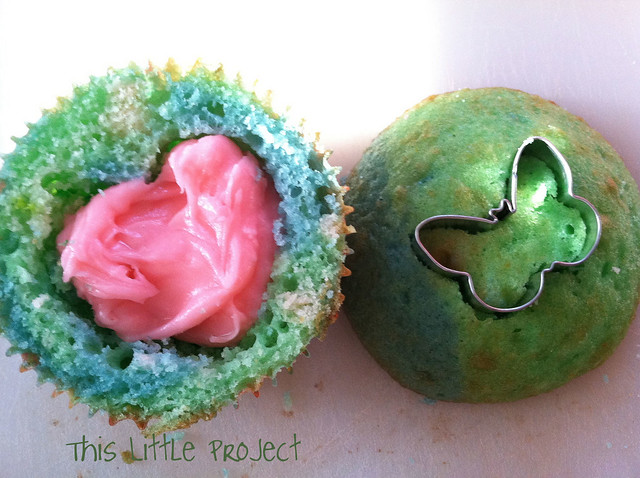
 My sweet friend gave me some darling mini cookie cutters as a birthday gift this year and we decided to use them to showcase some of God's creations on the earth.  

First I cut the tops off of the cupcake.
 

Then I frosted the "new top" while the kids cut out a shape from the "muffin" part.

Then we replaced the tops.  One bonus of this method: less frosting all over faces and hands!
 
 
We also tried some where we cut out the inside of the cupcake and filled it with frosting.
 

Loving the Earth is wonderful.  We need to be good stewards of the incredible gift we have been given.

But to me, these cupcakes are more like: "For God so loved the world, that he gave his only begotten Son, that whosoever would believe on Him would not perish, but have everlasting life." (John 3:16)

For whatever reason, Jay and Kay have been fighting/teasing/bothering each other like crazy this week.  One night I named these cupcakes "no-contention cupcakes."  They couldn't have one if they were causing contention.  It got their attention.

The next night (we couldn't eat them all at once!) I called them "Peace on Earth" cupcakes.  And the name stuck.  These cupcakes were just the reminder my kiddos needed about what is important.

Makes me want to make these {little} yummies again!


And my {little} boy hit the 5 month mark around Earth Day.  I can't believe it.  Since I haven't been blogging much since his birth, I haven't shared much about him.  He's the sweetest {little by little} major project there ever was!  I'm one lucky mommy!
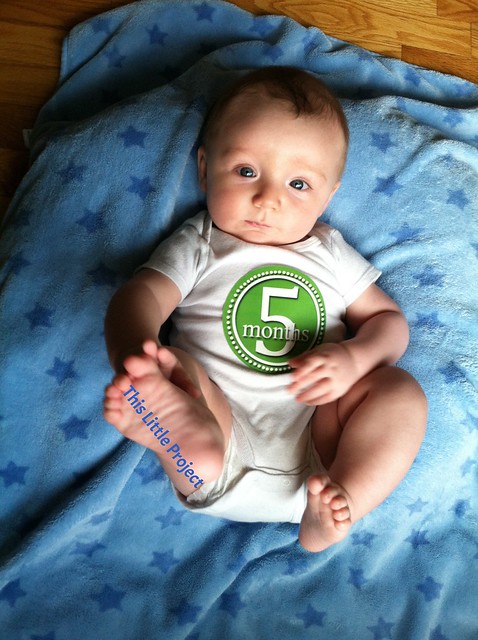
onesie sticker by Purple Possum

In other Earth Day projects, our Cloth Diaper Project is up and going again with Baby M.

And since we're talking of Earth Day and babies, I read this today about children and motherhood and loved it.

(you can see past year's party ideas and Earth Day Projects here)

Also, today is the last day to enter the Shabby Apple giveaway (below)
--don't miss it!

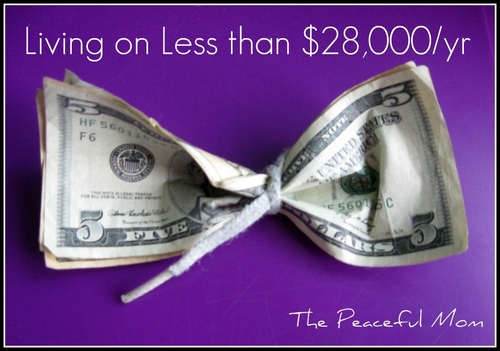
Friday Favorites and Freebies: Living Well and Frugal Tips

I've bumped into some great blogs about living well and living within your means this past week.
 
I feel like I've been through a mini Earth Day week mixed with a financial boot camp at my house with these fantastic reads.  A fresh start is always nice!
Here are some of my favorites that I had to share:

Save money and eat organically and sustainably?  Count me in!


Fun, Cheap, or Free is the idea here-with a how-to for tracking that budget, that's easy!


How to shop for 2 weeks at a time and spend less than $100/week on groceries! Great planning tips!


This girl has ideas for how to replace every plastic item you use with something not disposable.  We can all pick up a few tips here!

Plastic Free book by Beth Terry

I love the ideas here about how to shop without bringing home so much waste.  Again, lots of ideas and we can all start somewhere.

Zero Waste Home


Whew!  So many great things to learn.  

Happy Friday and have a great weekend!

DIY Laundry Detergent

I'm a bit of a hippie. 
It's partly an excuse to do my own thing. 
And it's partly true because I go ahead and do my own thing.

But if you're a hippie, that's expected.  Right?

For mother's day I made my own laundry detergent. 

In all my hippie-ness I am a bit of a tree hugger and am ever aware of my stewardship of our earth.  I've blogged quite a bit about that.

So I decided to give mother earth a gift for mothers day. 

Not only does making your own detergent save you $$, it's also really great for the environment.  More and more companies are becoming greener, but sadly, many of our cleaners are not very earth friendly for our drinking water.

I've been using my DIY Laundry Detergent for a few months now.  And  love it!

Here is the recipe I used:
1 cup Borax
1 cup Super Washing Soda
1 bar Fels Naptha Soap
(ZOTE would also work--see note about ivory below)


I used my food processor to make it.

I have one of those Ninja machines.  It basically turns everything to either a soup or smoothie so I don't use it for much food prep.
I thought it would be perfect for whipping some bars of soap into powder though.


It was! 

I doubled the recipe above and decided to use a bar of ivory soap instead for the second batch.  That's part of the white you see.  The Fels Naptha is yellow.  Ivory worked ok, but it didn't make the same light powder.  I could see it potentially not dissolving as quickly. So I wouldn't use it alone, but mixed in it's nice.  And the scent is too!

Just mix it together with a spoon and you get
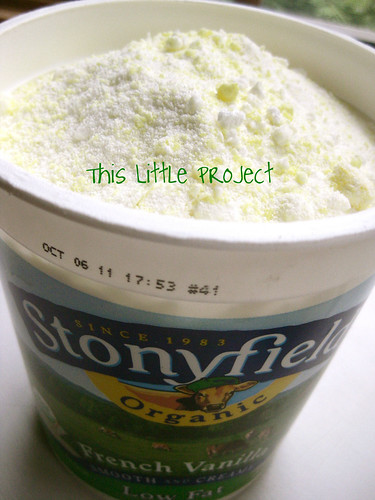
 this powder goodness!


For the record, my sister also uses her food processor to make her detergent and it's not a ninja.  You can use a regular hand grater as well if you are worried about putting a bar of soap in your food processor.  But if it can handle ice...you're probably fine...

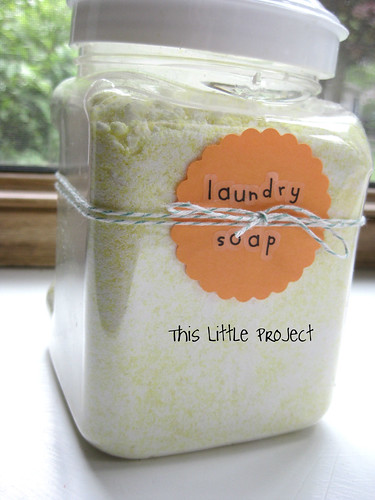
If you are feeling like a hippie (I mean earth friendly), a double batch fits great in two reused large yogurt containers.

 
I use 1-2 tablespoons depending on the size of the batch and how soiled the laundry is.

Each yogurt container holds enough for 32-64 loads of laundry! 

And it cost about 5 cents a load to make--big time savings there!


And if you are going for cute, I keep mine in this too.


As a bonus, I haven't needed to use a dryer sheet either.

The {little} stuff matters :)

Warning: if you make this soap, you may feel a bit like a hippie.

Enjoy it!


For another laundry secret weapon, check out this post from the archives.

DIY Reusable Gift Wrap {Happy Earth Day!}

When you think back, do you ever just laugh at how some of your traditions got started?

It seems like some of our favorites traditions happened totally unexpectedly.
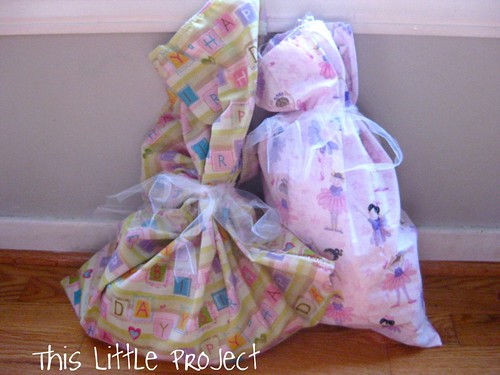
Our reusable gift wrap is a {little project} I started 2 years ago and it has turned into one of our FAVORITE TRADITIONS.
Go figure.

With Earth Day coming up this week, it's a perfect {little project} to try out.


Our reusable gift wrap is one of husband's favorite {little} things at Christmastime.  Since we still have {little} people at our house we don't wrap anything until Christmas Eve.  
(No matter what gift wrap we use it gets opened early, otherwise!)

And, since wrapping gifts isn't his favorite thing to do, he really loves these {little} bags that he just has to stuff and tie it closed!  Reusable gift wrap is super quick too!

Speaking of tying them closed, I love how {this little project} looks with tulle as the tie.  I'm a big fan of tulle.  It's cute, gives it a special look, and is so inexpensive.  You can use it again and again too.

The reason my kids love our reusable gift wrap is that they have their own special birthday bags.
Each birthday they choose the theme they want for their party and we pick out a special fabric that matches the theme to make a special bag with.
Here is Kay's choice from her "ballet birthday" this year.  It's fun to use the birthday bags from past years too and relive memories of previous events too.


We love that this reusable gift wrap lasts from year to year and we aren't throwing tons of waste away anymore.

And one of the best things about this reusable gift wrap is that it's a cinch to make!

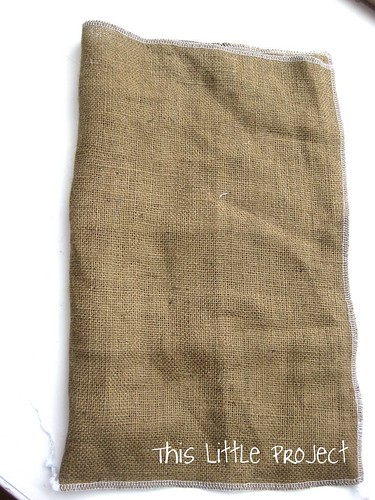
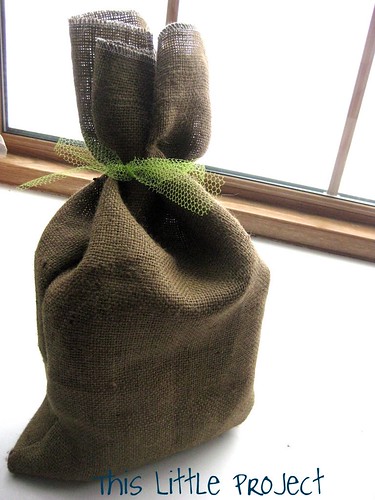
Here's a burlap one I did (it's inside out in the photo)

 
I just used a serger across the top and then folded it and half and went down the 2 sides.
You don't have to use a serger, but burlap frays otherwise. I use the same steps with the other bags.  And of course, you can make them any size.

Sometimes I hem the top instead.  If I'm not being lazy :)

This really is a {little} project.  
It takes 5 minutes or less!


But you get to enjoy it for a long time. 
And the Earth will thank you for it!

Happy Birthday...or...Earth Day!


Earth Day Produce Bags

Every time I go to the grocery store I come home with this:

Lot's of yummy fruits and veggies
AND 

LOTS OF PRODUCE BAGS!

I do recycle these bags, but wouldn't it be 
great not to have the waste in the first place?

If you are someone who like reusable grocery bags, 
{This Little Project} is for you!

Each year our family makes a few more small changes to lessen our carbon print and try to be better stewards of our world.  At Earth Day each year I look at what we've accomplished and try to share how it has worked for us.  
Because change takes time.  

And it can be hard to get used to, right?

Here is one of our family's changes this year: reusable produce bags!


Now, you may think I'm going a little tulle crazy after telling you about my travel bags and Kay's ballet bag made out of the magical stuff, but
  here is one more thing you can make with your tulle:

Produce bags for the grocery store!

Here are some of the things I like about these bags:

They are light-so you won't be paying more for that produce!

They breath-so your fruits and veggies will stay fresh!

They're washable-so you stay healthy!

You can see into them-so nothing gets lost in the fridge or on the counter!

They are reusable-so you don't create more waste on our world!

Want to make {This Little Project}?

Here are my {Project Tips} 
I used a single layer of tulle (not doubled like on the previous bags I made for other things)

I used a zig zag stitch around 3 sides

For the top, I folded the edge down about 1/2 inch and sewed through it with a needle and 3 strands of embroidery floss to create a drawstring for the bag (for more photos and details of how that works see my post about making tulle travel bags).  This way was quick and easier than feeding a string through it.

The folded-down top makes it a little stronger.  But I still don't carry the bag just by the string.  I hold to the entire top of the bag when it is cinched up-the same way you would carry the plastic produce bags.

I also made them in different sizes and colors (tomatoes are in orange, apples in white, broccoli in green).  I also tried the netting tulle with the bigger holes (broccoli on the right in photo).  That way we'll have the right sized bag for what we're getting at the store that day. 

Earth Day is April 22nd, but it's always a great time to commit to doing a little something to make the world a brighter place.

If you're looking for a fun way to record your goals, try this Earth Day pledge.  It's a great way to get kids onboard too!


If you are looking for more ideas for changes and goals to set for your family this year, check the archives!

Happy Earth Day!


Want to Help with the Gulf Oil Mess too?

Craft Hope Spreading seeds of hope one stitch at a time
My heart aches every time I read or see anything about the mess of oil that has been created. It's devastating and I keep wondering what I can do to help. I love the Craft Hope projects and am so excited to get involved to help make towels to send. The towels will be used to help clean dolphins and other marine animals. The deadline to join in has been extended to the end of August!! I know my kids are excited to help too. If you would like to participate (and I hope you do!), check out the details on their blog.
It's a {Little Project} that sure means a lot!

How to make a Sieve (via the invention box)

In anticipation of Earth Day tomorrow, let me share one of my favorite things:
{This Little Project} of a box has brought us lots of fun and given new life to the word "reuse" at our house.

Also, known as my "junk box," it's organized by categories: wood, fabrics/fiber, metal, paper, plastic, etc. Inside are things like thread spools, metal circles from cans of frozen juice, toilet paper rolls, fabric left from previous little projects, etc. To learn how to make your own, go HERE.
Today's {Little Project} comes from the insides of the invention box!

This Reuse Little Project is sieve made from the red plastic topper from a box of clementines and an old bracelet. The second sieve I made (I didn't want the kiddos to fight) was made from the white mesh wrapping that a toy came in. You will also need a needle and thread (I used 3 strands of embroidery floss.) If you are wondering what this sieve is used for, check out this post about our Sensory Box.
For the white sieve I used two layers of the "mesh." For the red one, just one layer. I simply sewed around the outside of the bracelet to secure the mesh to it and then trimmed the excess off.

Ta Da! These sieves will help little ones find treasure now!

Easy. Fun. Reused. Earth Friendly. Kid Friendly :) To see other things that have come from this fun box, go HERE and here.

Also, {This Little Project} was featured on the Family Education.com blog. Go check out the other great earth day ideas featured there with the crayon shavings project from This Little Project!

Game: Where in the World?

Where in the world is.....?  Where in the world do they speak....?   Where in the world do they eat...?  Where in the world is the capital of.....?

This is a fun game to play with any ball and a map. We used our blow up globe ball.  You can prepare questions ahead of time or just play as you go.

Just say the name of a country and throw the ball to the next person. That person can name the capital or say another country before passing it on, depending on how you play. It's a great way to learn about different places on the Earth. Point them out on a map too before you pass the ball. You can also play it using names of states, cultural foods, or languages.

For other Earth learning ideas, click on the "Earth Day" category on the sidebar. Happy globetrotting!

Simple ways to Preserve and Conserve the Earth


It's been about a year since I had watched "The Story of Stuff." (thanks Mom!)  It's simple. It's profound. And it's certainly timely.  It's 20 minutes of viewing that will change how you view your stuff.

Did you know that simply unplugging your cell phone chargers saves a TON of energy? For more ways to save energy in your home, check this out.  My computer needs to be on a diet!

If you are wondering what is actually in your drinking water thanks to our obsession with stuff, check THIS out.

My sister equates saving money with saving the world. Here are things she does to do both:
1- Buy used toys-keep them out of the landfill
2- Cloth diapers-win-win: better for Earth and baby
3- Cook from scratch-less packaging in the trash
4- Make her own laundry detergent-did you know that lots of the chemicals that go into our water supply aren't taken out?  You can help by not putting them in!  There are lots of great "recipes" on the web.  Here is what she uses:

Dishwasher Detergent:

Mix equal parts Borax and Baking Soda or Washing Soda.

Add 2 Tablespoons for each load.  If you use a rinsing aid or have hard water, replace it with Vinegar.


Laundry Detergent:

1 Cup grated Fels Naptha Soap, Zote, or Ivory

1/2 Cup Washing Soda

1/2 Cup Borax

I used my food processor to grate the soap and mix and chop everything up nicely.

Use 1 Tablespoon for a light or little load and 2 Tablespoons for a big or heavy load.


For some ways to help your kids see what Preserving and Conserving our Earth is all about, see links below:
The Wildlife Conservation Center

Join a local hike with the Sierra Club

Kids can learn what they can do to save energy Here

Check out Spring Outside 2009 at nature.org

This quote seems all the more poingant this week:

'There is a great work for the Saints to do.  Progress, and improve upon and make beautiful everything around you. Cultivate the earth, and cultivate your minds. Build cities, adorn your habitations, make gardens, orchards, and vineyards, and render the earth so pleasant that when you look upon your labors you may do so with pleasure, and that angels may delight to come and visit your beautiful locations. In the mean time continually seek to adorn your minds with all the graces of the Spirit of Christ" (Deseret News, Aug. 8, 1860, 177)."The more you trust and rely upon the Spirit, the greater your capacity to create. That is your opportunity in this life and your destiny in the life to come... trust and rely on the Spirit. As you take the normal opportunities of your daily life and create something of beauty and helpfulness, you improve not only the world around you but also the world within you."
~Brigham Young (nearly a century and a half ago!)

Being a good steward on this Earth is something that is personal.  It truly begins with the beauty you create and maintain in your own life and home.  I find myself more committed and more informed to preserve and conserve the Earth.  It's a Little Project that means a lot.

How to Recycle your Crayons (eARTh Day)

We've been doing some eARTh today. Below are directions for 2 little projects that help you recycle your broken crayons.
At Green Talk I learned that millions of crayons are thrown away everyday and that because they are petroleum based it will take centuries for them to biodegrade! These little projects allow kids to help keep crayons out of the landfills (with adult supervision). 

Children really do hold the whole world in their hands. It's up to us to help them learn how to love her.

Of course we started out celebrating eARTh day with these treats. Then we got busy making old crayons into new eARTh creations.

Here are your supplies for the first activity: making worlds with recycled crayons.  You will need wax paper, an iron, crayon pieces, and a pencil sharpener.  A paper bag is a great help too.

The first crayon activity involved shaving the broken crayons with a pencil sharpener. We separated them by color.

Then spread them out to look like the Earth on the wax paper:
Next cover them with a layer of wax paper.  I put an added layer of paper (from a paper bag) over that.  You don't want any wax to get on your iron.

It doesn't take long for the little wax pieces to melt.  Try not to rub your iron around too much.  It makes the wax slide around.  It's better to just touch it down.  You can take the paper off and check as you go to see how it is looking.  Here is how our 2 looked after the iron melted the shavings.

Then just take a round object from the house and trace around it.  I took the top layer of wax paper off before I did this.
Cut it out and hang in the air.  You've made your own little world :)


We used the leftover bits (you can't sharpen the entire crayon) to melt and make new crayons.
The thickness of your crayons depends on how many pieces you put in.  Don't fill it too full or it will spill over the sides.  These crayons were about a half inch thick.  

Just set the oven to 300 degrees and watch them melt.  

When they are all melted, take them out and let the pan cool. After it has cooled, put the pan in the freezer for 20-30 minutes. The new crayons will fall right out!
Here is a song for you-can you guess the tune? (think birthday)
Happy Earth Day to YOU
Happy Earth Day to YOU!

Have a great eARTh Day! And since we are making a week of celebrating the Earth at our house, you're welcome to check back for more ideas during the week.

LinkWithin Related Stories Widget for Blogs Add to Technorati Favorites Share/Save/Bookmark