Showing posts with label Recycle. Show all posts

Friday Favorites and Freebies: Living Well and Frugal Tips

I've bumped into some great blogs about living well and living within your means this past week.
 
I feel like I've been through a mini Earth Day week mixed with a financial boot camp at my house with these fantastic reads.  A fresh start is always nice!
Here are some of my favorites that I had to share:

Save money and eat organically and sustainably?  Count me in!


Fun, Cheap, or Free is the idea here-with a how-to for tracking that budget, that's easy!


How to shop for 2 weeks at a time and spend less than $100/week on groceries! Great planning tips!


This girl has ideas for how to replace every plastic item you use with something not disposable.  We can all pick up a few tips here!

Plastic Free book by Beth Terry

I love the ideas here about how to shop without bringing home so much waste.  Again, lots of ideas and we can all start somewhere.

Zero Waste Home


Whew!  So many great things to learn.  

Happy Friday and have a great weekend!

Our Cloth Diaper Project--Finale!

A pretty big thing happened at our house this past week.  I washed my last batch of cloth diapers!

Yes, Ellie is 2 years old and a big girl now :)  And actually, our cloth diaper story really isn't totally over since we'll be using them again after baby #4 arrives in December. 

I haven't shared much about {this little project} before.  Some of you maybe thinking it really isn't a {little} project.  And that's what I used to think too.  Which is why I decided to take a minute and share our family's experience with cloth diapers.

This is Ellie in her cute little cloth diaper ;)


I've mentioned before that I call myself a hippie sometimes.  Well, that's partly because of where I live right now.  I don't personally know anyone else in our city that uses cloth diapers.
We moved 2 years ago and where we used to live, it was something that a lot of my friends did.
And I think that made a lot of difference for me.

Cloth diapering, when it is totally foreign, seems totally overwhelming.  It's hard to know where to start without someone to show you the ropes.

So, I'll share our story here in case there are some of you that are wondering how it works and where to start.
Feel free to ask questions.  And know that there is not a "right" way.  This is just how we do it :)

I'll answer tho most common questions people ask me about cloth diapering:

Why did you choose to cloth diaper?
I used disposables for Jay and Kay.  I switched Kay to cloth right as I was starting to potty train her for practice for me before baby #3 came.  As a "first timer" at cloth, I wanted to know what to expect and have my system figured out before I was sleep deprived with a newborn. Trying the cloth diapers on Kay first gave me courage to try cloth diapering.
Kay did well in them and seemed to potty train better in cloth diapers.

There were a few things that made me interested in cloth diapering specifically:

1- I read some articles about the chemicals that are in disposable diapers.  Some of them have been linked to a rise in infertility as well as cancers.  I started to think about what is best for baby. (If you want to read more about the chemical debate in diapers, here is a good place to start.)

2- I was thinking about this gift I was receiving in this {little} person joining our family.  And when I thought about the estimated 4,700 diposable diapers that we would go through before the baby was potty trained, I just felt like my little gift should not hurt the world she is becoming a part of and will inherit from my choices.  I didn't want my baby to leave that ugly spot right from the start.

3- There is a financial investment initially with cloth diapers.  But, over time they save you a lot of cash.  Especially if you get to use them with more than one child.  My husband was in school and we didn't have a lot of extra money to start our cloth diaper "collection."  We really had to consider whether to choose to do cloth because of that.  I started with just buying a couple to try out with Kay.  I wanted to feel sure we would really go cloth before we invested all the way.  My husband was not nearly as motivated as I was to do cloth diapering.  But at our house, we've come to an agreement: he does most of the dishes and I change most of the diapers.  Knowing that it would be my job made it easier for him to commit too :)

 What kind of cloth diaper do you use?
I decided to start with gDiapers.  I liked the idea of having a pad that lays inside the diaper that you can remove when you change, and if it's not poopy, you can replace it with a clean pad and use the outside cover again.  This is different than the "pocket" style (I'll talk about those later).  One thing I liked about these was that they are potentially less laundry.


gDiapers come in newborn, small, med, and large.  I bought about 10 of each size.  I tried their newborn size and it was terrible.  I don't recommend doing cloth diapering on a newborn.  It's best to wait until baby is about 10 pounds, or the size of a regular small diaper. 

The other reason I chose gDiapers is because they are less bulky.  Many other brands are a one-size-fits-all diaper.  But that means that a tiny person is wearing all that bulk and it's snapped up to fit her.  And that works for a lot of people.  But I was worried that her clothes wouldn't fit well.  And the gDiapers were still bulkier than a disposable, but in a cute way :)

gDiapers also have biodegradable inserts that are another option.  It's like doing part cloth, part disposable and it's better for the environment too.


I also used "pocket" styled diapers when my kids got bigger than the gDiapers large size.  The kind I bought were the Kawaii Baby cloth diapers.
  These diapers are a very affordable alternative to brand name diapers and they have worked great for us. 

Where did you buy your cloth diapers?
As I said before, we were in school when we decided to cloth diaper.  So I was interested in getting the best prices I could for diapers.  Some diapers are $10-20 a piece.  That can add up quickly.  I looked at baby "deal-a-day" websites, ebay, etc. when looking for good prices.  It can take some time, but it did save us some money to compare prices.

What kind of wipes do you use?
I made my own wet wipes.  I used 2 pieces of flannel or terry cloth about 7x7 inches sewn together.  They worked great.  I just got them wet right before I used them.  If I was out and about I used disposable wipes.

What about dealing with poop?
When you are a mom, you get to be more up close with poop, right?  Cloth diapering doesn't change that.  When baby is milk-fed you don't have to do anything different with the poop.  Just toss it into the container you keep them in because the poop is water-soluble.  But when baby starts solids you have to dispose of it.
I like these biodegradable and flushable liners.  Just lift them up off the diapers and toss them in the toilet.  But I didn't always use them.  I used to just tip the diaper and dump it.  And that works too. 


These liners also work great if you need to use a diaper cream.  It's best not to get the cream on the cloth diaper because it affects its absorbancy.  The liner takes care of that.

Where do you store your dirty diapers?
I picked up a frosting bucket from my grocery store and have been using that to store dirty diapers in.  It's worked well.  I store the diapers as is (no wet solution in the bucket) and just rinse the bucket in the sink by my washer each time I wash the diapers.

My friend uses a wet bag and throws it in the wash with her diapers each time she does the wash.  


What about the laundry?
You don't want your dirty diapers to sit a long time.  The smell grows that way.  I wash them about every 3-4 days.  But you pretty much wash just whenever you are running out!   For me, two extra loads a week isn't significant.  It's pretty simple.  Some people wonder about the environmental impact of washing diapers.  But it's often compared to the 5-6 flushes of the toilet your baby will be making when s/he is potty trained.  And our water is a renewable resource.  Disposable diapers never breakdown.

You do need to be careful about the soap you use with your diapers.  I used this soap powder for mine.  But my new homemade soap recipe will work too, when baby #4 comes :)


I run a rinse cycle and a regular wash cycle.  I have a normal washer and dryer.  Nothing fancy.  They work great with cloth diapers.

You should know that there is a bit of a smell while you wash your diapers.  It doesn't last.  My washer is in the basement so no one has to smell it, but if your is in the kitchen, you should be aware that you might need to burn a candle or something :)
I line-dry the outsides of the diapers and put the liners in the dryer.  The previous owners hung some nice telephone? wire from the rafters of our unfinished basement, which work great.  But I'm including a link for a great (space saving) solution for a drying rack too:


Can you make your own diapers?
I made my own inserts/pads for my gDiapers.  It was a good cost savings for me.  But it's not for everyone.  I also made my own wipes (see above).   If you want to look into sewing your own diapers here are some places to get you started.

What about when you are traveling?  Or just out and about?
I keep little plastic bags in my diaper bag, just like I did for disposable diapers.  When I am running errands and need to change I diaper I put the dirty diaper in the bag and instead of tossing dirty diaper in the garbage, I take it home and toss it into the bucket.  I thought this would feel weird, but it doesn't.  I use disposable wipes when I am out because wet wipes have to be treated with teatree oil or something antimicrobial to keep their dampness from becoming a freshness problem.

 These wet bags are nice because you can toss it in the wash too!


When we travel I use disposable diapers.

And I also use disposables when I am lazy.  Or if I didn't get the wash done in time.  Or if my babysitter can't handle a cloth diaper.  About babysitters: most of my babysitters do great with cloth diapers.  In fact, they think it's rather cool that we use them.  Which I think is cute of them!
 
The main thing is: you have to make cloth diapering work for YOU.  Sometimes it works, and sometimes I'm glad I have another option when I need it.  Other families may do things differently.  And that's ok.

Overall, I feel like we have been successful in our 3 goals (see beginning of post) of: less chemical contact for baby (healthier), better for the world we live in and baby will inherit, and better for the budget.  Every time I use a disposable diaper I cringe, knowing that I'm throwing away around 25 cents change.  After you use cloth for a {little} while that might happen to you too :)

I'm looking forward to putting the diapers away in the closet for a few months.  Just after Christmas, baby #4 will get to use them and I will be glad to think about those 3 goals again for a healthy baby, world, and budget.

But, not having a baby in diapers is pretty great.

And the hippie thing...well, I'm ok with it :)

DIY Laundry Detergent

I'm a bit of a hippie. 
It's partly an excuse to do my own thing. 
And it's partly true because I go ahead and do my own thing.

But if you're a hippie, that's expected.  Right?

For mother's day I made my own laundry detergent. 

In all my hippie-ness I am a bit of a tree hugger and am ever aware of my stewardship of our earth.  I've blogged quite a bit about that.

So I decided to give mother earth a gift for mothers day. 

Not only does making your own detergent save you $$, it's also really great for the environment.  More and more companies are becoming greener, but sadly, many of our cleaners are not very earth friendly for our drinking water.

I've been using my DIY Laundry Detergent for a few months now.  And  love it!

Here is the recipe I used:
1 cup Borax
1 cup Super Washing Soda
1 bar Fels Naptha Soap
(ZOTE would also work--see note about ivory below)


I used my food processor to make it.

I have one of those Ninja machines.  It basically turns everything to either a soup or smoothie so I don't use it for much food prep.
I thought it would be perfect for whipping some bars of soap into powder though.


It was! 

I doubled the recipe above and decided to use a bar of ivory soap instead for the second batch.  That's part of the white you see.  The Fels Naptha is yellow.  Ivory worked ok, but it didn't make the same light powder.  I could see it potentially not dissolving as quickly. So I wouldn't use it alone, but mixed in it's nice.  And the scent is too!

Just mix it together with a spoon and you get
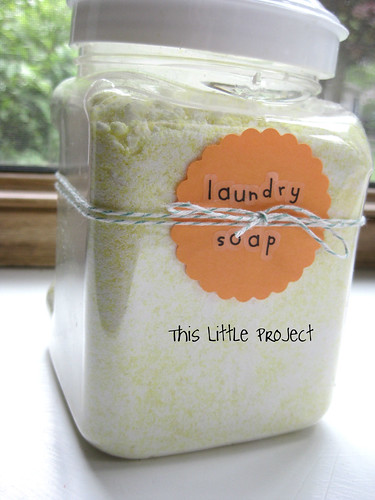
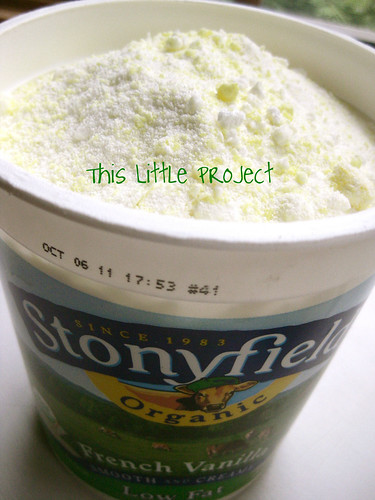
 this powder goodness!


For the record, my sister also uses her food processor to make her detergent and it's not a ninja.  You can use a regular hand grater as well if you are worried about putting a bar of soap in your food processor.  But if it can handle ice...you're probably fine...

If you are feeling like a hippie (I mean earth friendly), a double batch fits great in two reused large yogurt containers.

 
I use 1-2 tablespoons depending on the size of the batch and how soiled the laundry is.

Each yogurt container holds enough for 32-64 loads of laundry! 

And it cost about 5 cents a load to make--big time savings there!


And if you are going for cute, I keep mine in this too.


As a bonus, I haven't needed to use a dryer sheet either.

The {little} stuff matters :)

Warning: if you make this soap, you may feel a bit like a hippie.

Enjoy it!


For another laundry secret weapon, check out this post from the archives.

DIY Reusable Gift Wrap {Happy Earth Day!}

When you think back, do you ever just laugh at how some of your traditions got started?

It seems like some of our favorites traditions happened totally unexpectedly.
Our reusable gift wrap is a {little project} I started 2 years ago and it has turned into one of our FAVORITE TRADITIONS.
Go figure.

With Earth Day coming up this week, it's a perfect {little project} to try out.


Our reusable gift wrap is one of husband's favorite {little} things at Christmastime.  Since we still have {little} people at our house we don't wrap anything until Christmas Eve.  
(No matter what gift wrap we use it gets opened early, otherwise!)

And, since wrapping gifts isn't his favorite thing to do, he really loves these {little} bags that he just has to stuff and tie it closed!  Reusable gift wrap is super quick too!

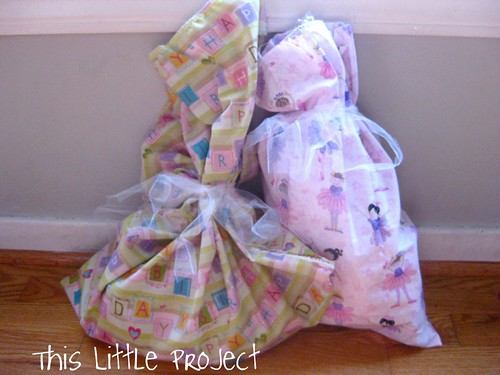
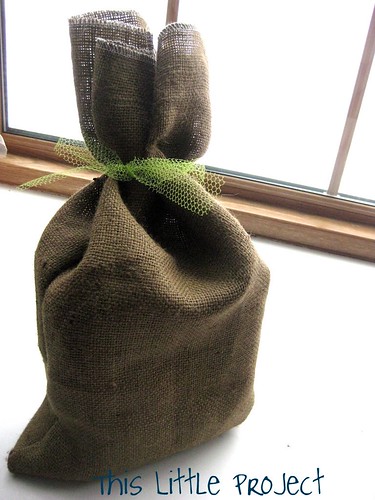
Speaking of tying them closed, I love how {this little project} looks with tulle as the tie.  I'm a big fan of tulle.  It's cute, gives it a special look, and is so inexpensive.  You can use it again and again too.

The reason my kids love our reusable gift wrap is that they have their own special birthday bags.
Each birthday they choose the theme they want for their party and we pick out a special fabric that matches the theme to make a special bag with.
Here is Kay's choice from her "ballet birthday" this year.  It's fun to use the birthday bags from past years too and relive memories of previous events too.


We love that this reusable gift wrap lasts from year to year and we aren't throwing tons of waste away anymore.

And one of the best things about this reusable gift wrap is that it's a cinch to make!

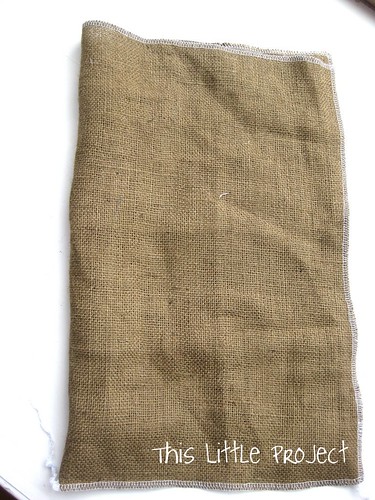
Here's a burlap one I did (it's inside out in the photo)

 
I just used a serger across the top and then folded it and half and went down the 2 sides.
You don't have to use a serger, but burlap frays otherwise. I use the same steps with the other bags.  And of course, you can make them any size.

Sometimes I hem the top instead.  If I'm not being lazy :)

This really is a {little} project.  
It takes 5 minutes or less!


But you get to enjoy it for a long time. 
And the Earth will thank you for it!

Happy Birthday...or...Earth Day!


How to make a Leprechaun Trap (2 of them!)

Well, we didn't catch any leprechauns in our traps this year...but Jay's art teacher did such a good job designing them and Jay had so much fun setting them, that I had to share them anyway...for next year, right?

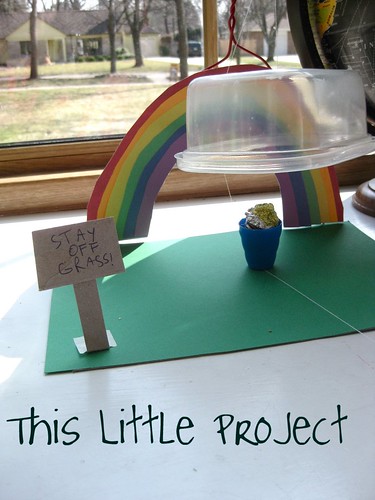
This first leprechaun trap has a clothes hanger attached behind the rainbow that is cut and bent to go under the green paper too.  The clothes hanger is bent to hold up the plastic container. 


The "pot of gold" has pennies in it to weigh it down to hold the string in place.  When the {little} leprechaun comes to snatch the treasure the trap (plastic container) will fall on him!  
The "gold" on top is a gold foil wrapper in a mound that looks like gold!

His teacher told him that leprechauns do NOT like rules.  So they made a sign to stay off of the grass, just to tempt them closer!  


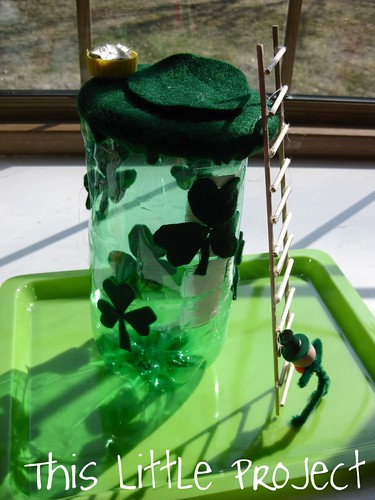
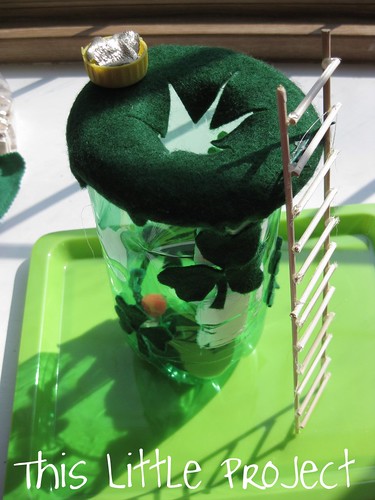
This is the second trap they made:  It's from a 2 liter soda pop bottle.  They cut off the top and used a cottage cheese lid to go over the top and covered it with felt.  The gold on top is the pop bottle lid upside down with pieces of gold circle fabric in it.


When the leprechaun climbs the ladder (bamboo skewers, I think) he walks across the top to get to get to the gold and he falls inside!  They had cut a hole in top of the lid and holes in the felt but covered it with felt so he wouldn't know!


Kay and Ellie have had fun setting it off...or was it the leprechauns that had escaped?  

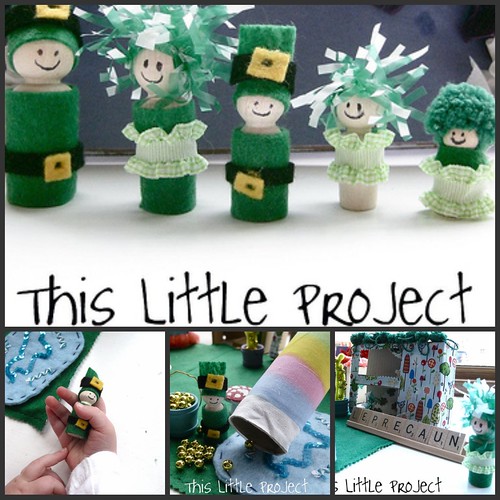
It's a good thing we still had our own leprechaun peg dolls in their village to play with so we're not too disappointed.  

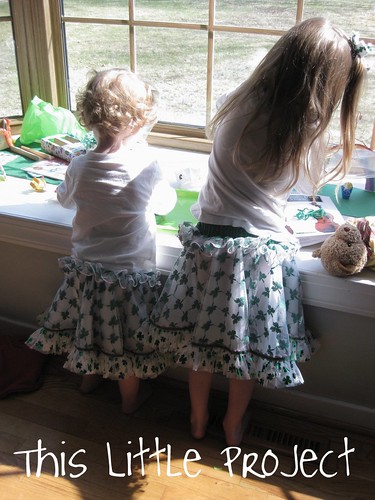
And you know those {little} shamrock necklaces and skirts?  They made the front page of our local newspaper for St. Patrick's Day!


Good Luck catching some {little} leprechauns!

Leprechaun Land (in the village)


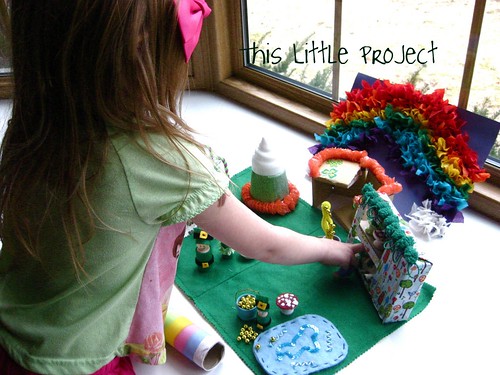
We've been playing with {little} people this week: the leprechauns have been at our house!


Jay has 2 leprechaun traps set in our house but those sneaky {little} leprechauns keep escaping when the traps go off (The traps he made at his art class are darling and I'll try to get some photos to share.)

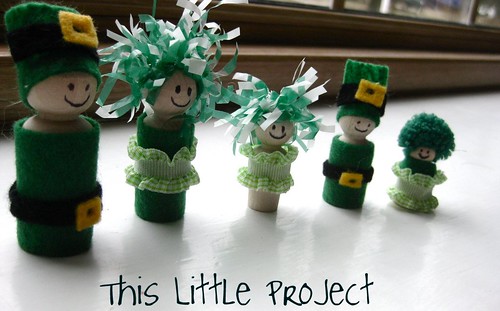
Since we haven't had much luck catching them, we made our family into leprechaun peg dolls instead!


We have had so much fun with other {little} building projects in our village and playing with our pilgrim peg people in our Thanksgiving Village.   

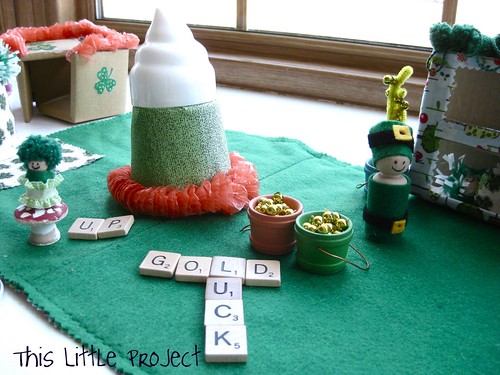
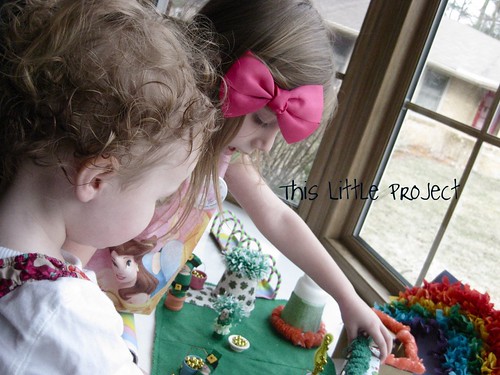
So, naturally, we had to make a Leprechaun Land to add into our village.  For those of you who haven't seen our other village projects, it's kind of like a doll house, made into many houses.  There's so much more fun to have that way!

Want a tour of {this little} magical land?

You got it.

There's quite a bit of dreaming up that you can do with some felt and the invention box.

Here's how the leprechauns get from our land to theirs...
This magical lane was made from the side of a cereal box, and chenille stems, and then covered with some rainbow fabric.

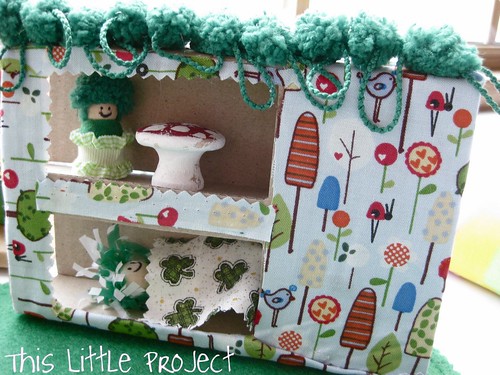
This is a leprechaun apartment (cardboard covered with fabric).  
Here's a close-up:  leprechaun Ellie has a toadstool table, leprechaun Kay is taking a {little} nap.


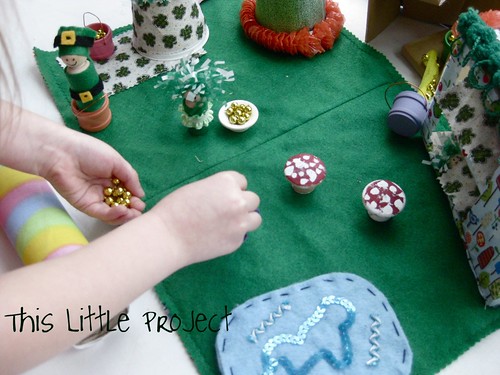
Our toadstools (on the left) were drawer pulls painted by Jay and Kay.  The top of this house in the middle is from a top of a spray cool whip can.  Under that is a yogurt cup with part of a lei glued around the bottom of it.  The leprechauns like to hid in there with their gold!

We like to use scrabble tiles to practice spelling words while we play in our {little} land.

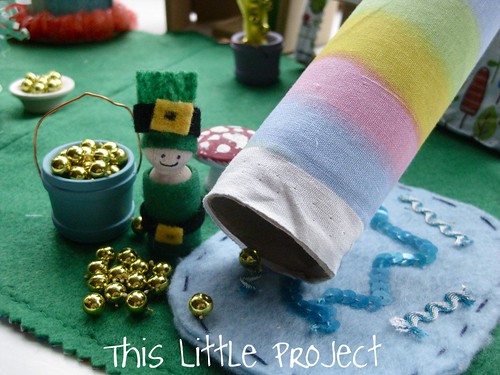
Are you wondering where all of the leprechaun gold came from?  It was a gold colored bead necklace that Jay and Kay cut up to put in their {little} buckets.  It's perfect!


Kay likes to count the gold...

And Ellie likes to dump it...and gather it....and dump it...

We made a paper towel tube into a rainbow that they can slide down.  Right now it looks like they land in the swimming pool when they come out!  But there's gold there too, as promised!


Here's our family turned into {little} leprechauns.  

Jay told me that he read in a book that there are no girl leprechauns--it's strictly a guy thing.  Whatever.  As if girls always have to be pretty little fairies....

So I'm on the lookout for a book that includes the female gender in the leprechaun tales.  Let me know if you know of any!


 I love seeing {little} minds and hands busy imagining and learning.  So {this} was definitely a lucky {little project}. 


Dr. Seuss Dress Up

I've been getting some {little} dress-ups ready in preparation for some games and other activities we're doing to celebrate Dr. Seuss' birthday on March 2nd.

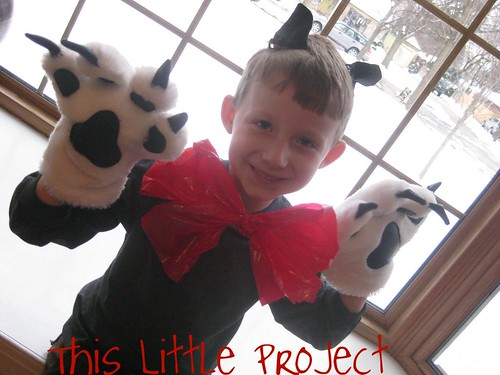
Here's our Cat in the Hat costume look so far (the kids will be making their own hats)

{This little project} is courtesy the invention box.

I got this red bag with a purchase recently and loved the color so much that I couldn't throw it out (I know-that probably means I'm weird!) so I put it in our invention box instead.  I'm so glad I did because it is perfect for our Cat in the Hat bow ties!


I simply cut it along the seams to get a nice long piece and then cut it in strips.

Then tie it to a rubber band, or hair ponytail before you tie the bow:

Now you can use a clothes pin to attach it to the person wearing it.

For the ears I used black felt and hot glued them to alligator clips.  

The white paws are from the dollar store a few years back, but you could whip some up out of white and black felt.


Stay tuned for some fun {little} games to use this Dr. Seuss dress up costume with!

Pin It 

Invention Box: Hair Clip Keeper (Rupunzel Princess)

One of my New Year Resolutions is to do an Invention Box 
{little project} with my kids each week. 

  If you want to make an invention box of your own, 
here's how we did that {little project}. 

  Our motto for {this little project} is:

"To invent you need a good imagination 
and a pile of junk." 
~Thomas Edison.

I love seeing their minds go crazy with all the possibilities of inventing.


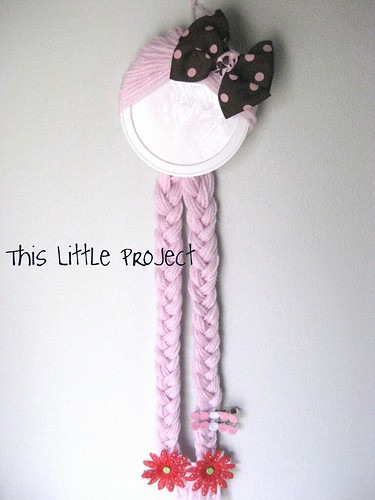
One of our favorite invention {projects} has been the Rupunzel Hair Clip Keeper.

My little Miss Kay is really into long hair.  
Many {projects} (like these headbands) have been for her.  


I'm soaking in her little girliness because I know it won't last forever.
Right now she's a little girl that loves princesses.  

So this invention was just her style.

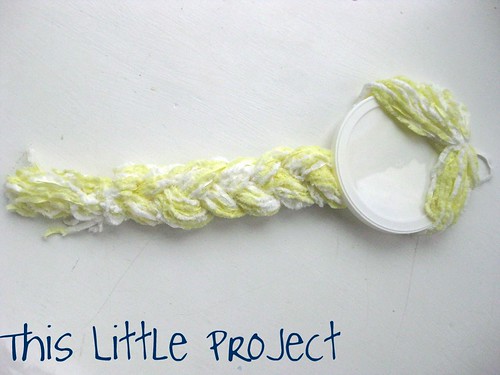
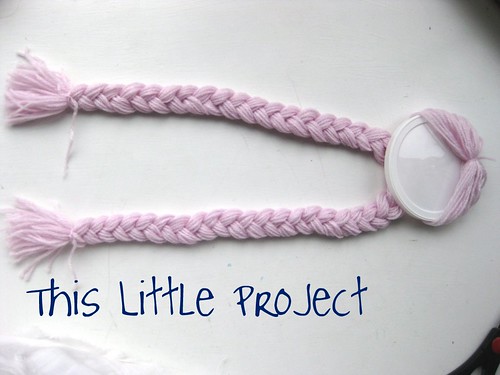
Meet the Rupunzel Hair Clip Keeper:
( in pink!)


 And here is the yellow-haired version:


You need 3 things to make {this little project}
scissors
yarn
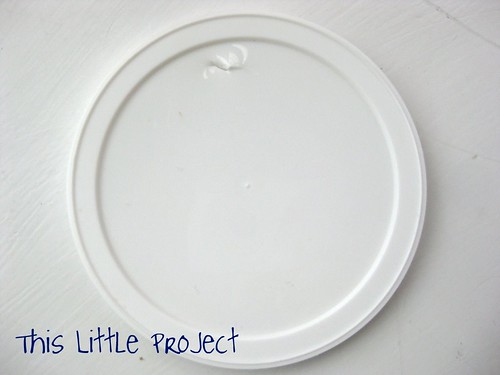
a plastic lid
(optional: a sharpie marker to draw a face on with)


To start off, you need to punch a hole in the top of your plastic lid.  This is a parent job :)
 
 
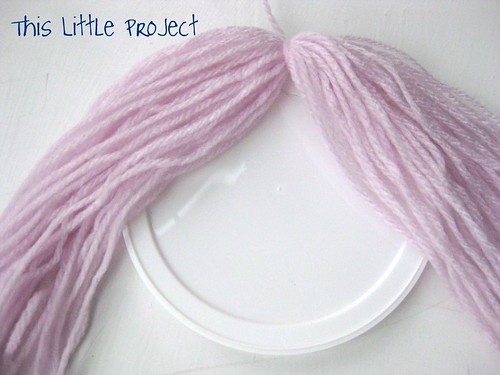
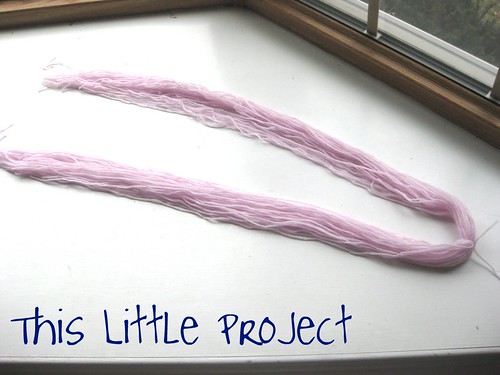
Next you need to decide how long you want the "hair" to be.  Remember that the longer her hair is, the more clippies she can wear (hold).  And also that braiding the hair will shorten it a little.  

The number of pieces of yarn you cut will determine how thick her "hair" is.

You will lay out her "hair" like this regardless of whether you do one braid or two. 

Two braids uses more yarn because each side becomes a braid.  You will combine the two sides if you want one long braid.
 
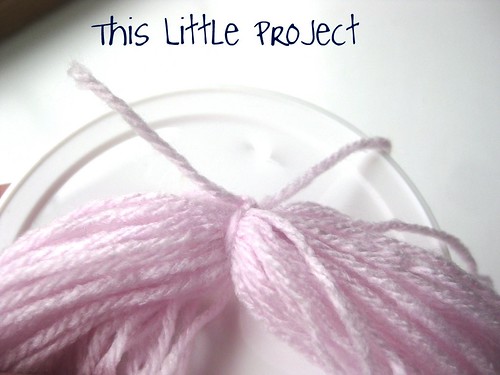
Then cut a LONGish piece of yarn to tie ALL the long pieces together in the middle at the top--see the knotted piece on the right side of the photo.
You can use the rest of this piece of yarn to hang it up when you are done.
 
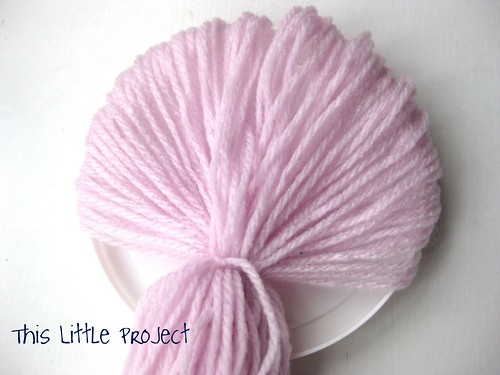
Then take that knotted piece of yarn and use it to tie the hair to the plastic lid, through the hole you made.


So it looks like this.  
 
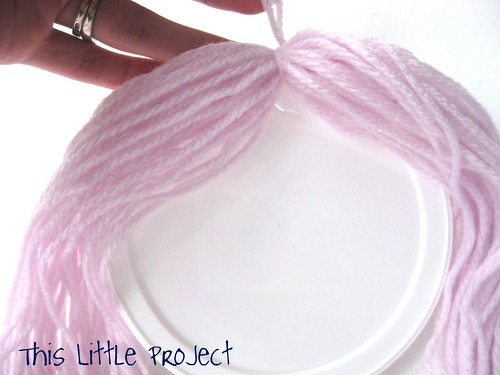
Then pull the hair down around the front of her face like this:


Next pull her hair around the the back.  It will start to look like she really has hair now!

Use a small piece of yarn to tie her hair into a pony tail.


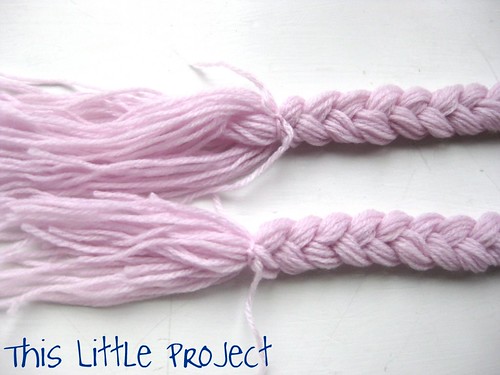
Then just braid the yarn into one or two braids with the yarn. 
If your little girl is old enough, she might like to do the braiding.


When you get to the end, tie each braid off and give her a little hair cut to trim the ends.


 Remember the first knot you tied?  The rest of that piece of that yarn can be used to hang her up. 


 Now is also the time to add a face (self portrait!) with a sharpie if you want to.


And there you go, a {little} invention to keep your princess's clippies organized.  
She's all ready to be decorated!


p.s. these are fun gifts too!
LinkWithin Related Stories Widget for Blogs Add to Technorati Favorites Share/Save/Bookmark