Showing posts with label Go Green. Show all posts

Our Cloth Diaper Project--Finale!

A pretty big thing happened at our house this past week.  I washed my last batch of cloth diapers!

Yes, Ellie is 2 years old and a big girl now :)  And actually, our cloth diaper story really isn't totally over since we'll be using them again after baby #4 arrives in December. 

I haven't shared much about {this little project} before.  Some of you maybe thinking it really isn't a {little} project.  And that's what I used to think too.  Which is why I decided to take a minute and share our family's experience with cloth diapers.

This is Ellie in her cute little cloth diaper ;)


I've mentioned before that I call myself a hippie sometimes.  Well, that's partly because of where I live right now.  I don't personally know anyone else in our city that uses cloth diapers.
We moved 2 years ago and where we used to live, it was something that a lot of my friends did.
And I think that made a lot of difference for me.

Cloth diapering, when it is totally foreign, seems totally overwhelming.  It's hard to know where to start without someone to show you the ropes.

So, I'll share our story here in case there are some of you that are wondering how it works and where to start.
Feel free to ask questions.  And know that there is not a "right" way.  This is just how we do it :)

I'll answer tho most common questions people ask me about cloth diapering:

Why did you choose to cloth diaper?
I used disposables for Jay and Kay.  I switched Kay to cloth right as I was starting to potty train her for practice for me before baby #3 came.  As a "first timer" at cloth, I wanted to know what to expect and have my system figured out before I was sleep deprived with a newborn. Trying the cloth diapers on Kay first gave me courage to try cloth diapering.
Kay did well in them and seemed to potty train better in cloth diapers.

There were a few things that made me interested in cloth diapering specifically:

1- I read some articles about the chemicals that are in disposable diapers.  Some of them have been linked to a rise in infertility as well as cancers.  I started to think about what is best for baby. (If you want to read more about the chemical debate in diapers, here is a good place to start.)

2- I was thinking about this gift I was receiving in this {little} person joining our family.  And when I thought about the estimated 4,700 diposable diapers that we would go through before the baby was potty trained, I just felt like my little gift should not hurt the world she is becoming a part of and will inherit from my choices.  I didn't want my baby to leave that ugly spot right from the start.

3- There is a financial investment initially with cloth diapers.  But, over time they save you a lot of cash.  Especially if you get to use them with more than one child.  My husband was in school and we didn't have a lot of extra money to start our cloth diaper "collection."  We really had to consider whether to choose to do cloth because of that.  I started with just buying a couple to try out with Kay.  I wanted to feel sure we would really go cloth before we invested all the way.  My husband was not nearly as motivated as I was to do cloth diapering.  But at our house, we've come to an agreement: he does most of the dishes and I change most of the diapers.  Knowing that it would be my job made it easier for him to commit too :)

 What kind of cloth diaper do you use?
I decided to start with gDiapers.  I liked the idea of having a pad that lays inside the diaper that you can remove when you change, and if it's not poopy, you can replace it with a clean pad and use the outside cover again.  This is different than the "pocket" style (I'll talk about those later).  One thing I liked about these was that they are potentially less laundry.


gDiapers come in newborn, small, med, and large.  I bought about 10 of each size.  I tried their newborn size and it was terrible.  I don't recommend doing cloth diapering on a newborn.  It's best to wait until baby is about 10 pounds, or the size of a regular small diaper. 

The other reason I chose gDiapers is because they are less bulky.  Many other brands are a one-size-fits-all diaper.  But that means that a tiny person is wearing all that bulk and it's snapped up to fit her.  And that works for a lot of people.  But I was worried that her clothes wouldn't fit well.  And the gDiapers were still bulkier than a disposable, but in a cute way :)

gDiapers also have biodegradable inserts that are another option.  It's like doing part cloth, part disposable and it's better for the environment too.


I also used "pocket" styled diapers when my kids got bigger than the gDiapers large size.  The kind I bought were the Kawaii Baby cloth diapers.
  These diapers are a very affordable alternative to brand name diapers and they have worked great for us. 

Where did you buy your cloth diapers?
As I said before, we were in school when we decided to cloth diaper.  So I was interested in getting the best prices I could for diapers.  Some diapers are $10-20 a piece.  That can add up quickly.  I looked at baby "deal-a-day" websites, ebay, etc. when looking for good prices.  It can take some time, but it did save us some money to compare prices.

What kind of wipes do you use?
I made my own wet wipes.  I used 2 pieces of flannel or terry cloth about 7x7 inches sewn together.  They worked great.  I just got them wet right before I used them.  If I was out and about I used disposable wipes.

What about dealing with poop?
When you are a mom, you get to be more up close with poop, right?  Cloth diapering doesn't change that.  When baby is milk-fed you don't have to do anything different with the poop.  Just toss it into the container you keep them in because the poop is water-soluble.  But when baby starts solids you have to dispose of it.
I like these biodegradable and flushable liners.  Just lift them up off the diapers and toss them in the toilet.  But I didn't always use them.  I used to just tip the diaper and dump it.  And that works too. 


These liners also work great if you need to use a diaper cream.  It's best not to get the cream on the cloth diaper because it affects its absorbancy.  The liner takes care of that.

Where do you store your dirty diapers?
I picked up a frosting bucket from my grocery store and have been using that to store dirty diapers in.  It's worked well.  I store the diapers as is (no wet solution in the bucket) and just rinse the bucket in the sink by my washer each time I wash the diapers.

My friend uses a wet bag and throws it in the wash with her diapers each time she does the wash.  


What about the laundry?
You don't want your dirty diapers to sit a long time.  The smell grows that way.  I wash them about every 3-4 days.  But you pretty much wash just whenever you are running out!   For me, two extra loads a week isn't significant.  It's pretty simple.  Some people wonder about the environmental impact of washing diapers.  But it's often compared to the 5-6 flushes of the toilet your baby will be making when s/he is potty trained.  And our water is a renewable resource.  Disposable diapers never breakdown.

You do need to be careful about the soap you use with your diapers.  I used this soap powder for mine.  But my new homemade soap recipe will work too, when baby #4 comes :)


I run a rinse cycle and a regular wash cycle.  I have a normal washer and dryer.  Nothing fancy.  They work great with cloth diapers.

You should know that there is a bit of a smell while you wash your diapers.  It doesn't last.  My washer is in the basement so no one has to smell it, but if your is in the kitchen, you should be aware that you might need to burn a candle or something :)
I line-dry the outsides of the diapers and put the liners in the dryer.  The previous owners hung some nice telephone? wire from the rafters of our unfinished basement, which work great.  But I'm including a link for a great (space saving) solution for a drying rack too:


Can you make your own diapers?
I made my own inserts/pads for my gDiapers.  It was a good cost savings for me.  But it's not for everyone.  I also made my own wipes (see above).   If you want to look into sewing your own diapers here are some places to get you started.

What about when you are traveling?  Or just out and about?
I keep little plastic bags in my diaper bag, just like I did for disposable diapers.  When I am running errands and need to change I diaper I put the dirty diaper in the bag and instead of tossing dirty diaper in the garbage, I take it home and toss it into the bucket.  I thought this would feel weird, but it doesn't.  I use disposable wipes when I am out because wet wipes have to be treated with teatree oil or something antimicrobial to keep their dampness from becoming a freshness problem.

 These wet bags are nice because you can toss it in the wash too!


When we travel I use disposable diapers.

And I also use disposables when I am lazy.  Or if I didn't get the wash done in time.  Or if my babysitter can't handle a cloth diaper.  About babysitters: most of my babysitters do great with cloth diapers.  In fact, they think it's rather cool that we use them.  Which I think is cute of them!
 
The main thing is: you have to make cloth diapering work for YOU.  Sometimes it works, and sometimes I'm glad I have another option when I need it.  Other families may do things differently.  And that's ok.

Overall, I feel like we have been successful in our 3 goals (see beginning of post) of: less chemical contact for baby (healthier), better for the world we live in and baby will inherit, and better for the budget.  Every time I use a disposable diaper I cringe, knowing that I'm throwing away around 25 cents change.  After you use cloth for a {little} while that might happen to you too :)

I'm looking forward to putting the diapers away in the closet for a few months.  Just after Christmas, baby #4 will get to use them and I will be glad to think about those 3 goals again for a healthy baby, world, and budget.

But, not having a baby in diapers is pretty great.

And the hippie thing...well, I'm ok with it :)

DIY Laundry Detergent

I'm a bit of a hippie. 
It's partly an excuse to do my own thing. 
And it's partly true because I go ahead and do my own thing.

But if you're a hippie, that's expected.  Right?

For mother's day I made my own laundry detergent. 

In all my hippie-ness I am a bit of a tree hugger and am ever aware of my stewardship of our earth.  I've blogged quite a bit about that.

So I decided to give mother earth a gift for mothers day. 

Not only does making your own detergent save you $$, it's also really great for the environment.  More and more companies are becoming greener, but sadly, many of our cleaners are not very earth friendly for our drinking water.

I've been using my DIY Laundry Detergent for a few months now.  And  love it!

Here is the recipe I used:
1 cup Borax
1 cup Super Washing Soda
1 bar Fels Naptha Soap
(ZOTE would also work--see note about ivory below)


I used my food processor to make it.

I have one of those Ninja machines.  It basically turns everything to either a soup or smoothie so I don't use it for much food prep.
I thought it would be perfect for whipping some bars of soap into powder though.


It was! 

I doubled the recipe above and decided to use a bar of ivory soap instead for the second batch.  That's part of the white you see.  The Fels Naptha is yellow.  Ivory worked ok, but it didn't make the same light powder.  I could see it potentially not dissolving as quickly. So I wouldn't use it alone, but mixed in it's nice.  And the scent is too!

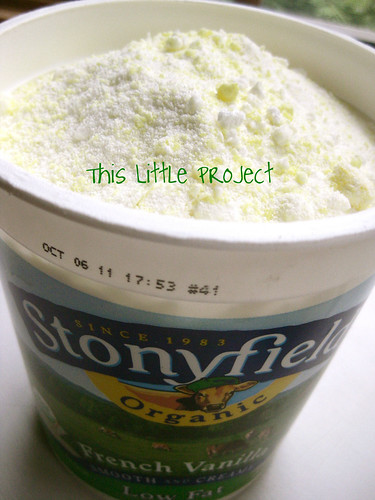
Just mix it together with a spoon and you get
 this powder goodness!


For the record, my sister also uses her food processor to make her detergent and it's not a ninja.  You can use a regular hand grater as well if you are worried about putting a bar of soap in your food processor.  But if it can handle ice...you're probably fine...

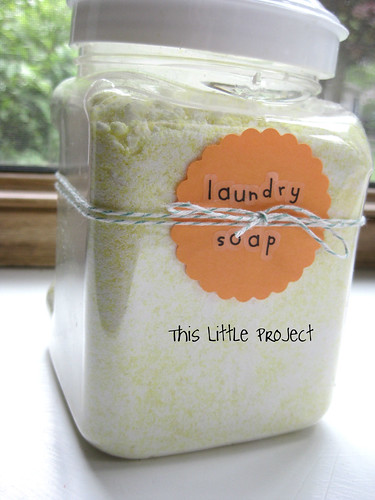
If you are feeling like a hippie (I mean earth friendly), a double batch fits great in two reused large yogurt containers.

 
I use 1-2 tablespoons depending on the size of the batch and how soiled the laundry is.

Each yogurt container holds enough for 32-64 loads of laundry! 

And it cost about 5 cents a load to make--big time savings there!


And if you are going for cute, I keep mine in this too.


As a bonus, I haven't needed to use a dryer sheet either.

The {little} stuff matters :)

Warning: if you make this soap, you may feel a bit like a hippie.

Enjoy it!


For another laundry secret weapon, check out this post from the archives.

Invention Box: Hair Clip Keeper (Rupunzel Princess)

One of my New Year Resolutions is to do an Invention Box 
{little project} with my kids each week. 

  If you want to make an invention box of your own, 
here's how we did that {little project}. 

  Our motto for {this little project} is:

"To invent you need a good imagination 
and a pile of junk." 
~Thomas Edison.

I love seeing their minds go crazy with all the possibilities of inventing.


One of our favorite invention {projects} has been the Rupunzel Hair Clip Keeper.

My little Miss Kay is really into long hair.  
Many {projects} (like these headbands) have been for her.  


I'm soaking in her little girliness because I know it won't last forever.
Right now she's a little girl that loves princesses.  

So this invention was just her style.

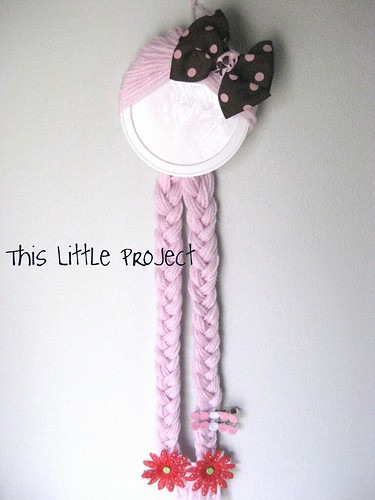
Meet the Rupunzel Hair Clip Keeper:
( in pink!)


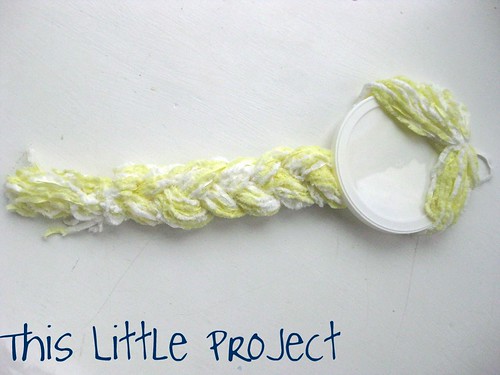
 And here is the yellow-haired version:


You need 3 things to make {this little project}
scissors
yarn
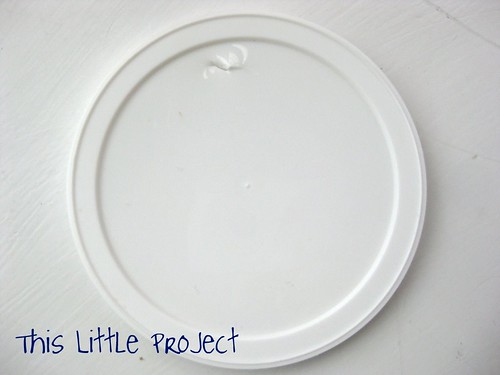
a plastic lid
(optional: a sharpie marker to draw a face on with)


To start off, you need to punch a hole in the top of your plastic lid.  This is a parent job :)
 
 
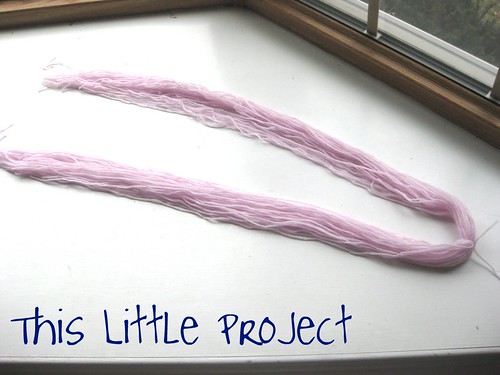
Next you need to decide how long you want the "hair" to be.  Remember that the longer her hair is, the more clippies she can wear (hold).  And also that braiding the hair will shorten it a little.  

The number of pieces of yarn you cut will determine how thick her "hair" is.

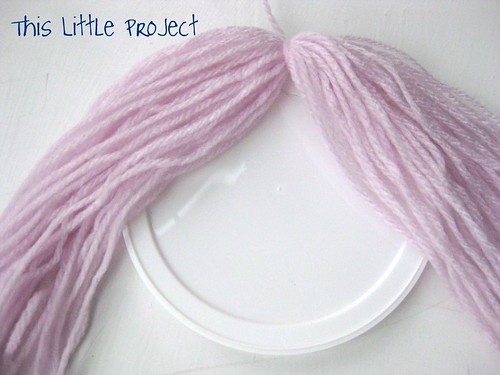
You will lay out her "hair" like this regardless of whether you do one braid or two. 

Two braids uses more yarn because each side becomes a braid.  You will combine the two sides if you want one long braid.
 
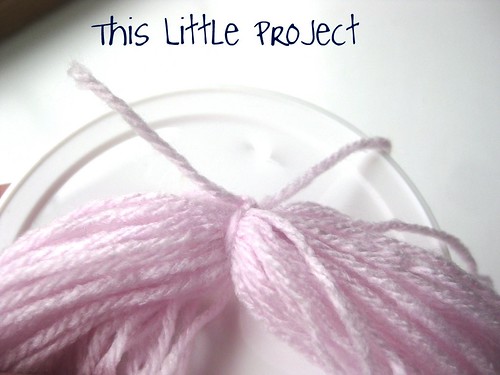
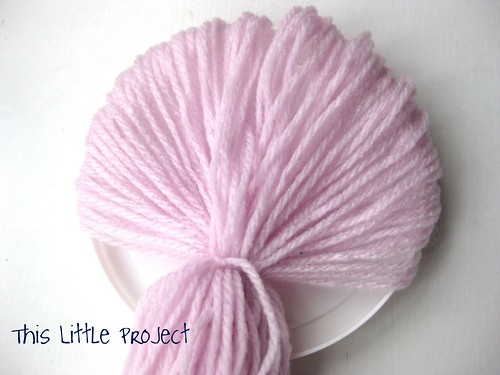
Then cut a LONGish piece of yarn to tie ALL the long pieces together in the middle at the top--see the knotted piece on the right side of the photo.
You can use the rest of this piece of yarn to hang it up when you are done.
 
Then take that knotted piece of yarn and use it to tie the hair to the plastic lid, through the hole you made.


So it looks like this.  
 
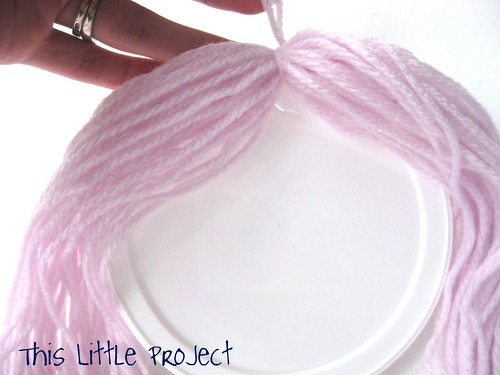
Then pull the hair down around the front of her face like this:


Next pull her hair around the the back.  It will start to look like she really has hair now!

Use a small piece of yarn to tie her hair into a pony tail.


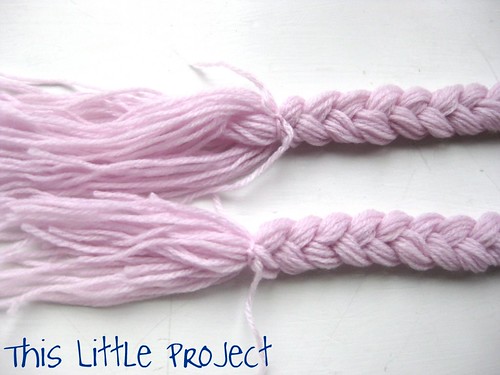
Then just braid the yarn into one or two braids with the yarn. 
If your little girl is old enough, she might like to do the braiding.


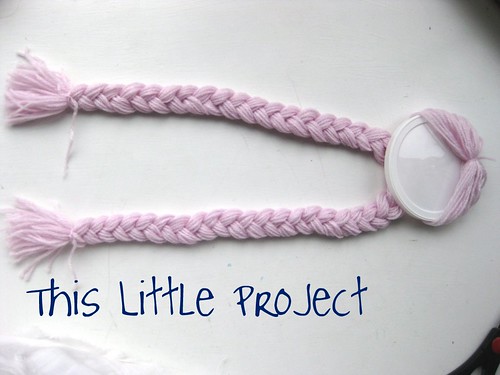
When you get to the end, tie each braid off and give her a little hair cut to trim the ends.


 Remember the first knot you tied?  The rest of that piece of that yarn can be used to hang her up. 


 Now is also the time to add a face (self portrait!) with a sharpie if you want to.


And there you go, a {little} invention to keep your princess's clippies organized.  
She's all ready to be decorated!


p.s. these are fun gifts too!

Earth Day Catch Project

In honor of Earth Day, {This Little Project} is about reusing. With some scissors you can turn a milk jug in to a ball catch. Jay is starting T-ball this weekend and I thought we could use some catching practice around here. This is what we came up with (courtesy of the invention box):

To make {This Little Project} you need:
a plastic milk jug
electric tape (probably not totally necessary so go ahead if you don't have it).
yarn
ball with lots of holes (ours is from dollar tree)

Just cut the jug in half below the handle. Use electric tape to cover the top. (If you are wondering what to do with the bottom half, we put soil in and are using it for a planter.)

Tie one end of the yarn to the jug and the other through the holes on the ball.
Now play ball with this earth-friendly toy and feel good about planting seeds in the other half! Happy Earth Day!

Little "Green" Projects

I had an experience which warmed my heart.  In a world where people seem to be more worried about what they wear than anything else, I witnessed real beauty at my local recycle center!  As you may know, we are in a new town for the summer.  My laundry room and garage have been piling up with things that need to be recycled.

Good news: I found where to take them all and we've been there a few times now. The sight of people showing up and sorting their own "recycle garbage" into different bins made my heart swell! We hear so much bad news and so much about unhappy things in this world. Seeing so many people choose to make the world a better, cleaner place made my day. It seriously made me so happy!

I find that my own experience of learning about ways to lessen our family's impact on the Earth and prevent waste goes like this:
1- I learn about a specific issue/problem.
2-  I want to do something better.
3- I come across an idea of something I CAN DO.
4- I have to think on it until I figure out how I can make that idea fit into my life.
5- I make the change.

My sister is always a step ahead of me on this. When I visited her in DC this past spring she told me that they no longer use any paper towels or paper napkins. She has converted entirely to cloth napkins and cloth towels for their family. I thought, "seriously? wow! I don't know if I could do that." I had to think on it. I think of all the paper products we've just tossed and never thought about....sad, I never even thought about it! But, now I am figuring out how to fit that in my life.

These little cloths are one of our little green projects that brings good change for us.  I only bought 40 of them :)
It seems like a little thing really, to reuse something.  It is amazing how good it can make you feel.

If you want to make/use some too, here is a great list of how to stop using paper towels, napkins, and even baby wipes I think it is an inspiring thought.  If you are like me, you can think on it and you will be able to see a way to make small changes in your life and help your family learn too.  A little bit really does matter!

Here are some tips to prolong the life of your washing cloths from Stacy@momcentral.com:
"Synthetic sponges and kitchen cloths can start to smell and carry bacteria, but you don't have to toss them out after a few uses. One option to reduce bacteria is to sanitize sponges and dishrags by soaking them in a bleach solution (¾ cup of bleach* to a gallon of water) for 5 minutes in the sink. Don't forget to rinse and dry when done. A wet sponge can also be microwaved to get rid of bacteria. (* Always remember to read and follow precautions and usage directions before using cleaning products)"

To learn how to make your own green kitchen cleaning supplies at Plum Pudding.  I love her cleaning container too!

One of our other little "green" projects has been turning old tank tops
and T-shirts into grocery shopping bags.  Want to know how many bags Americans THROW AWAY each year?  It will make you sad!  100 billion! :(  Did you know that if you sew the bottom of a T-shirt closed, cut off the arms and cut the neck a little wider it makes an awesome grocery bag?

Another little green project: donate your old stuff to a thrift store.  It makes me so sad to drive around on garbage day and see all the things people are just not using anymore that are filling the landfills.  I see high chairs, desks, chairs, etc.  They look totally decent and maybe the owners didn't know that most thrift stores offer free pick-up of items.  A phone call.  So easy!

Little things really mean a lot.  See if you can add a little Green project into your life.  It will make you happy :)

From the invention box: recycled stitching

This Little stitching Project has been on my mind for awhile and we finally tried it out today. All of the materials for this stitching project came from one of our favorite places: "the invention junk box," which means they were all recycled things.  If you are wondering what an invention junk box is, check this out.

We recycled the red plastic "holed" cover from a box of clementines, but any "holed" material would work.  We have some from a bag of onions we bought, and also from a bag of potatoes.  Next time you pick up some produce keep your eye out.  Tulle can also be used.

*Materials: reused "holed" material,  hoop, yarn, chenille stem.

You can make a kid-friendly needle with your chenille stem by bending it and securing it to hold the yarn like this:
 I saw this idea somewhere on the web a few months ago and can't remember where.  If you know PLEASE let me know so I can give them credit for this great idea!  UPDATE: Croq Zine is the author of this great needle trick-go see what they made too!


With large holes you have to tie a really big knot or just go up through and then down in the next hole a few times to secure the end for your child.

Jay hasn't had a lot of lacing activities so I helped hold it so he could see if he should go "up" or "down" next.

He kept asking me what it looked like to me....?

After we finished that one I used a cookie cutter and a sharpie marker to make a pattern for him to lace over:
He loved it.
Easy, fun, educational, recycled.  That's my kind of project :)  I hope you enjoy lacing and stitching with materials you have around the house or from your own invention/junk box too!

Simple ways to Preserve and Conserve the Earth


It's been about a year since I had watched "The Story of Stuff." (thanks Mom!)  It's simple. It's profound. And it's certainly timely.  It's 20 minutes of viewing that will change how you view your stuff.

Did you know that simply unplugging your cell phone chargers saves a TON of energy? For more ways to save energy in your home, check this out.  My computer needs to be on a diet!

If you are wondering what is actually in your drinking water thanks to our obsession with stuff, check THIS out.

My sister equates saving money with saving the world. Here are things she does to do both:
1- Buy used toys-keep them out of the landfill
2- Cloth diapers-win-win: better for Earth and baby
3- Cook from scratch-less packaging in the trash
4- Make her own laundry detergent-did you know that lots of the chemicals that go into our water supply aren't taken out?  You can help by not putting them in!  There are lots of great "recipes" on the web.  Here is what she uses:

Dishwasher Detergent:

Mix equal parts Borax and Baking Soda or Washing Soda.

Add 2 Tablespoons for each load.  If you use a rinsing aid or have hard water, replace it with Vinegar.


Laundry Detergent:

1 Cup grated Fels Naptha Soap, Zote, or Ivory

1/2 Cup Washing Soda

1/2 Cup Borax

I used my food processor to grate the soap and mix and chop everything up nicely.

Use 1 Tablespoon for a light or little load and 2 Tablespoons for a big or heavy load.


For some ways to help your kids see what Preserving and Conserving our Earth is all about, see links below:
The Wildlife Conservation Center

Join a local hike with the Sierra Club

Kids can learn what they can do to save energy Here

Check out Spring Outside 2009 at nature.org

This quote seems all the more poingant this week:

'There is a great work for the Saints to do.  Progress, and improve upon and make beautiful everything around you. Cultivate the earth, and cultivate your minds. Build cities, adorn your habitations, make gardens, orchards, and vineyards, and render the earth so pleasant that when you look upon your labors you may do so with pleasure, and that angels may delight to come and visit your beautiful locations. In the mean time continually seek to adorn your minds with all the graces of the Spirit of Christ" (Deseret News, Aug. 8, 1860, 177)."The more you trust and rely upon the Spirit, the greater your capacity to create. That is your opportunity in this life and your destiny in the life to come... trust and rely on the Spirit. As you take the normal opportunities of your daily life and create something of beauty and helpfulness, you improve not only the world around you but also the world within you."
~Brigham Young (nearly a century and a half ago!)

Being a good steward on this Earth is something that is personal.  It truly begins with the beauty you create and maintain in your own life and home.  I find myself more committed and more informed to preserve and conserve the Earth.  It's a Little Project that means a lot.

How to Recycle your Crayons (eARTh Day)

We've been doing some eARTh today. Below are directions for 2 little projects that help you recycle your broken crayons.
At Green Talk I learned that millions of crayons are thrown away everyday and that because they are petroleum based it will take centuries for them to biodegrade! These little projects allow kids to help keep crayons out of the landfills (with adult supervision). 

Children really do hold the whole world in their hands. It's up to us to help them learn how to love her.

Of course we started out celebrating eARTh day with these treats. Then we got busy making old crayons into new eARTh creations.

Here are your supplies for the first activity: making worlds with recycled crayons.  You will need wax paper, an iron, crayon pieces, and a pencil sharpener.  A paper bag is a great help too.

The first crayon activity involved shaving the broken crayons with a pencil sharpener. We separated them by color.

Then spread them out to look like the Earth on the wax paper:
Next cover them with a layer of wax paper.  I put an added layer of paper (from a paper bag) over that.  You don't want any wax to get on your iron.

It doesn't take long for the little wax pieces to melt.  Try not to rub your iron around too much.  It makes the wax slide around.  It's better to just touch it down.  You can take the paper off and check as you go to see how it is looking.  Here is how our 2 looked after the iron melted the shavings.

Then just take a round object from the house and trace around it.  I took the top layer of wax paper off before I did this.
Cut it out and hang in the air.  You've made your own little world :)


We used the leftover bits (you can't sharpen the entire crayon) to melt and make new crayons.
The thickness of your crayons depends on how many pieces you put in.  Don't fill it too full or it will spill over the sides.  These crayons were about a half inch thick.  

Just set the oven to 300 degrees and watch them melt.  

When they are all melted, take them out and let the pan cool. After it has cooled, put the pan in the freezer for 20-30 minutes. The new crayons will fall right out!
Here is a song for you-can you guess the tune? (think birthday)
Happy Earth Day to YOU
Happy Earth Day to YOU!

Have a great eARTh Day! And since we are making a week of celebrating the Earth at our house, you're welcome to check back for more ideas during the week.

LinkWithin Related Stories Widget for Blogs Add to Technorati Favorites Share/Save/Bookmark