Happy New Year Cake

Jay's birthday is close to the end of the year so we just had his party. He requested a "clock" theme for his party this year and I just made the clock face with cupcakes.

We put candles on the cupcakes counting up to how old he is now and the time it shows is the time he was born. He loved it!

But then I started thinking, that this would be a fun cake for celebrating the New Year too! It would be a YUMMY way to count down.
We're getting out our prediction jar from last year to see how many came true and trying to think of what to write for next year...
Wishing you a wonderful Happy New Year!


DIY Nativity Costumes: Wisemen

Here is another costume to make for your nativity pageant. These wisemen costumes crowns are easy to make, reusable, and fit any size!

I used this template and tutorial to make the felt crown.
Then I just added elastic across the back
and hot glued big rhinestones to the front.
Easy and fun to wear!
For some {Little Project} tips on making sheep costumes, see this link.
Merry Christmas!

Friday Favorites and Freebies-Christmas Edition

There are so many fantastic ideas to be found for celebrating Christmas. Here are a few I found this week and wanted to share with YOU! Enjoy!

I love this nativity finger puppet set idea.

These darling gift tags will come in handy and are free to print :)

Check out this easy neighbor gift with a printable gift tag too!

This list of 25 gifts kids can make might come in handy for friends, family, and teachers.
(Thanks Crafty Crow for including {This Little Project's} softie gift for a baby in the list!)

And I can't wait to make this burlap and felt nativity with my kids-pattern is included in tutorial.

Enjoy your weekend!

DIY Nativity Costumes: SHEEP

 It's a tradition in our family to read the story of the nativity from the bible on Christmas Eve. If you're like us, you might be starting to gather things for your children to wear as you read it.

Each year I make a few costumes. These sheep costumes were easy to make. I wanted them to be quick to put on, easy to make, and look like a sheep when they were crawling around. Here's what I came up with:

They are made similarly to a children's bath towel with a hood.
I used 3 pieces of "furry" fabric (A white bath towel would work great too!)
one for hood
one for sheep body
one for tail
Then I just tacked on some eyes, ears, feet and nose of black felt.


The kids look like cute little sheep when they crawl around on their knees. See the link above if you haven't made a hooded towel before. They sew up in a jiffy!
Stay tuned for more fun and easy costumes to make ;)


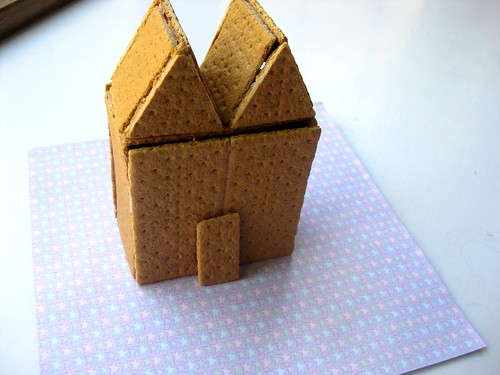
The Secret to Easy Gingerbread Houses

Want to know the secret for making
quick and easy gingerbread houses?

This is the princess castle we made for Miss Kay's princess birthday party.
It took all of a few minutes to make-and that's only because it was a big castle.

At this time of the year you need a few extra minutes!


So {This Little Project} secret is...
Use your hot glue gun!


The kids don't eat the graham crackers anyway-it's more about the candy, right?
And you'll still get that "snowy" frosting look when the candy gets plastered on with frosting ;)

I'm lucky enough to be visiting Elspeth right now. We're having a great time doing {Little Projects} and our kids are having an awesome cousin reunion.

And we've got 13 gingerbread houses to make for an upcoming party.
If you're like us...consider the glue gun.
(And be sure to let the parents know)


This Christmas season think: little.

If this Christmas season is overwhelming to you. Think little.

Here's what I mean:
This past year I read this article that highlights the #1 reason kids in America are failing to learn to read: most middle-income homes have 10 or fewer books on the bookshelf for their children.

Low-income families are lucky to have one book per child in their home.
There simply aren't books around calling to and inspiring their children to open the pages and learn to read them.
Children Reading Clip Art
We have the opposite problem at our house. We have more bookshelves than beds. Reading means so much to us and our children. That article cried out to me and I determined that I could do something to change that statistic. Even just a little.

Probably 75% of the books that we own I picked up second hand. I pick them up-often nearly new-from library book sales, thrift stores, yard sales, etc. We LOVE to have books to pique curiosity at our house but my husband has been a student for the past 4 years and that is what we can afford.

Because it has been such a HUGE blessing to have these little books we decided to collect children's books to give to other families.

So for the past six months our stack of books to donate has grown and been donated and grown again. There is a local community clinic where we live that also houses WIC and we leave them on their donation table for the little people that come in.

This is just a simple little project:
Little books from the hands of my little kids to the hands of other little kids.

We happened to be at our local Re-Store yesterday and found that they have a children's book section. A dime a book. We went through them all, picked out the best and our favorites, and my little kids are so excited to take these little books and go leave them for other little kids at the clinic today-just in time for Christmas!

Lots of other people do amazing things.

This is something little. I am sharing this simply because it's little.

If this Christmas season is overwhelming to you. Think little.
Thought Cloud Clip Art

Do a little project for someone else.
It will make your Christmas one you'll never forget.

Christ gave us such a BIG gift. Little by little we can each pass that on.

How to Make a Wall Map to Color


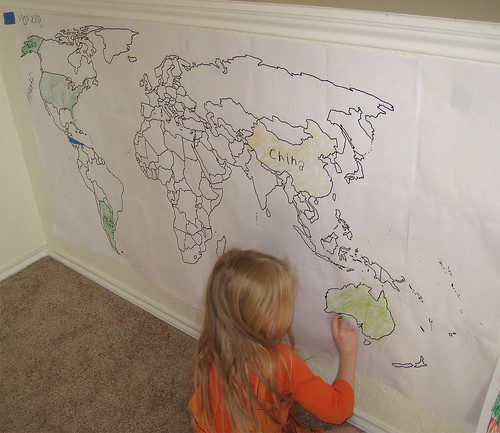
We love to color at our house. So when we were learning about where things are, it just made sense to make a wall map to color. We've made a United Staes Wall Map and World Wall Map.
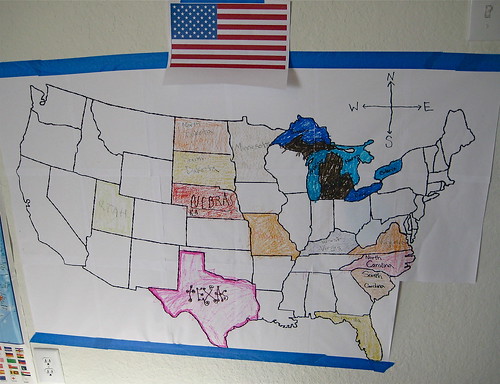


Want to make one too?


I started by deciding how much room I had on my wall. For my world map, I had a long space but only enough height for three pieces of paper. When I was making my U.S. map, width was the limiting factor. I only had room for 6 paper widths which made for a map 3 paper heights high as well.

Then in my printer menu I used the option for scaling the image. I played around with this in my printer preview until it was the size I needed for my wall. The scaling for a wall map will likely be between 500% and 900%. For my world map, I scaled the image to 800% and printed out pages 1-24 making a 3x8 paper map.


Around each printed paper there is a white border. Using my glue stick, I glued the pages together; overlapping so that the map line from one page matched the next.


After glueing the pages together, I used my black sharpie to trace the map line of the page underneath onto the border of the page on top so that the map lines are continuous.

We've been using our world map with Confessions of a Homeschooler's Expedition Earth Animals.


What will you make a map of?

e_signature


I Spy Ornaments-Gift for Kids

We have a family tradition of making homemade gifts. There is something special that goes into something you make for a certain someone.

This I Spy Ornament is fun to give for lots of ages!
To make {This Little Project} you will need:
  • A clear plastic ornament that is fillable (ours were from Hobby Lobby)
  • ribbon for hanger
  • miniature ornaments or other small things (like shaped buttons) to put inside
  • "snow" is polypellets (like inside a bean bag chair or try plastic "snow" from the craft store)
  • paper to write the "list" of what you put inside so it can be found
  • super glue (to hold it closed once you are done)
Make your list of what is inside then put the items in one half of the ornament. Cover with "snow" then put a little glue around the outside and attach the other half. Punch a whole in your list and attach it with the ribbon hanger.
Easy and FUN!

Have fun give something YOU made JUST for THEM!

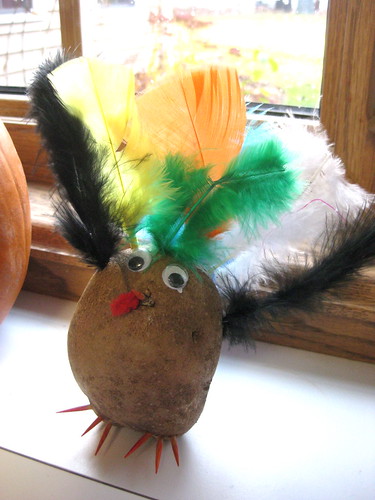
Mr. Potato Head Turkey


Jay came home from his art class with this potato-head styled turkey. It was so cute I had to share.
He's so proud of himself for making it (toothpicks and feathers-including one in the back to help him stand) but doesn't think it's funny when we talk about cooking him up for Thanksgiving!


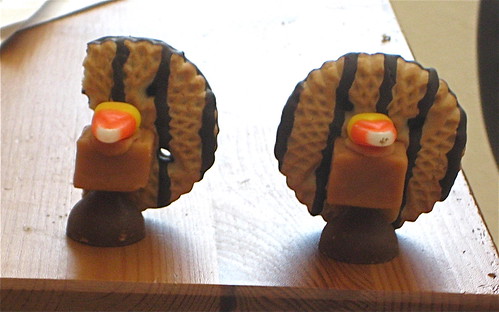
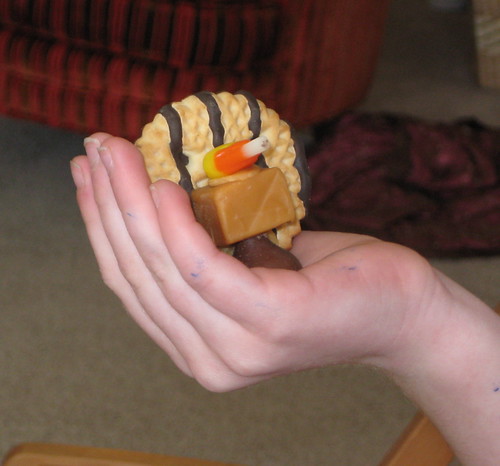
Make a Turkey Cookie


These turkey cookies are made out of a cookie, carmel, chocolate kiss and candy corn glued together with creamy peanut butter. YUM!


Happy Thanksgiving!

e_signature

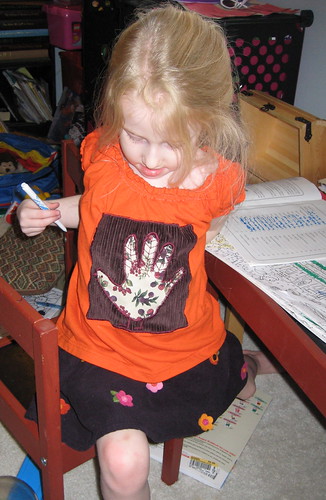
Hand Turkey Shirts


This post is also from the past as I made these Thanksgiving shirts last year. I think they're going to fit again this year too so we may not get new shirts until next year!

Last year I bought orange shirts planning to make the Halloween pumpkin shirts I made this year. I didn't get to it in time so I made Thanksgiving shirts instead. My little one's shirt was made out of an 6-9 month boys onsie. I cut off the bottom, hemmed it and covered up the logo with the hand turkey.


To make the turkey on their shirts, I traced their hand and cut it out to make the pattern. Then using a scrap of fabric I cut out the hand and a square to back it up. The turkey needed a little contrast to help it stand out. I appliqued the square and hand on with my zigzag stitch and then added the details of feathers, eye, beak, legs and feet. I reversed the fabrics on the second shirt just for fun and to make them a little different.


What are you wearing for Thanksgiving?

e_signature

My Favorite Pie Recipe

Whenever I get the chance to make pie I go for this one:
Sour Cream Apple Pie.
The recipe comes from an old friend of my mother's. Every time I serve it people ask for the recipe. So here we go!
(I'll give you an easy pie crust recipe to go with it too-down at the end.)

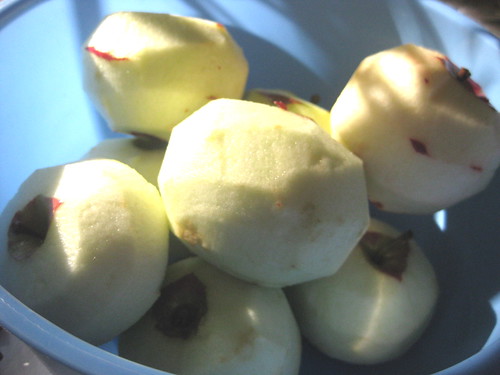
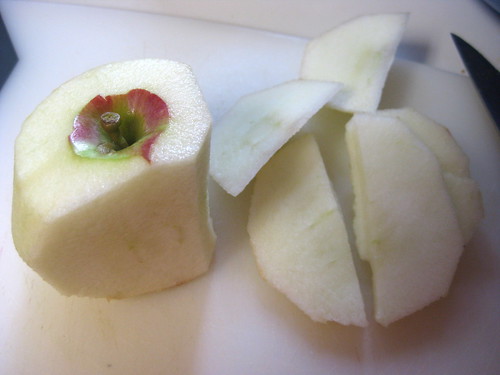
You need 3 cups of apples-peeled and cored. {Little Project Tip:} If you don't have one of those handy little things the slicing and coring for you just cut around as you go-see photo. It's faster than cutting into 4's and slicing the seeds out. Plus you end up with nice small pieces.

{Little Project Tip:} I think it's easier to peel the apple in one long peel going around and around. But that's just me. I love adding such a cheery bit of color to the compost pile-but that's just me too!


Sour Cream Apple Pie Recipe:
2 eggs beaten
1 cup sour cream
1 cup sugar
2 T flour
1 tsp vanilla
1/4 tsp salt
3 cups apples (peeled/cored and sliced)

Crumble for top of pie:
3 T. butter
1/4 cup brown sugar
1/4 cup flour
Directions: Combine eggs and sour cream. Add sugar. Then add flour, vanilla, and salt. Apples go in last.
Pour into an unbaked pie crust (see recipe below) and bake for 15 minutes at 375 degrees. Then sprinkle with the brown sugar crumble and finish baking 20-25 minutes


So many people are afraid of making pie crust. I love this recipe because it always turns out and it's so EASY!

Pie Crust Recipe:
2 1/2 cups flour
1 cup shortening
1/2 tsp salt
1 egg
1 T white vinegar
1/4 cup water
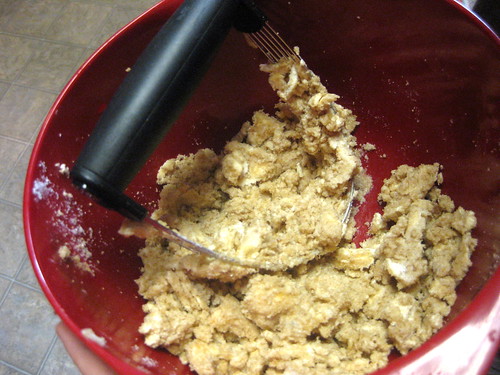
Just throw all the ingredients in your Kitchen Aid or Bosch and it turns out great.
(makes three 9 inch crusts or four 8 inch)

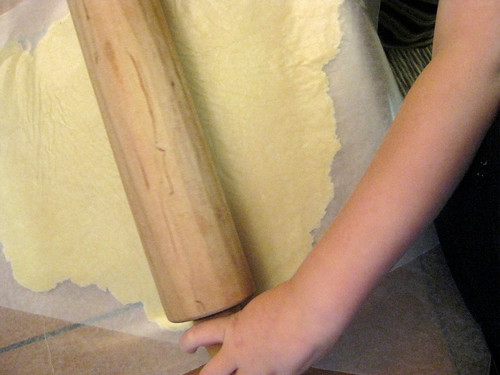
To roll it out, start with a ball of dough and sandwich it between two layers of wax paper. Roll and then release each side of the paper and roll again as needed. If it sticks too much to the wax paper sprinkle a tiny bit of flour. It gets easier each time you do it.
One other {Little Project Tip}: I use enough wax paper that I have some extra hanging over the edge of the table or counter so that I can lean against it to keep it from moving around as I roll.

Enjoy This YUMMY Little Project! It's best served warm, but it's great the next day too :)
Trust me, it's the best!

Thanksgiving Blast from the Past

If you are looking for some ideas for celebrating Thanksgiving, be sure to check out the Thanksgiving Little Project archives here for ideas like this shirt,
game, and more!


Enjoy!

Turkey Treats for Kids

There isn't anything fancy about these turkey treats. But they are festive and kid-friendly to make.

To make {This Little Project} you will need:
  • graham crackers (2 of any cookie would work too)
  • chocolate chips
  • frosting
  • candy corn
  • vanilla wafer cookies
  • sour straws (for feathers)
Just cover on graham cracker with frosting. Add the feathers and cover with the other graham cracker. Then use the frosting to add the face.

Kids like to make 'em and eat em' and they take just a few minutes to complete ;)

enjoy your turkey treats!

Bones Song

bones

My girls love to sing and will learn anything in the form of a song. A year ago, my 5 year old discovered bones and we made up a song to learn the different bones in our body.
Click on the picture to see the movie of her singing it. She isn't pointing to the respective bones in the movie, but you should when you sing it.
Here are the lyrics:

Tibia
Fibula
Patella
Femur
Pelvis
Spine
Ribs
Sternum
Clavicle
Humerus
Radius
Ulna
kiss my Skull on top

Hope this hits your fun bone!
e_signature

Friday Favorites and Freebies

I hope your first weekend in November is looking to be fantastic! Enjoy these fun favorites and freebies!

I have been wanting to have a "ball" with my stash of styrofoam balls. These are beautiful! And I can't wait to try one!

Tis the season to fall in love with your slow cooker. Here's a a yummy blog and recipe to try!


If you haven't tried making your own crayons yet, these pumpkin ones are perfect!

And finally, a fun way to play with your food-check out these AMAZING pancakes!

Happy Weekend to you!

Upcycling Halloween

When I was a kid I always looked forward to Halloween. My Mom loved making costumes and it was fun to see what she could dream up! I caught the costume-making bug and love to do it for my kids now! This year by popular demand Jay, Kay, and Elle were Peter Pan movie characters.

But a fun costume to make is one that doesn't totally stress you out, right?


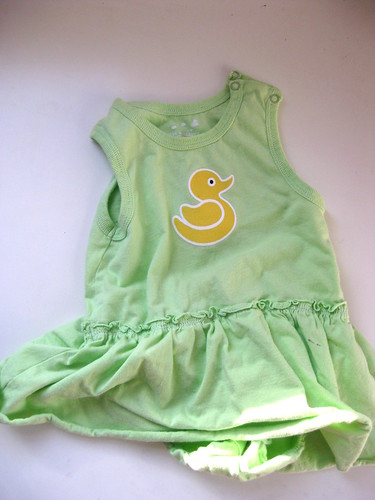
So, how to get from this:

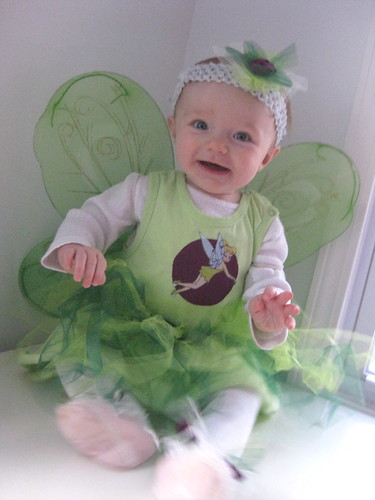
To this?

My secret weapons for {This Little Project} are:
hot glue gun
and not starting a costume from scratch.

Here's what I mean:
The green jumper was $2 at the thrift store (this way I didn't have to make it)
The purple is upcycled from an unused t-shirt.
The Tinker Bell cut from a piece of fabric is put on with one of my favorite secret weapons: steam-a-seam. It's the easy way to make your own iron-ons.

And, since tutus are so stink'n cute on babies I had to make her one and the wings were from the dollar store.
Total cost was about $5 and time spent was around an 1.5 hours.

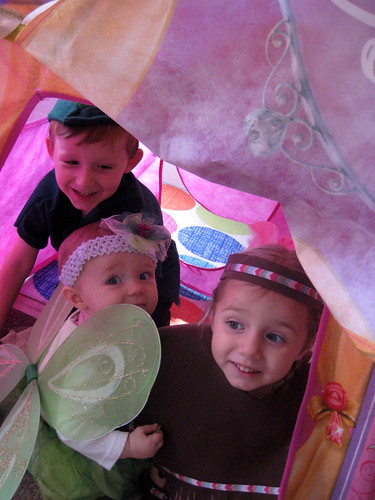
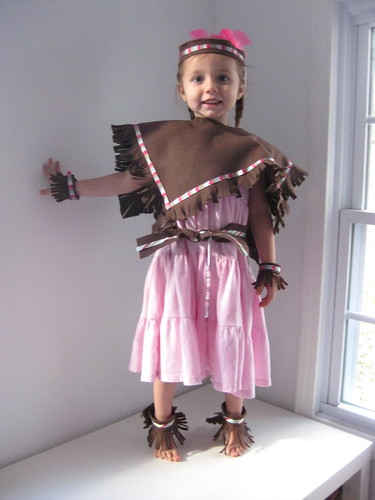
Kay's Tiger Lily Indian costume is felt, ribbon, and hot glue (with a few feathers and beads). Seriously. I didn't sew a single thing!
Safety pins are a good secret weapon too. We started with a pink jumper underneath and just accessorized
(never mind that her collar is crooked for the photo ;)

Now you have a few secrets for adding some fun costumes to your dress-up box, school plays, and yes Halloween! Have fun dreaming them up!

LinkWithin Related Stories Widget for Blogs Add to Technorati Favorites Share/Save/Bookmark