Around Town-March

 If you would like some ideas about music and movement to do with your kids (or just enjoy on your own!), be sure to stop over at ABCand123 for the write-up I did featuring the music and movements of Ireland including Irish Step Dancing!

abc button


Speaking of music, a friend of mine from college has a wonderful piano teaching blog.

 She shared this activity she did using my spring birds to teach curved fingers for piano playing-so clever!


We're making more birds this week and I'm going to use them with Jay and Kay to work on their piano technique-thanks to Jenny's great idea!


Kierste at Brown Paper Packages featured my monogrammed Scripture Power Book Cover that I made for Kay.  Kierste has lots of fun crafts and organizing ideas.  Be sure to stop by!

brown paper packages

Happy Monday!


Jedda's Granola

My house smells divine right now!


Want to know why?


Because I have my granola cooking in the oven-yum!!


 It's one of my favorite {Little Projects}!
You know how it is when you find something you really love,


and you just have to share it?

This granola is that kind of recipe.


I put two on a page so you can share it too!

Jedda’s Granola


Here are a few notes about the recipe:


I purchase the cashew bits from a local food co-op.  The bits are actually less-expensive than the regular cashews.  But if you use the regular ones, you will want to put them in your food processor first to make them a little smaller.  I also get my dried fruit that way.


I've experimented a lot with this recipe.  Everything from trying less oil and sugar to mixing honey in and using less maple syrup.  I've even tried adding a tablespoon of milled flax seed.  It seems to turn out yummy every time!  So don't worry about messing it up if you change it or substitute with what is in your cupboard!


All of the granola fits perfectly in this container(purchased at Meijer)  It lasts our family about a week.  It's the perfect breakfast or snack.  Sometimes we eat it with milk, sometimes yogurt.  I'm pretty sure that you're gonna love {This Little Project}!


Seal'n Saver™ Cereal Keeper by Rubbermaid®

Also, the dried fruit really makes it even better! 


If you're a granola girl and you try {This Little Project} be sure to let me know what you think ;)


Don't Steal My Luck!

For years St. Patrick's Day was huge for me.  I taught Irish Step Dancing and it was reason to PARTY with every green treat we could think of and Dance a jig-Literally!!

Today we've been enjoying some Irish Step Dancing at home.  I'm the Movement and Music Feature Writer over at abcand123.

 I will be sharing some fun music and dance ideas there on Monday centered around Ireland and the traditions there.  Be sure to stop by!

While you are waiting for that fun, enjoy this fun game.  It's our St. Patrick's Day version of, "Don't Eat Pete!"  

We call it: Don't Steal My Luck!

It's fun to play with rainbow colored fruit loops, Lucky Charms or green m&ms!

And there are other fun things in the archives too ;)

Happy St. Patrick's Day!!

Don't Steal my Luck!

Scripture Power Book Cover

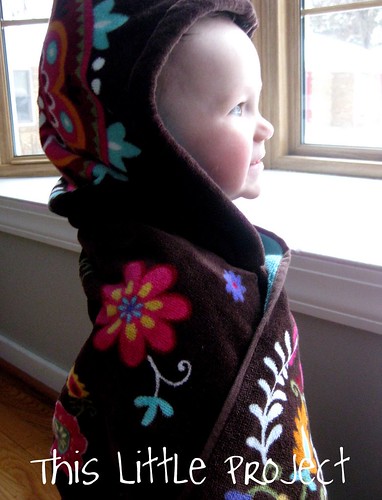
This year Kay wanted to be able to take her own scriptures with her to church so she could have her "Scripture Power."  

At our church, the kids love the song, "Scripture Power." (If you want to hear this amazing song, here is the link-scroll down-they are in alphabetical order) 

Kay was sure that she was a big girl now and needed to take hers just like her big brother takes his to church each week. 

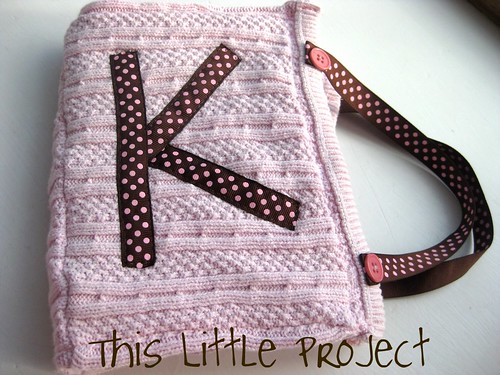
{This Little Project} turned out like this:
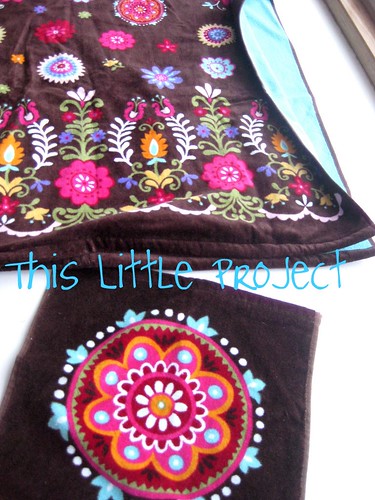
Front:

Other side:


I decided to make just a book cover-no zippers to try to sew in.  No loud velcro to open.  Just a simple cover to keep her scriptures safe and easy to carry for her.  She's been using it now for a few months and still loves it.  So it's safe to share {This Little Project} with you!


{This Little Project} is mostly repurposed! 

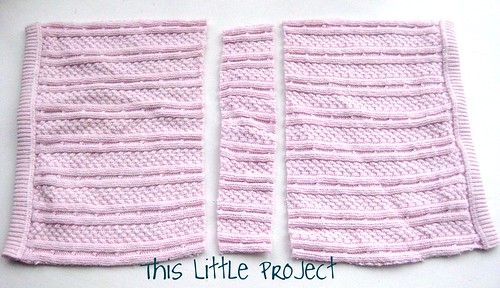
The pink outside is a "sweater" baby blanket that Kay had when she was a baby. It got a little hole in it but I just couldn't throw it out-I new it was destined to turn into another {Little Project} and it's meaningful to have it carrying her scriptures since I used to carry her in it.

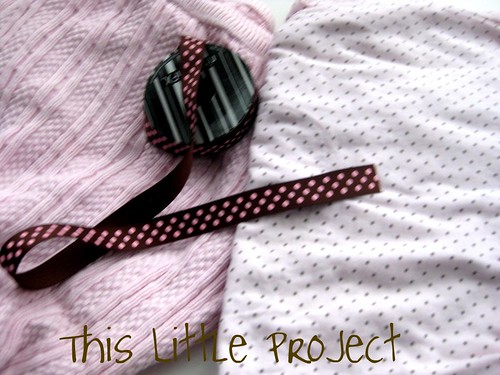
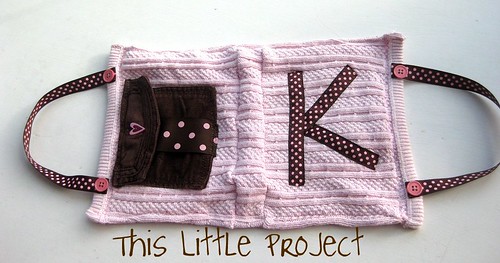
The lining is from a shirt and the outside brown pocket is from a pair of pants. 


One of my favorite things

about sewing {Little Projects} with

repurposed materials 
is that they actually are 
easier to make!

I didn't have to sew that pocket! 

I just cut it out and put it on! 
The pocket is Kay's favorite feature!


See how I used the edge of the blanket?  That way I don't have to make it look good. It already does :) It's less work that way. When I do things like this I always wonder if I'm being smart or just LAZY!!


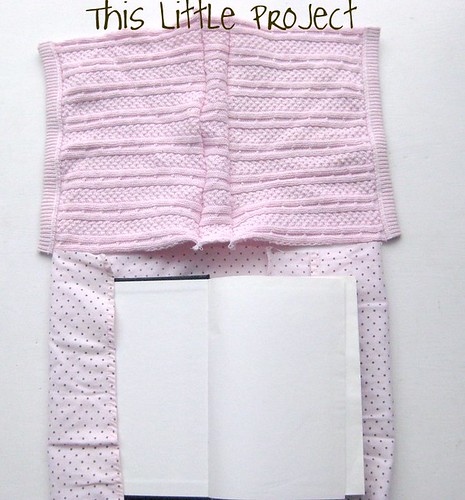
The polka-dot (from the shirt) is the lining.  I cut it from the bottom of the shirt-you know, the part that is already hemmed-so I didn't have to finish the edge that wraps over the edge of the book.  It already looks great!

I measured the lining longer so I could fold over the fabric to hold the book in place.  To put the outside and inside lining together, I sewed the outside and the lining right sides together and then turned it.  Just like you would if you were making a pillow.  Then after I turned it right side out I stitched around the edges again to hold the two pieces in place and give it more stability.


Decorating it was the most fun!  
I used nylon (invisible) thread to add the other details.  

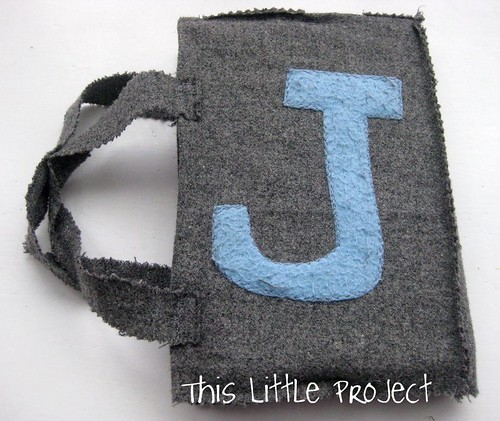
And, if you are thinking, "But wait!  I have a BOY!"  

Here is how Jay's looks after 2 years of use!  I used wool felted from some wool pants for his and it's still in great shape after using it every day at home and each week at church for 2 years!


Jay likes his.  But, I must admit that being a girl sure looks more fun to me!


Now Kay's got her Scripture Power too!


Do you have yours?


Butterflies

Where we live a butterfly exhibit recently opened.  We've had so much fun with butterflies lately and it's not even spring yet! We've been inspired and are doing {Little Projects} with butterfly science, art, spanish, etc.

And on Amazon right now their butterfly kits are 50% off-so now is a great time to enjoy watching them grow and change before your very eyes! 

So one of our {Little Projects} right now is enjoying this:


I will tell you that when the kit comes in the mail it will include a mail-in voucher for five butterfly larvae and special food. ($3.00 fee for processing).  

You need to know this or else your little one will be as disappointed as mine was that we couldn't start right away!  You could even order your kit now and then send the card in later if you aren't ready to start {This Little Project} right away (or want to wait until spring).

I guess we couldn't wait...


Did you know that coffee filters are the perfect watercolor paper?  
They don't get holes in them like regular paper and they are $1 at Dollar Tree.


It reminds me that we too can change into something more beautiful than we are today.

Like I said, we've been doing all kinds of {Little Projects} to go along with this butterfly theme.  

Here are a few you may like too:

A butterfly matching game (print two to play)


And what where would we be without a little Eric Carle? 
Hungry Catapiller printables Here, Here and Here

We're also enjoying this "Scratch and sketch" Butterflies

Here's a wish that spring gets here soon because it snowed where we live today!!!


Baby Birthday Gift-Hooded Towel

My baby is one! 
I can't believe that this year has just zoomed by. 

I could spend the day just baby gazing at her:


See what I mean?

{This Little Project} started because I really wanted to make some handmade gifts for Ellie's birthday.  
Somehow, handmade means more.  It's a little more special.  
And it feels like a meaningful way to celebrate someone you love.
 
Isn't this a beautiful towel? It's so soft too! 
When I saw it I knew it would be perfect for baby Ellie!

 
Baby Ellie has been using Jay's blue hooded towel from when he was a baby and it was time to have one of her own ;)
 
Hooded towels make great gifts  
for baby showers and older kids too! 
Jay actually still uses one, just not the baby blue one ;) 
 
To make {This Little Project} you need:
a towel 
 
a hand towel

(many people use a hand towel for the hood, but I just used a washcloth and it turned out fine.)
 
This hooded towel is only 2 seams to sew! 

 
I have used the hooded towel idea to make Christmas Nativity costumes as well. 
 
For a tutorial to make one of your own, this one's easy to follow.


Have fun wrapping that little one up in something YOU made!
 
I'll be back with more {Little Project} birthday fun!

Handwriting Helper

{This Little Project} has been a fun game to help us practice good hand writing.  
It turned out pretty cute considering {This Little Project} out of our invention/junk box!

To make {This Little Project} you need:

an egg carton that holds 2 dozen eggs

stickers of the alphabet

a pom pom

To assemble: put an alphabet sticker inside each egg spot.  
You'll be short 2 spots so we put the last two at the top.


To Play the Handwriting Helper Game:
Have the child toss the pom pom into the carton.  
The child writes the letter the pom pom lands on.
You can have them write the uppercase or lowercase letter, or both!
You could also have the child say the sound that goes with the letter.


Game Variation for Older Children:
Instead of writing just the letter, have the child think of a word that starts with that letter.  

This can turn into a spelling game too!


Have fun writing and playing!


abc button


Stilts for Dr. Seuss

We love an excuse for a party!
Dr. Seuss's birthday (March 2nd)
is a great excuse to party and cuddle up and read together too!

We've been busy doing {Little Projects} to get ready for another party: 
Little Ellie is turning one soon! 
 Stay tuned for some fun {Little Projects} I've been doing for her!

 We've enjoyed a new (to us) book of Dr. Suess's called, 
The King's Stilts

 Ellie has been busy getting her own stilts working and she's walking everywhere now! Now that she's a upright and taller she can get into even more messes!


Since Ellie's almost one, another {Little Project} I've been doing is weaning her.  That has meant we have a few formula cans for our Invention Box.

You'll find those in {This Little Project} of Seuss Stilts:

To make {This Little Project} you need:

2 formula cans (13 oz size)  I found that these are nicer than tin cans because their top surface is bigger and they are easier to control and walk on.

a nail

 hammer

shoe laces or yarn (long)

tape

paper to wrap around (and color/decorate if you wish) 

We have wood floors (that we try not to scratch up too much) so I put the plastic lid as the surface that goes on the floor.

Decorate your cans with paper and color.

Then, simply hammer the nail about 1.5 inches from the bottom of the can on each side.  Make the hole big enough for your shoelace or yarn to go through.

Put the string through both sides (see photo)

Tie a knot to hold on to as they walk.

And there you go!  Hours of fun coordination-building clomping around like a King!  

My kiddos also like to hang them around their neck and bang on them like drums.  But I didn't show them that :)

For a fun printable unit on Dr. Seuss to enjoy with your kids 
check this out at What the Teacher Wants.

We are also going to be making some of
these printables from Michaels today!

And we'll be eating {This Little Project} for lunch!

Have a Happy {Little Reading Project}!  


p.s. There's more Dr. Seuss fun in the archives!
Wocket in my Pocket
Dr. Seuss Day
LinkWithin Related Stories Widget for Blogs Add to Technorati Favorites Share/Save/Bookmark