Ruffle Flag Pillow

Ruffles make the perfect flag!

{This Little Project} is actually the result of a sleepless night.  As I lay awake this sweet pillow popped into my head and I couldn't wait to make it!

One of my {Little Projects} this year is to create with a lot of repurposed materials.  The red is from a shirt, the white from a sheet, and the blue left over from a quilt and crib set I made for Jay.  Happy Birthday America-no carbon print here (ok I did use my sewing machine to sew it ;)


To make {This Little Project} I just ruffled the fabric and then sewed the ruffles on so they overlapped like this:


I made the sizes of this (white) pillow cover extra long so that it wraps around the back and makes a nice slip-cover, just like This Little Project in the past.


It makes me smile every time I walk by it-there's just something so great about ruffles and America mixed together!


Happy Fourth of July!


Charming Reading Project

I like to keep my kids interested in all the fun things they were learning during the school year throughout the summer.  


{This Little Project} is for beginning readers.


Kay is starting to read and I wanted to do something to reinforce the sight words she reads.  I came up with {This Little Project} that I knew she would love because: 

1) it involves making something fun
2) She gets to wear her work
3) it shows her progress in reading and she can be proud of herself!


Do you know someone that would enjoy 
doing {This Little Project}?

Here is what you need:

chenille stems or 1/8" ribbon or narrow string

letter beads

"spacer" beads-something to go between your words

These "charm-style" letters I found at Walmart.  They come with numbers too!
Oh the possibilities!  Just looking at them I get excited!

I also got these wood alphabet beads.  There aren't nearly as many in the bag though.  Jay was disappointed by that.  The charms come with so many colors in the bag though that a boy or girl could have fun stringing them.


To make {This Little Project}:

First decide if you want a bracelet or necklace.

We used half of a chenille stem for each bracelet-size it to your child's wrist though.

Decide what words you are doing and get all the letters out.

String each word onto your bracelet or necklace.  Put a "spacer" bead between each word.  We used regular pony beads as spacers.


Be sure to bend the ends of the chenille stems back after you put all your beads on so the wires don't scratch.

{Little Project Hint} Kay was able to thread the chenille stems on her own.  If you use the ribbon/string your child may need some help.


Wear Your Words!

Kay got compliments wherever she went.  And people wanted to know what her bracelet or necklace said-which gave her even more practice with her new sight words!


Father's Day Photo Shoot

I have some EASY and QUICK ideas to share with you.  
As in 1-Hour Photo quick!

For Father's Day this year I took a photo of the kiddos with the letters D.A.D.  Taking them was hilarious.  Jay, Kay, and Ellie could find all kinds of things to do while holding their letter.  I'll share some of the out-takes with you...you'll get the idea for {This Little Project}!


{Little Project Hint} The letters can be found at a craft store-you only need to purchase one D.


I put these in a frame that will hold all 3 of them side-by-side. D.A.D. 

Sidewalk chalk can make a quick and easy message for your card.  Again, this isn't the "real" one (can you tell why?) but we're sending these to grandpas.  


Just print them quick at the 1 Hour photo (or think ahead so you don't have to!) and then put them in your frame or the mail.  Easy. Meaningful. Done!

Happy Father's Day!


The Change Your Mind Headband

I've had a crazy-fun time making headbands.  {This Little Project} is good for me because headbands are one of the only things Kay will wear in her hair right now-and that's because she can put them in herself.  Gotta love the, "I'll do it myself" phase.

So the thing is, when you have a cute denim headband, 
how do you decide 
THE ONE flower to go on it?

I guess I like to change my mind because I couldn't settle on just one.  
Instead I came up with 
a way to put WHATEVER flower we wanted on it. 

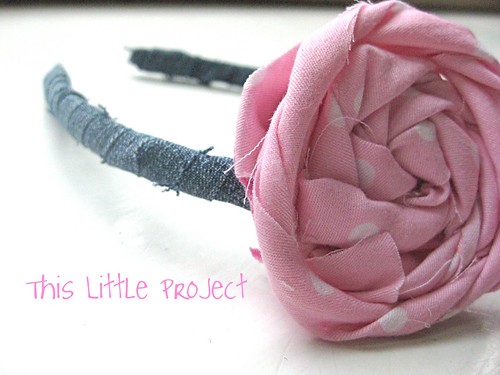
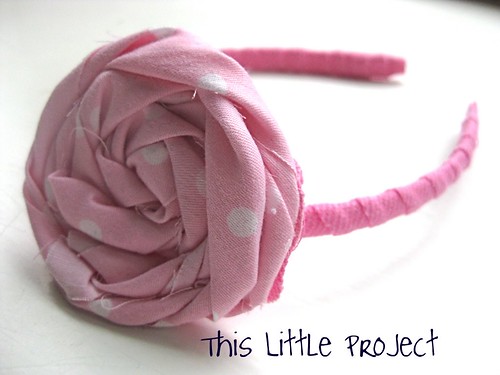
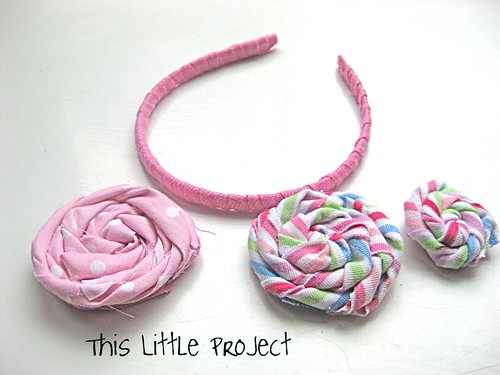
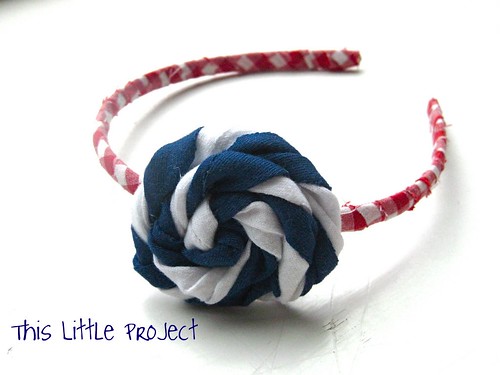
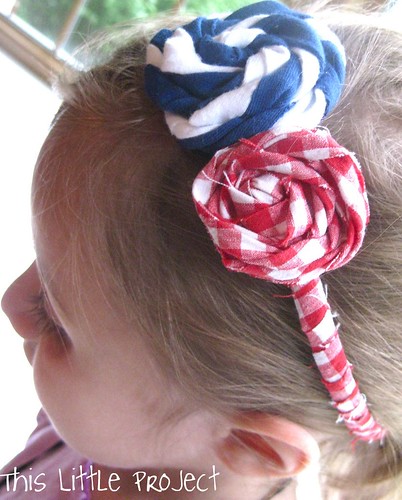
 The "Change your Mind" headband can look like this:
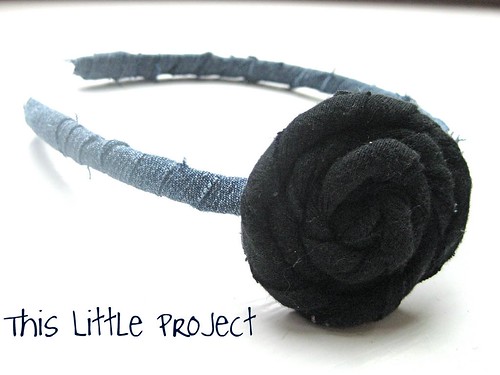
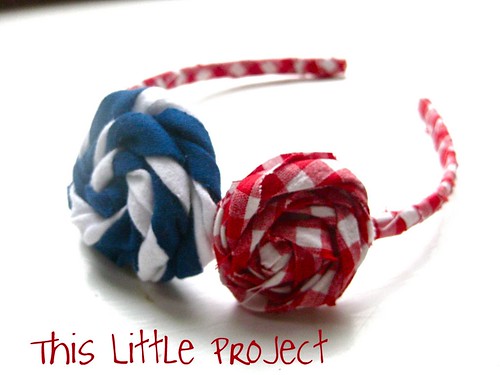
or this:


And remember that pink flower at the top on the denim headband?  

It can also slip onto the pink headband:

One headband...so many possibilities!


Want to know you add any one or two flowers onto it 
and then change your mind the next day?


Simple.

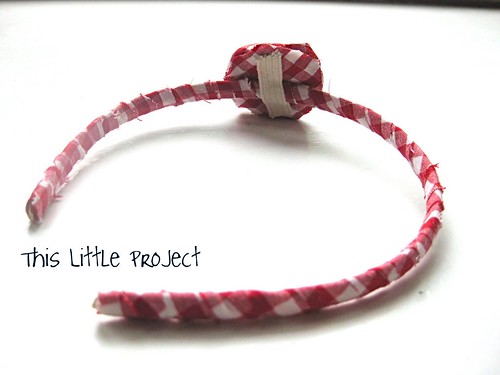
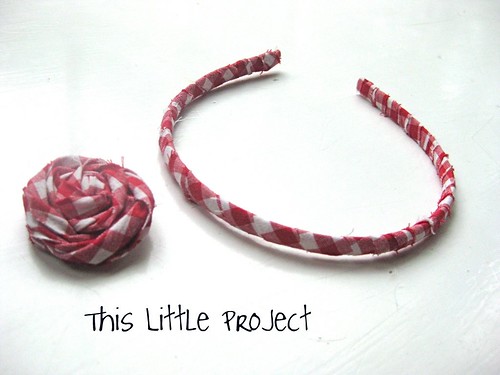
Add a little piece of elastic to the back.  Then it will slide right on like this:
And now you have a Change your Mind Headband!

I'm feeling brilliant right about now-it's rare so I'm soaking it in.
ok...moving on...

The elastic will stretch a little to hold the flower in place.  
And since the flower rests against her head on a fabric-wrapped headband it will stay nicely right where you want it-yay!

If you want to make {This Little Project} 
you will need:


hot glue gun

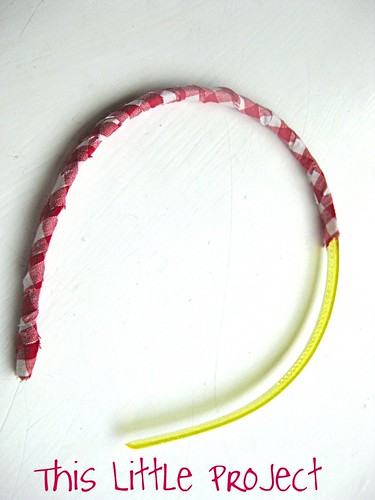
elastic (mine was about the same width as the headband)

How to make {this little project}:

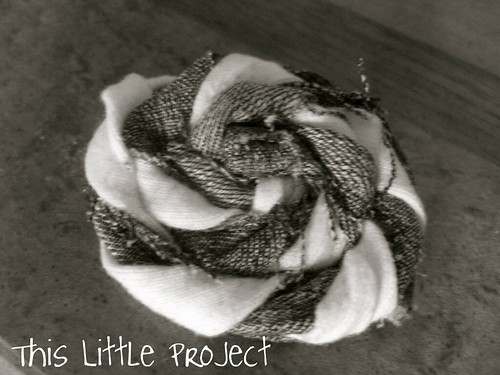
1-make sure that your fabric flower has a circle of fabric glued to the back of it.

2- cut a piece of elastic just smaller than the flower.

3- glue each end onto the back of the flower.  Make sure there is just enough room for the headband to scoot through.

4- let the glue cool.  Then carefully slide it onto where you want it to be.  

Now you can have fun mixing and matching because 
you can Change your Mind now!

Yes, these make fun gifts too!

{You're Welcome!}


Music @ my House: Playing a Story


Today is the first in a series I will be doing on the first Monday of each month.  I hope that reading some ideas here will inspire you to share a few minutes of music-making with your kids too!

For my youngest piano students (and my own kiddos) one of the first things we do is to play stories on the piano. Anyone can do it-you don’t have to be a piano teacher! 

 To start, just choose one of your favorite children’s books. 

 I’ll show you what I mean:

One of our favorite stories to play on the piano is
We’re Going on a Bear Hunt


I should also mention that you can use any instrument with this activity, but I will share how we have been doing this at the piano.

First we make our hands into bear paws and then we play all five fingers on the piano. First left hand then right hand-like we’re walking. We do this steadily as a beat while I/we say, “We’re going on a bear hunt….”

Each thing that we come to in the story is a chance to make different sounds:

Loud (“Oh no!”)

Short (“Splash”)

Low/high (“running/in the cave”)

Long (“mud”)

Quiet (“tiptoe”)

Quick (“quick, back!”)

Etc.

With a little imagination, you can do this kind of thing with almost any children’s story.

We like to put the storybook right up on the music stand and turn the pages as we go.

Pretty soon the kids know the story and the “music” that goes with it and will tell the story and make the music sounds all on their own. I love it when I am in the other room and hear Kay “playing” one of our stories. It’s so fun!
Try it!


New Projects to come...

We're getting started on our summer {Little Projects}.  One of them is dressing up our Sun Room and making it into a fun Playroom.  I'll share our favorite ideas with you as we go this summer. It's going to be a Party in the Playroom!

It's finally summer where we live!  I couldn't resist this photo of Ellie-here shirt says what I'm thinking!

I've had some requests to share more music ideas here.  Making music is one of our favorite {Little Projects} and we do it everyday.  I completed my degree in Piano Performance and Pedagogy (teaching) and love to make music with my kids.  So I'm excited to be sharing ways that you can enjoy music with yours.  

My Goal is just to share what we're doing and maybe it will inspire something that will work for your family.  I'll plan to do a Music at My House post on the first Monday of each month (coming up!)

In the meantime, you can check out the Music and Movement-in China 
ideas that I shared over at abcand123learning.  

If you have requests for anything specific you would like to see in the music series, please let me know!


Patriotic Hair Project


For Memorial Day I had fun making some new hair things for my little girlies.  I used the same technique that I shared before with my spring headbands
These will be perfect for the 4th of July too!

Then I tried some new things and
I'm excited to share these ideas with you!

Here's the first take of {This Little Project}


First I covered the headband with fabric like this:


Not only does it look SO MUCH BETTER, 
it also strengthens the headband so it won't break as easily.

Just add a little hot glue to hold the fabric in place and wrap.  Easy!.
(you can get a pack of 7 headbands at Dollar Tree.)

Then I tried twisting 2 colors together for the flower: 
It turned out really fun-like a lollipop!

I also tried it with denim-I love how this turned out!


The next {Little Project} I tried was putting the two together....

Just for fun...how would it be if {This Little Project} was:
 Interchangeable?

Then you could wear the patriotic version of {This Little Project} or the all red gingham or maybe blue and white to match one of our favorite sports teams!

Wouldn't that be nice?  I figured out a great way to make {This Little Project} interchangeable!  I can't wait to share it with you next time! 
update: check out how to make them interchangeable so you can change your mind :)

LinkWithin Related Stories Widget for Blogs Add to Technorati Favorites Share/Save/Bookmark