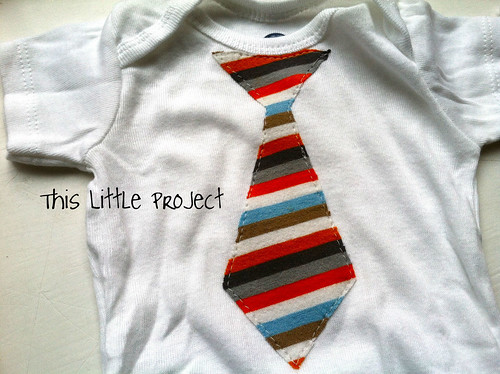
With Baby M making his appearance sometime in the coming month, I have been sewing a bunch of {little} things for him. {This little project} is a tie onesie for him to wear to church.
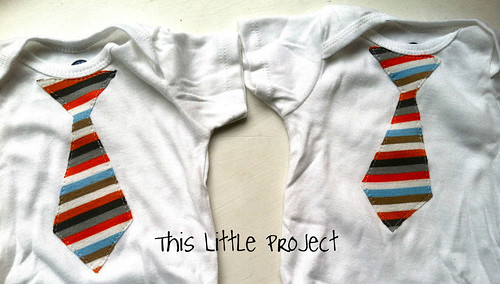
I made a few--not because there are triplets coming or that he needs that many--but because 3 of my sister-in-laws are having boys too! It's going to be fun to have a big pack of boy cousins the same age!
Which brings me to another point: these {little} shirts make great
gifts! And they really are a {little project} so you will be able to
whip them out fast!
How to make {this little project}
You need:
Steam-a-seam or Heat and bond (an iron-on material)
fabric for tie
onesie (or shirt)
iron
needle/thread/sewing machine (optional)
1- I cut a piece of paper in half and cut a tie shape (I just eye balled it). Then unfolded it. That way both sides are the same. I cut a little round part out of the very top so it would go around the rounded neck nicely.
2- use your paper pattern to cut the tie shape from your fabric. {this little project} was repurposed from a T-shirt! The knit fabric from a T-shirt doesn't fray and is soft for baby.
3- Put your cut out fabric tie on one of the sticky sides of your iron-on material (I used steam-a-seam). It should also be sticky on the other side so you can iron it on but don't pull the paper off on that side until you cut out the tie pattern.
4- Cut around the tie pattern.
5- Pull the back paper off and place your cut-out tie/iron-on onto your onesie and iron on according to package directions.
6- You can be done there, or you can stitch around the tie. I always stitch around it because I like the finished look it gives and it makes the ironed-on part look nice for longer (through multiple washes).


No comments:
Post a Comment