Showing posts with label Birthday. Show all posts

Jay's Angry Birds Birthday Party


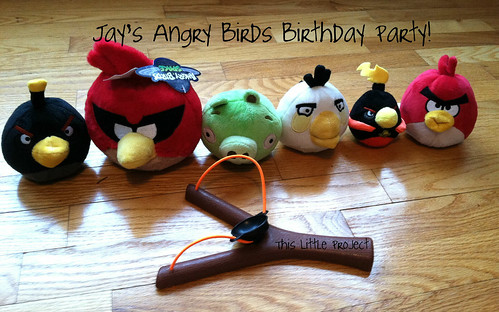
Jay told me he wanted to invite some friends over for an Angry Birds birthday party this year.  He told me this months ago and I was grateful for the warning because we would have a newborn when his birthday came around!

I tried to think ahead but I knew I would have to keep it simple.  And simple turned out to be perfect.  We had a ton of fun and baby M slept through the whole thing--perfect!


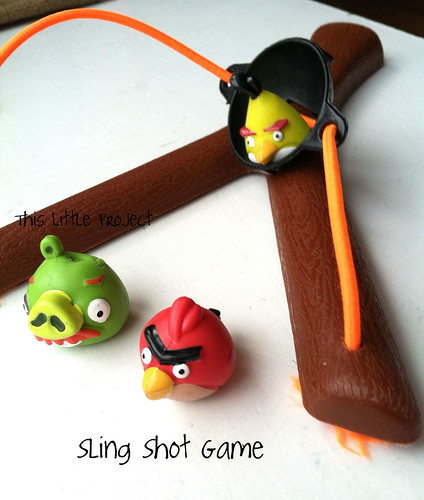
I wanted to have a fun game for the kids to play while we were waiting for the guests to arrive.  I made a Sling Shot Game and it was the perfect activity and it kept everyone busy and having a great time.

I had all kinds of blocks available for the kids to build structures with.  They built their structure and then they placed the green pom poms in them for the piggies.


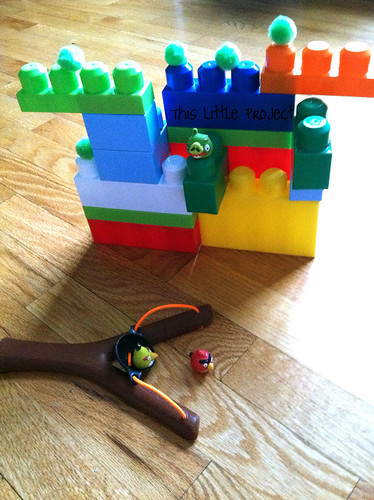
I had a variety of sling shots and Angry Birds available to fling at their structures.  They loved it!


After the kids had fun knocking down their structures we went on a {little} Treasure Hunt --one with secret codes!


The treasure they were looking for was this nest of eggs (the eggs the green pigs stole!)


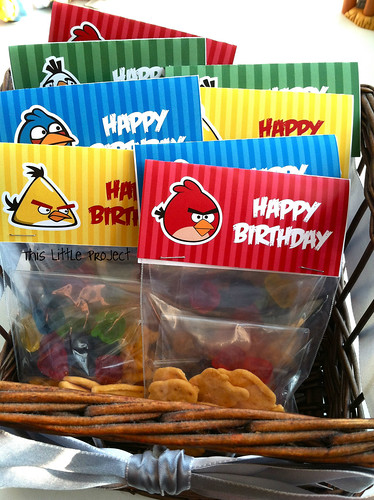
I filled the eggs up with Angry Birds Fruit Snacks.


I prepared enough Treasure Hunt clues for each guest.  
But they were in a secret code.  
This clue took them to the playroom. 
 

I used white 3x5 cards and wrote the clues out with a white crayon so they couldn't see the clue. I numbered the clues on the other side so I would remember what order they went when I placed them.

Then I gave each child a washable marker.  As they went around from one clue to the next each guest had a turn to "decode" the clue by coloring their marker over the card to show what it said. 
So easy!
And they LOVED it!

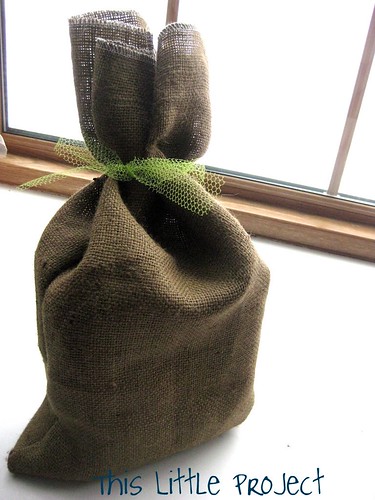
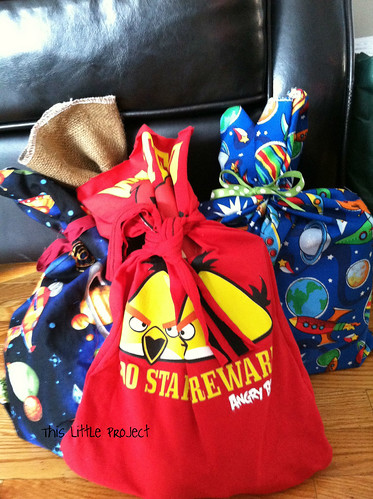
One of our favorite traditions is reusable gift wrap.  For each birthday I make a birthday shirt (see below for that) and I also make a gift bag that matches the theme of their birthday or goes along with something they like that year. It's fun to use the bags from the past and remember the fun years we've had and the celebrations we've had together of our special birthday boy!


I happened upon some clearance Angry Birds t-shirts and made one into a bag for this year.  The space bags worked perfectly with it too!


  I used one of my clearance shirts that I found for Jay's Birthday Shirt this year, and just added the 7 to the bottom right of the shirt.  I love {little} projects like that! 
(You might recognize the "7" fabric from other upcycled projects this winter ;)

  Jay wants to wear his birthday shirt everyday. I'm not kidding. 
 He loves it :)


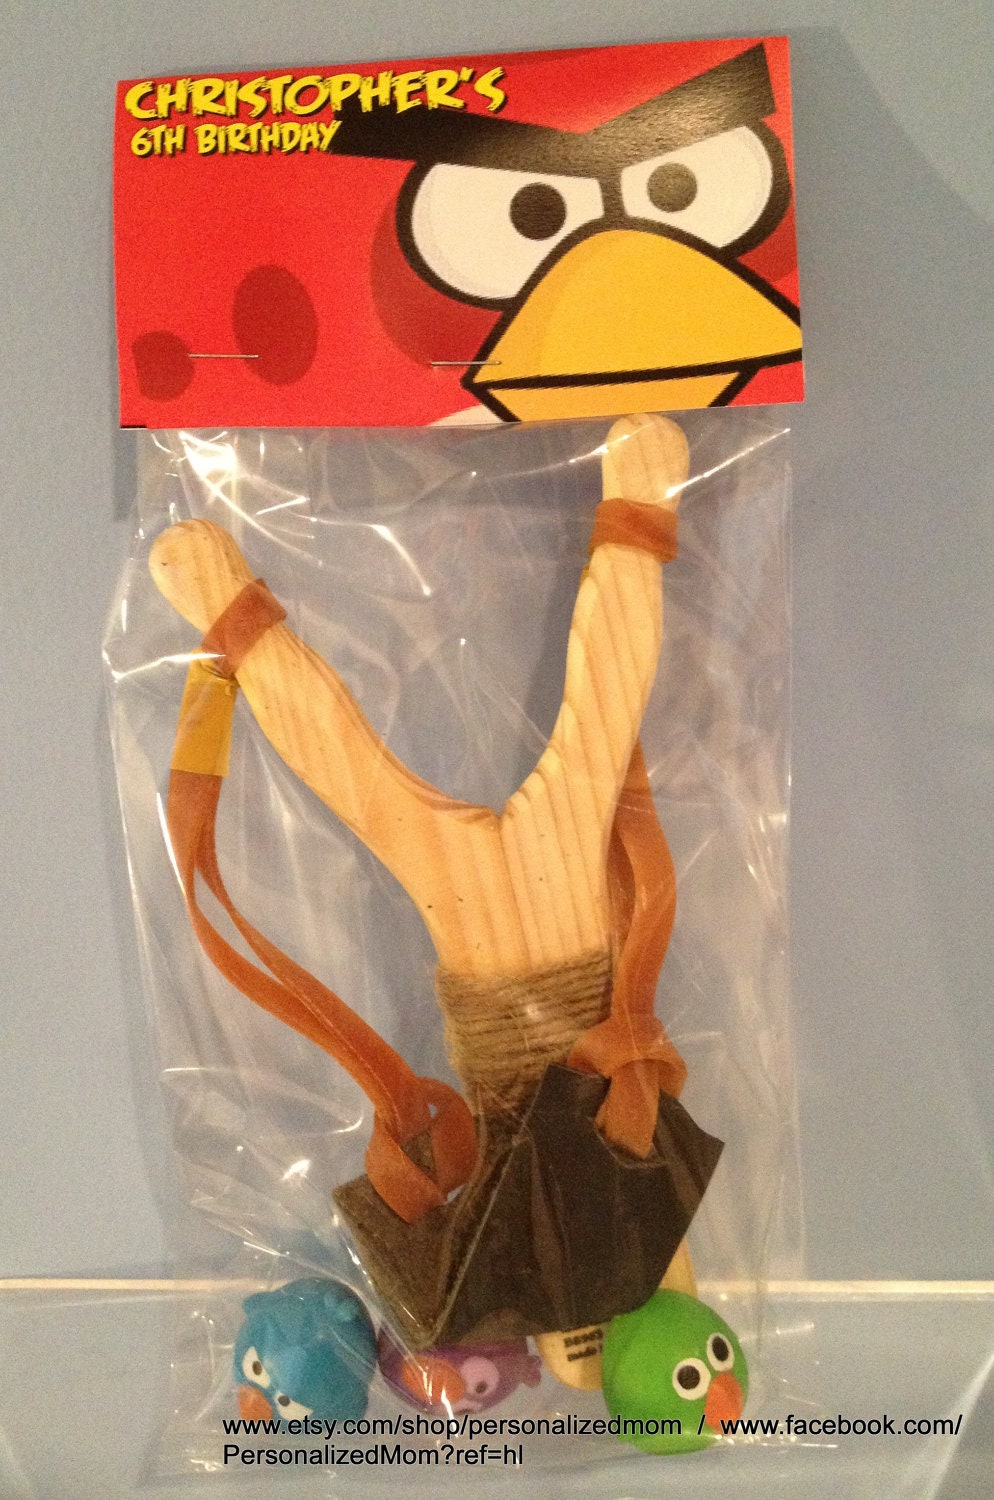
I happened upon some sling shots at a garage sale this summer (perfect!) but here are some other places to find them:

 Oriental Trading
 Pinned Image

Etsy: Bird Sling Shot Party Favors


One of our family's favorite games is "Don't Eat Pete."  So I made an Angry Birds version (you can print it out below.)


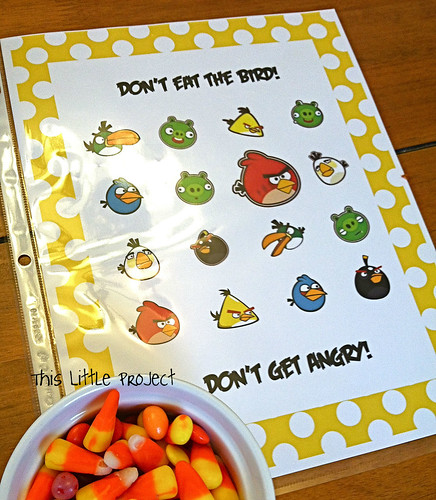
The kids LOVED this {little} game!  And it's so easy to play and prepare!  The candy in the bowl was our "bird seed" and we used it to cover up each Angry Bird on the paper.

Then we went around the circle and each child had a turn being the one choosing the bird that "doesn't want to be eaten" and his neighbor went out of the room while it was being chosen.
Then he came back in and took a candy off each Angry Bird until he got to the one that had been "chosen."  When that happened everyone yelled, "Don't eat the bird!" and his turn was over.  The goal is to get as many treats as they can--what's not to love about that kind of game ;)

It was a hit! 
Here's a copy for you to enjoy (but not to sell.)

Angry Birds Game


I used this [free!!!] printable Angry Birds party kit for setting up a lot of the rest of the party.

It made putting the rest together truly a {little project}.

Free Printable Bithday Kit | Angry Birds

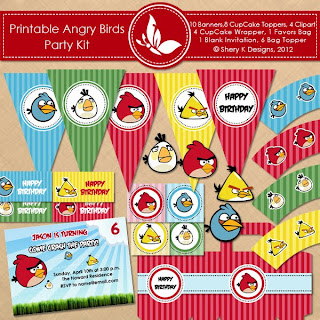
Here's what I used the Party Kit for:

Jay's Party invite: sample included on left in photo above.  I imported it to My Memories Suite --which I love! (use code: STMMMS60806 to save $10)
Using this software it was easy to customize it. 
The Angry Birds font is even included in the party kit!

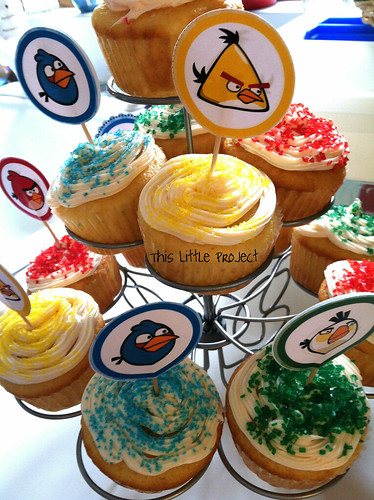
I made cupcake toppers with toothpicks and a little glue.  I {heart} cupcakes so these were perfect and simple.  The colored sprinkles were enough to fancy them up!


The printable birthday banner--super simple and fun!
The kit comes with empty banner pieces to write the birthday boy's name in too!
  
And the Party Favors: 
 
I found the Angry Birds activity books at Joann Fabrics in the $1 book bins.


I had Angry Birds Fruit Snacks and and Angry Birds Cheese Nips in {little} baggies with the bag topper that is included in the kit.
Angry Birds Fruit Snacks 42 Pouch Assortment Variety BoxProduct Details
 
 
The Angry Birds Honey Grahams are also a perfect snack!

How to Make a {little} Tie Onesie


With Baby M making his appearance sometime in the coming month, I have been sewing a bunch of {little} things for him.  {This little project} is a tie onesie for him to wear to church.  

I made a few--not because there are triplets coming or that he needs that many--but because 3 of my sister-in-laws are having boys too!  It's going to be fun to have a big pack of boy cousins the same age!  


Which brings me to another point: these {little} shirts make great gifts!  And they really are a {little project} so you will be able to whip them out fast!
 
How to make {this little project}
 You need:
Steam-a-seam or Heat and bond (an iron-on material)
fabric for tie
onesie (or shirt)
iron
needle/thread/sewing machine (optional)

1- I cut a piece of paper in half and cut a tie shape (I just eye balled it).  Then unfolded it.  That way both sides are the same. I cut a little round part out of the very top so it would go around the rounded neck nicely.
 
2- use your paper pattern to cut the tie shape from your  fabric.  {this little project} was repurposed from a T-shirt!  The knit fabric from a T-shirt doesn't fray and is soft for baby.  
 
 
3- Put your cut out fabric tie on one of the sticky sides of your iron-on material (I used steam-a-seam).  It should also be sticky on the other side so you can iron it on but don't pull the paper off on that side until you cut out the tie pattern.
 
4- Cut around the tie pattern.
 
5- Pull the back paper off and place your cut-out tie/iron-on onto your onesie and iron on according to package directions.
 
6- You can be done there, or you can stitch around the tie.  I always stitch around it because I like the finished look it gives and it makes the ironed-on part look nice for longer (through multiple washes).

 
Now go dress up your handsome {little} guy!

DIY Reusable Gift Wrap {Happy Earth Day!}

When you think back, do you ever just laugh at how some of your traditions got started?

It seems like some of our favorites traditions happened totally unexpectedly.
Our reusable gift wrap is a {little project} I started 2 years ago and it has turned into one of our FAVORITE TRADITIONS.
Go figure.

With Earth Day coming up this week, it's a perfect {little project} to try out.


Our reusable gift wrap is one of husband's favorite {little} things at Christmastime.  Since we still have {little} people at our house we don't wrap anything until Christmas Eve.  
(No matter what gift wrap we use it gets opened early, otherwise!)

And, since wrapping gifts isn't his favorite thing to do, he really loves these {little} bags that he just has to stuff and tie it closed!  Reusable gift wrap is super quick too!

Speaking of tying them closed, I love how {this little project} looks with tulle as the tie.  I'm a big fan of tulle.  It's cute, gives it a special look, and is so inexpensive.  You can use it again and again too.

The reason my kids love our reusable gift wrap is that they have their own special birthday bags.
Each birthday they choose the theme they want for their party and we pick out a special fabric that matches the theme to make a special bag with.
Here is Kay's choice from her "ballet birthday" this year.  It's fun to use the birthday bags from past years too and relive memories of previous events too.


We love that this reusable gift wrap lasts from year to year and we aren't throwing tons of waste away anymore.

And one of the best things about this reusable gift wrap is that it's a cinch to make!

Here's a burlap one I did (it's inside out in the photo)

 
I just used a serger across the top and then folded it and half and went down the 2 sides.
You don't have to use a serger, but burlap frays otherwise. I use the same steps with the other bags.  And of course, you can make them any size.

Sometimes I hem the top instead.  If I'm not being lazy :)

This really is a {little} project.  
It takes 5 minutes or less!


But you get to enjoy it for a long time. 
And the Earth will thank you for it!

Happy Birthday...or...Earth Day!


The Secret to Easy Gingerbread Houses

Want to know the secret for making
quick and easy gingerbread houses?

This is the princess castle we made for Miss Kay's princess birthday party.
It took all of a few minutes to make-and that's only because it was a big castle.

At this time of the year you need a few extra minutes!


So {This Little Project} secret is...
Use your hot glue gun!


The kids don't eat the graham crackers anyway-it's more about the candy, right?
And you'll still get that "snowy" frosting look when the candy gets plastered on with frosting ;)

I'm lucky enough to be visiting Elspeth right now. We're having a great time doing {Little Projects} and our kids are having an awesome cousin reunion.

And we've got 13 gingerbread houses to make for an upcoming party.
If you're like us...consider the glue gun.
(And be sure to let the parents know)


Birthday Shirt Tradition


It's becoming a new tradition at our house for the Birthday child to have a birthday shirt. It's fun to wear something made just for you on your birthday and it makes it easy to tell what year that birthday photo is from :)

I did Jay's birthday shirt with a simple number cut from a scrap of fabric and ironed on using double sided steam-a-seam. You could also just embroider it on.

Then I cut things from fabric that he has really loved this past year to make it "his" shirt. He loves all things that fly.

Kay's birthday shirt got us going on this tradition. She's had a love-of-all-things-piggy-year.

Some other birthday traditions for us are to measure up on the Growing Walls that I did made for each of the kids (and take a picture there).

And we also like to make a hand print of the birthday child with ink for the family scrapbook. It's fun to compare how hands and height have changed over the years.

I would love to hear your ideas on fun traditions too!

Candy Bouquet-great gift!


A friend of mine made the cutest candy bouquet for me for Christmas, but it is the kind of gift that is great anytime of the year.

For {This Little Project} you will need: bamboo skewers (at least 10), mug, styrofoam that fits inside the mug, cellophane, and your choice of candy bars and treats. You will also need hot glue or tape to secure the treats.

To make yours:
1-Place the styrofoam inside the cellophane and put it down into the bottom of the mug.

2-If you want some variations in the height of your skewers, you will need to cut some of the skewers shorter.

3-Tape or glue the candy wrappers to the skewers. If you are sneaky about hiding the top of the skewer under the wrapper it looks even better :)

4-Poke the skewers into the styrofoam to create a bouquet look.

5-Add a little ribbon and note-and YOU'RE DONE!

These sell for about $18 each at a nearby store. You just made a great gift to share (for a lot less)! What a FUN Little Project! Enjoy!
LinkWithin Related Stories Widget for Blogs Add to Technorati Favorites Share/Save/Bookmark