

I used a "funkin" and our bucket of parts to do some toy "repurposing."
All three kids are big fans of the results of our "pumpkin head" toy.
And judging by the fact that the parts are constantly being switched out and there's a pile of "parts" on the floor, {This Little Project} was a success.

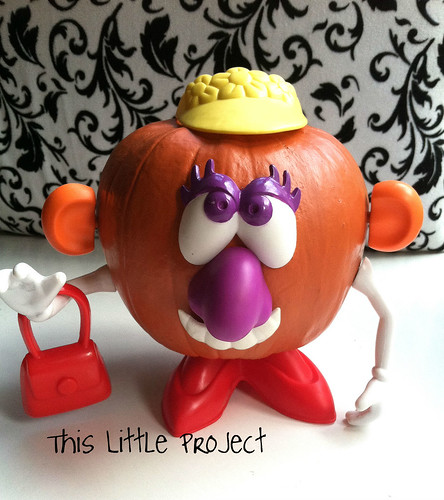
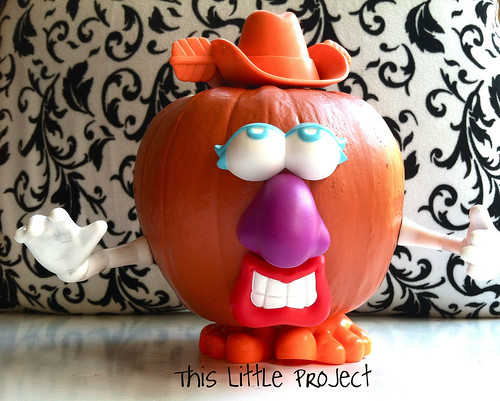
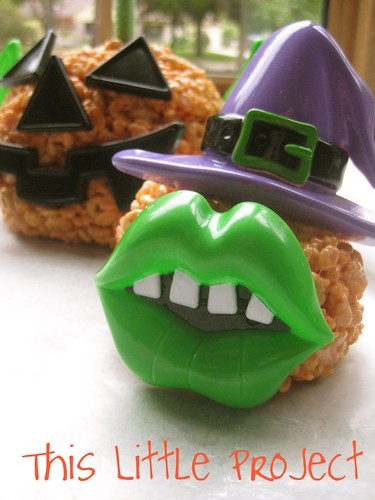
Here's a look at our {little} pumpkin fashion show.
There's something extra fun about dressing up a pumpkin
"in costume" at this time of year.
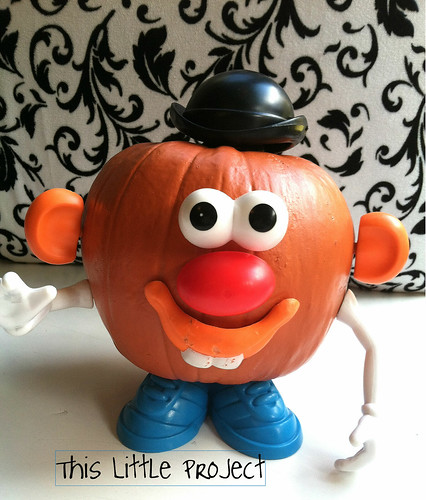
Here's a look at our {little} pumpkin fashion show.
There's something extra fun about dressing up a pumpkin
"in costume" at this time of year.
All you need to make {this little project} is:
a drill
a funkin (it's a fake foam-like pumpkin from a craft store)
and some parts.
I used the smallest funkin I could find (it's from Joanne's) because it was the closest size to the potatoes that the parts originally went to. But I think a bigger pumpkin would also work, you would just drill the holes a little farther apart.
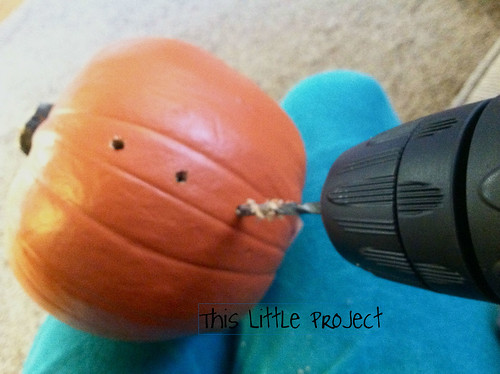
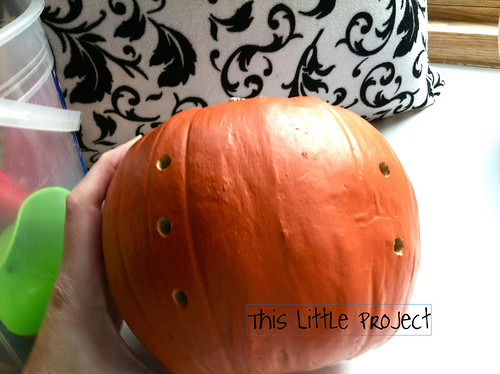
1- Drill the holes. Then check to see if the parts fit in. I had to wiggle the drill bit to get just a little bigger hole to make it fit just right. If it's too tight it isn't fun for the kids since they have to work to hard to play with it.
This is the eye, nose, and mouth placement:
2- Drill a hole in the top as well as the bottom of the pumpkin for hats and feet/shoes:

This photo shoes the ear and arm holes on the right side of the pumpkin. The three are the front of the pumpkin.
Then let the kids have fun dressing up your {little} pumpkin!

I love all the fine-motor practice Ellie is getting while she plays with {this little project}
It's quick and easy to make. And now is a great time to get these "funkins" on sale!
If you don't have a bucket of Mr. Potato Head parts sitting around. You might try using the parts that you can buy that are similar to the ones we used for our kid-friendly pumpkin decorating:
Have fun!


No comments:
Post a Comment