Showing posts with label Village People. Show all posts

Leprechaun Land (in the village)


We've been playing with {little} people this week: the leprechauns have been at our house!


Jay has 2 leprechaun traps set in our house but those sneaky {little} leprechauns keep escaping when the traps go off (The traps he made at his art class are darling and I'll try to get some photos to share.)

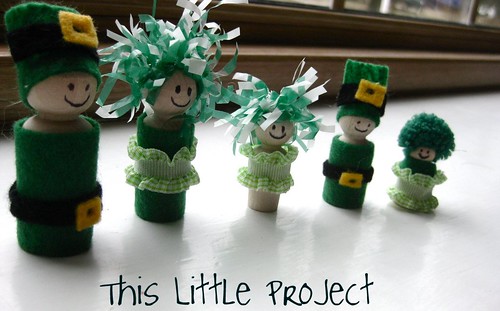
Since we haven't had much luck catching them, we made our family into leprechaun peg dolls instead!


We have had so much fun with other {little} building projects in our village and playing with our pilgrim peg people in our Thanksgiving Village.   

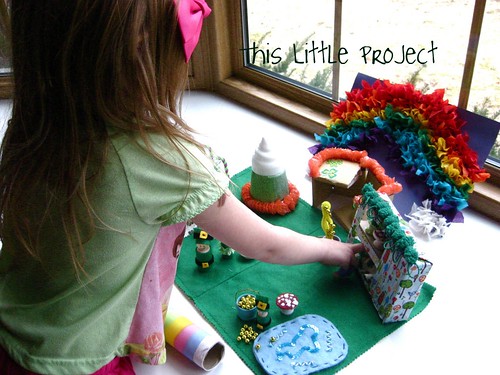
So, naturally, we had to make a Leprechaun Land to add into our village.  For those of you who haven't seen our other village projects, it's kind of like a doll house, made into many houses.  There's so much more fun to have that way!

Want a tour of {this little} magical land?

You got it.

There's quite a bit of dreaming up that you can do with some felt and the invention box.

Here's how the leprechauns get from our land to theirs...
This magical lane was made from the side of a cereal box, and chenille stems, and then covered with some rainbow fabric.

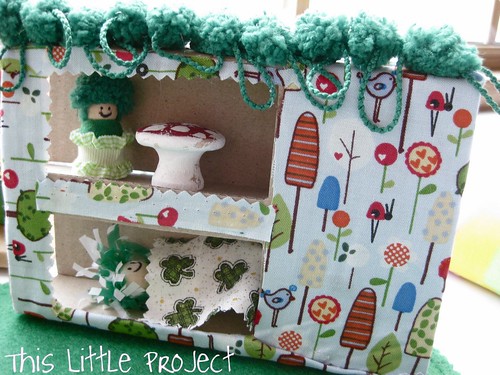
This is a leprechaun apartment (cardboard covered with fabric).  
Here's a close-up:  leprechaun Ellie has a toadstool table, leprechaun Kay is taking a {little} nap.


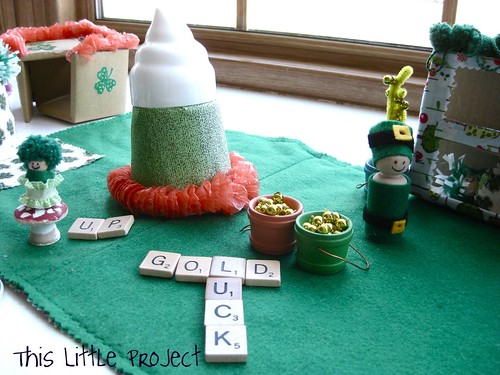
Our toadstools (on the left) were drawer pulls painted by Jay and Kay.  The top of this house in the middle is from a top of a spray cool whip can.  Under that is a yogurt cup with part of a lei glued around the bottom of it.  The leprechauns like to hid in there with their gold!

We like to use scrabble tiles to practice spelling words while we play in our {little} land.

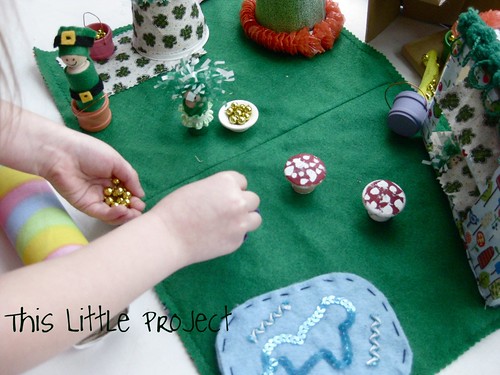
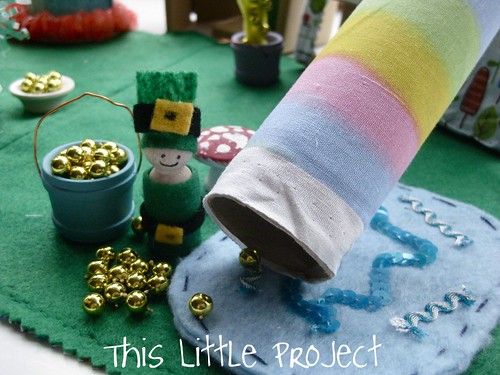
Are you wondering where all of the leprechaun gold came from?  It was a gold colored bead necklace that Jay and Kay cut up to put in their {little} buckets.  It's perfect!


Kay likes to count the gold...

And Ellie likes to dump it...and gather it....and dump it...

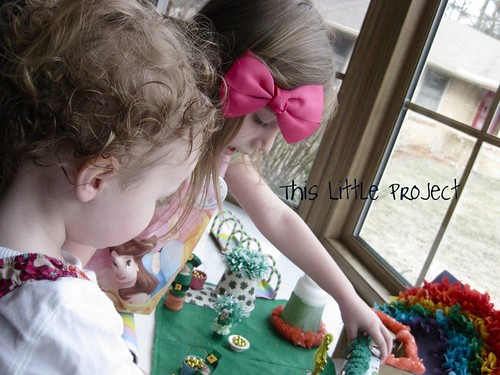
We made a paper towel tube into a rainbow that they can slide down.  Right now it looks like they land in the swimming pool when they come out!  But there's gold there too, as promised!


Here's our family turned into {little} leprechauns.  

Jay told me that he read in a book that there are no girl leprechauns--it's strictly a guy thing.  Whatever.  As if girls always have to be pretty little fairies....

So I'm on the lookout for a book that includes the female gender in the leprechaun tales.  Let me know if you know of any!


 I love seeing {little} minds and hands busy imagining and learning.  So {this} was definitely a lucky {little project}. 


Leprechaun Peg Dolls

We've caught some leprechauns at our house!


These cute {little} leprechauns have been found all over our house!  

I'll try to catch them at work and show you their leprechaun land tomorrow ;)


Pin It  

p.s. if you want to make your own peg people, check out {this little project} from the archives for more details.


Christmas in the Village

We spent this past summer creating a village. It is still one of Jay and Kay's favorite things to play with. For Christmas we made a Bethlehem Village with many of the same pieces (our family lives there for this month) and then a few extra.

I planned to make more peg people for the nativity characters, but found a similar set already in our Christmas box from years past.

The village gets all kinds of visitors from the jungle as the kids add all kinds of animals to the stable. It's fun to watch them interact with each of the people represented.

The village is in a corner and has small cardboard boxes covered with a piece of burlap. I had a piece of starry night scrapbook paper to put up behind, but haven't yet :)

So many of our decorations are not very kid-friendly. This Bethlehem Village has been a fun way to interact with the meaning behind why we celebrate Christmas at our house. I have a feeling it will become one of the favorites as the years go by.

Village Friends and a GIVEAWAY

This weekend we say goodbye to our friends we have made this summer during our internship and head back to real life. Before that happens we had to put our friends in the village.  Here is Abby's house:
And here is Stone's house, where Jay had Spanish lessons and I gave piano lessons each week.
Those are the only 2 we have done so far.  I sewed velcro onto the front of each house and used a sharpie marker to write some numbers and the friend's name.  That way they are all interchangeable and we can practice making 2 digit numbers.


Our village has been Jay and Kay's favorite {little project} this summer.  Today, before we packed it up we got everything out and made the full village. 
 Here is a little tour:
The library, post office, store, and park/farm area:

We added a small airport this morning on the back left, and you can see Abby's and Stone's houses, the construction site, and the roads and stop lights.

Here is an arial view:

We just used the cofee table that was in our apartment.  It was the perfect height for the kids. If you are building a village too, consider a short table.  A train table would also work well.

We will miss seeing and playing with our friends here, but at least they still "play" in our village.
When we get back we will make a few more people to resemble our friends.  This past post has links for a list of how to make your own roads and village places.

And now for a little GIVEAWAY fun!  We have had a great time with these animal finger puppets and I picked up an extra set to share with YOU!
So one lucky winner will receive this little set of animal finger puppets:
And another winner will receive this collapsible box.  I love storage like this.  We have stored our village in one of these this summer and I have an extra to share. 
This fun little box will come with some fun little wooden people too!
1- To enter the giveaway, leave a comment.
2- If you are a follower of This Little Project (you can add yourself on the sidebar) you can leave another comment and be entered again.
3- If you subscribe to this blog please leave another comment to be entered again.
4- And if you blog about the village let me know with a comment for another chance to win.
So there are 4 chances for each of you :)  Don't forget to leave a way for me to contact you if you win! The giveaway ends on Tuesday, August 25th!  
A Store for the Village

We completed more of our village store this week with the grocery store.  I am realizing that we only have one month left here in our summer home-away-from-home and I find myself thinking we have a lot more village to create in just a month.  The store started out looking like this:

These are little bird houses.  My Mom picked these up at Joanne's for me and said they would be perfect for our village.  She was right :)  They are slowing turning into different places in the village.

I used a dremel tool to carve out the back of each house and to cut off the little bird "perch" in the front.  You can tell I don't get much practice with this little tool (I always just borrow one.)
But it turned out to be the perfect size for our village people.

For all the grocery store "products" I cut apart the newspaper ads from the stores and put them on with modge podge (a layer under and a layer over each of the pictures.)  I guess our store is basically wallpapered on! 
The back of the store has the produce, and another side has the snacks.
The inside shows eggs, breads, cheese, milk, juice, etc.  I'm seeing it as a fun way for us to learn about the food pyramid and talk about different kinds of foods and where they come from.  

The "STORE" letters are just to work on word recognition.  Jay glued the scrabble letters onto popsicle sticks. 
You can may be able see that there is also a little carrot garden next to the store.  It adds a little "farmer's market" feel to the grocery store.  The carrots are sewn down so they can't get lost but they can be "picked" from the garden.  
The Store is open for business...
I hope to add some flowers too, and some berries since we picked some of those up too at the farmer's market today.  Hmmm...makes me hungry just thinking about it :) 
If you want to build a village too, feel free to check out past posts about the village and making roads.  It's been a great "open-ended toy" to encourage lots of imagination!

A Farm in the Village


It seems like it's been awhile since I've posted about our village.  Be assured that it is still flourishing and providing lots of imaginative play...I've just been out of town a lot lately.  The latest addition to the village is our farm.  

It started with the Village Park some wooden animals and a little red tractor.  Then we made and painted a little barn and added a tree and a robin (per Jay's request :)

The the librarian came over to take a look at the ducks in the pond with Jay.

And Kay found her favorite little piggy.

Grandpa and Jay heard some noise in the barn (made from recycled wood pieces).

It was a party in the barn and the Librarian wanted to in!

Some plastic animals came by to practice their reading skills.

Things got a little out of hand with the barn party.

But things got picked up pretty quick and everyone is back to work again!
We are still loving how versatile the village is.  There are so many stories to tell!


p.s. here are the links to the other places in our Village so far...
Swimming pool, Park, Library, Post Office
How to Make Your Wooden and Peg People
The Construction Site
and Stop and Go in the Village .

How to make Wooden and Peg People (The Village People)


The village has come alive as we've made people to be apart of the happenings in the Village. Kay calls them all her "babies."  Below are tips for how to make your own village people out of pegs and wooden clothes pin dolls.  I purchased all of my wooden materials at Casey's.  Search through what they have that might be fun for your village.  I purchased a wooden tree and some fun other things too besides the wooden doll stands, heads, peg turnings, angel turnings, etc.  

Here is a photo of much of the "Before."  I wanted our people to look more "real" so I gathered scraps of fabric, lace, cross-stitch threads, modge podge, paper, chenille stems, and paints to bring them to life.  See below for instructions about how to make each kind of wooden person.

I used regular acrylic paints on some, and also tried the paints that come in a tube that are also acrylic.  Both worked fine, but the tube paints paints seemed thicker.  My sister has a few basic colors and we mixed them to create the colors we wanted.  It was a fun way to get just the color you are looking for without buying them all.
You will need a fine tipped brush for painting faces.  I didn't have a very good one, so don't look to close at mine!  {Little Project Painting Tip:} If you are painting details (like the face) and don't like what you see, simply wash it off with water quickly and redo it :)
Here I used my sister's dremel tool to put a hole through so that we could add arms.  There are lots of ways to do arms.  For now, we just used flesh-colored chenille stems.  Remember to bend the ends back so they don't scratch.

Here is our librarian.  You can see that arms come in handy for holding a book.  I used a peg person from Casey's that looked like it had a hat on.  With Modge Podge all over the cap part I wrapped white yarn around to make it look like a great beehive of hair.  She could also be a grandma (but neither of ours have white hair yet :)  She has a trim glued on for her dress.

The other guy is our postman or postwoman.  I used modge podge on the wood and wrapped paper around.  Then covered with another layer of modge podge.  Remember that modge podge is a sealer.  But, it is waterbased, which means that if you have little ones in the house and they put things in their mouths it isn't a good sealer since they lick it off!  Be careful with little ones and peg people.  They could be a choking hazard...

Here is our group of Village people so far...
Our librarian is watching over things at the village library:
Here is our mailman at the Post Office.
These peg people were accessorized with stretch lace glued on for part of the mom's dress with "liquid stitch," and the baby has 3 strands of embroidery floss wrapped around her dress and glued on with modge podge (a layer under and a layer over).  Embroidery floss has also been a great way to add a belt on the daddy peg doll.  The baby also has a bonnet in her hair made from a piece of fabric that is also modge podged on.  Those arms let her hold her baby :)
These wooden clothes pin dolls below are quite a bit taller than the others.  They have a clothes pin, head glued over that and a stand that helps them stand up.  I put a little hole in the middle of a 4-5" circle of fabric and put it over the clothes pin and also made holes for arms.

 The chenille stem is just glued to the back of the clothes pin (next time I will make it longer :)  I loved the fabric title so I left it on to show some patriotic spirit!
She has some fabric stars and a floss headband modge podged in her hair.


This wooden clothes pin doll has fabric ruffled and then glued on around her.  She is awaiting some arms :)
Her embroidery floss headband is a felt flower with a sequin modge podged onto her head.  

This is a finger finger puppet doll.  I just pushed and glued a square of fabric into a wooden doll head.  You supply the finger and she can walk all over the place!  I think I may make some animals like this too!
Little arms make giving hugs a lot easier :)  These little village keeps my little people busy for hours!

More village to come...  Let me know if you have any questions about how to make your own little wooden friends.  For more ideas of how to paint your peg people, or to skip that process and purchase them already made, you might check out Etsy. 

And be sure to link your blog here for the Project of the Week linky each Wed. to share and celebrate fun project ideas!


p.s. here are the links to the other places in our Village so far...
Swimming pool, Park, Library, Post Office and Stop and Go in the Village, and the village construction site .
LinkWithin Related Stories Widget for Blogs Add to Technorati Favorites Share/Save/Bookmark