How to make Toilet Paper Roll Pumpkins

Last week I was helping the young women at church learn to made these quick and easy pumpkins.
  
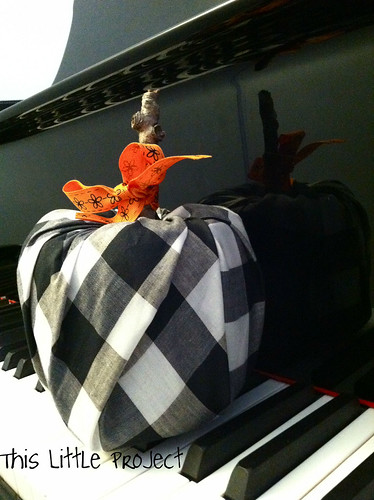
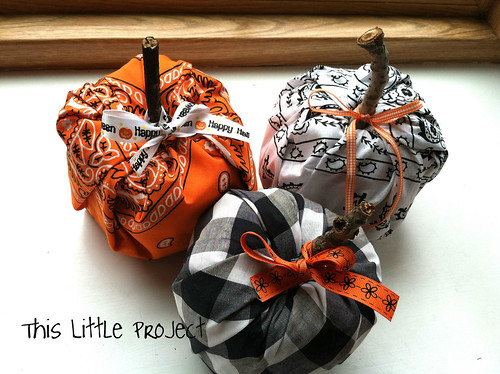
The fun thing about {this little} pumpkin patch is that no one will guess that inside each {little} pumpkin is a roll of toilet paper!
 
 
Since I had so much fun making pillow slipcovers with bandanas I decided that my {little} pumpkins would look cute dressed up in a bandana too!
I made them to go in our music room.  Halloween matches the piano so nicely ;) 


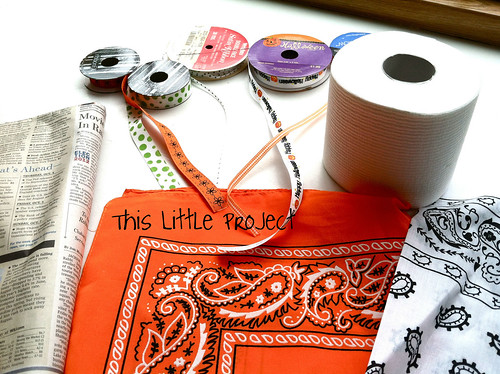
Here's what you need to make {this little project}
a bandana (or fat quarter of fabric) or repurpose-see below
a roll of toilet paper
Ribbon (about 15 inches)
 a sheet of newspaper
a branch/stick


 A bandana is a really great size for these pumpkins.  And a fat quarter works great (18x22") too.  But actually, when I worked with the young women we made these by repurposing shirts.  A t-shirt, an orange sweater, black velvet, etc.  They turned out really fabulous with a lot of different textures!
Just cut your shirt to be about 18"x22".
Now, on to how to make a toilet paper roll pumpkin!
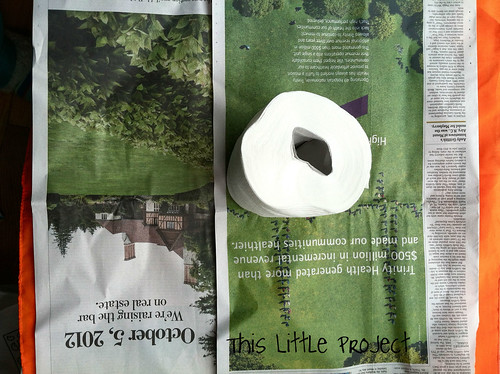
1- We did a little bending of the toilet paper roll to disguise it.  Under the roll is a piece of newspaper.  The bandana is under that.  The side you want to see on the outside is facing down to the table.
  
2- Starting with the shorter sides, pull up parts of the newspaper and fabric and stuff it inside the middle of the toilet paper roll.
 3- After the shorter sides are in, stuff the longer sides in.
 
4- After all the paper and fabric is inside, stuff your stick/branch (or dowel) inside the roll to help hold the fabric in place.
 
5- Then tie a little ribbon around the stick.
That's it!

These also make fun {little} gifts.  I took a bandana one to a friend yesterday and she loved it.  She was so surprised when I told her what was inside  :)

 
Now you can go make your own {little} pumpkin patch!
 

Sneaky Pillow {slipcovers}

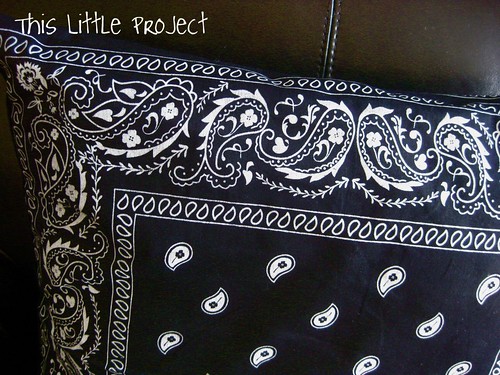
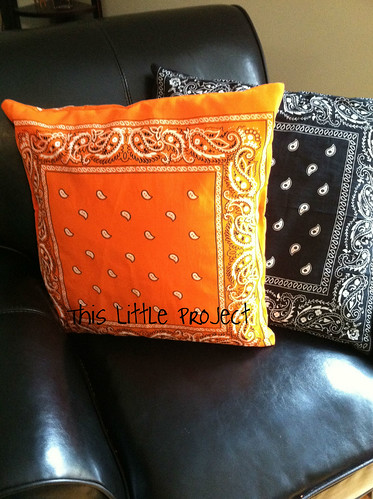
Here's a sneak-peak at my new pillow slip covers.
Can you guess what {this little project} was made from?


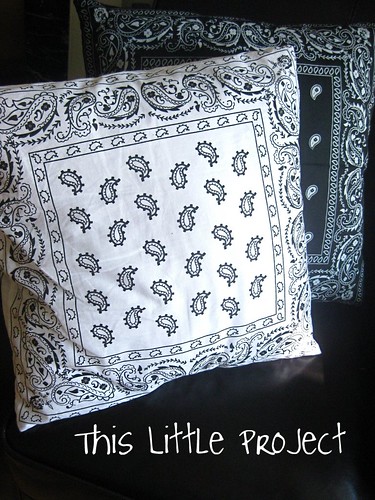
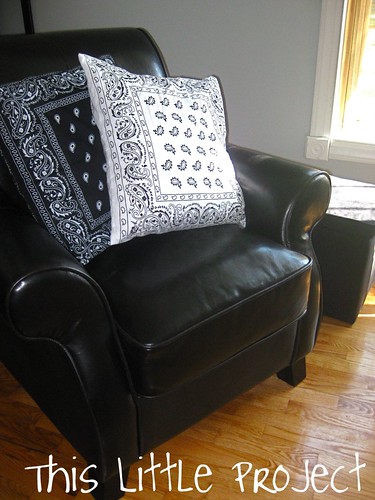
Here's another look.  I made these to go in our music room.  The big black piano takes up a good chunk of the room and it dominates the color scheme too, as you can see...


So, if you didn't guess yet I'll have to tell you....

These pillow slipcovers are made from 2 bandanas!

They were a buck each.
ya.  I can hardly believe it either.

Nobody ever guesses they are bandana pillows when they come over either.  
Your secret is safe :)

 
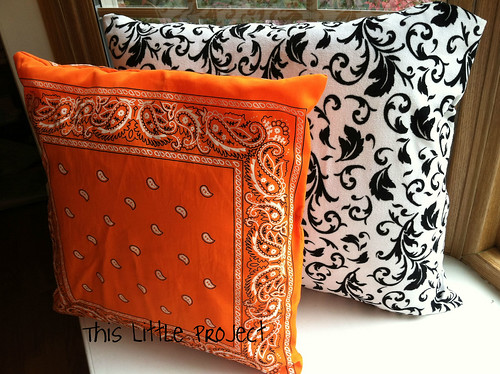
And since they are slipcover pillows I can change the black-and-white scenery of the room whenever.  The orange ones work perfect for Halloween!

The standard bandanas fit the 18"x18" pillow forms.  Perfect!!

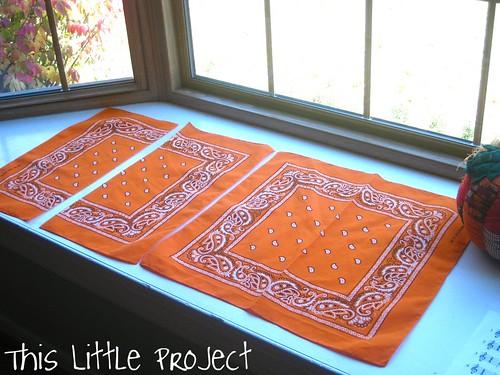
To get you started, here are the 2 bandanas I started with:  


p.s. I didn't take photos of the process, because it really is so easy!
(but if you have questions-just ask!)

To make {this little project}:

1- Cut one bandana in half.
The cut bandana is the one that opens in the back.

2- Simply fold back (1/4") and hem each side of the cut.

3- Then lay the cut pieces on top of the original bandana
The hemmed pieces should be in the middle so it looks like it started out.

4- Turn the cut pieces over so the two bandanas are now right sides together (printed sides are facing each other).

5- Overlap the cut pieces so that the hems overlap by at least 1/2 inch.
(for more pictures of how to make a slipcover see {this little project} from the past)

6- Pin it.

7- Sew around the square.  
The bandana you cut and hemmed is slightly smaller.  
So that's the square you sew around.

8- Turn it inside out and stuff your pillow inside!


Ta Da!  Easy. Fast. Changeable. $2 Bucks.
That's my kind of {little project}.


Multiplication Practice Cards {the Best!}

Do you remember learning your "times tables?"  I remember that they were on the wall in the form of paper ice cream cones in 2nd grade.  As I was trying to help Jay learn his times tables, I wanted something easy to work with and that was portable.
 
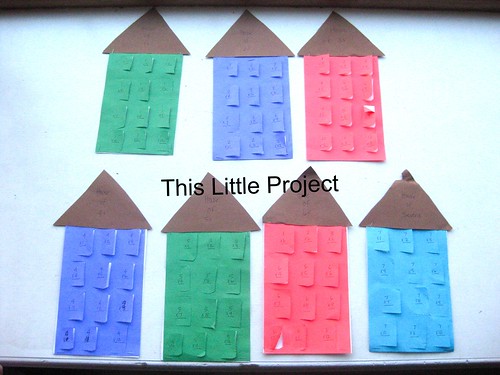
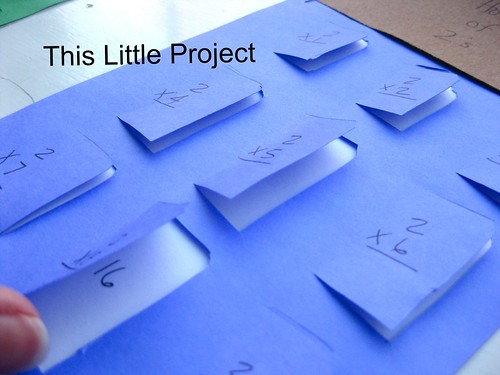
This is what I came up with.  I made these Multiplication Practice Cards for Jay about a year ago. 
These {little} houses are easy to make and made learning them easier.


The reason I love them and think they are {the best little idea} I've had for awhile, is because you don't have to haul around a whole stack of flash cards.  Just 12 little houses make up the whole set.

Also, it's easy to see how the numbers compound.  I think that makes the multiplication make more sense.  When Jay was learning them I would tuck a house or two in my purse when we went to the doctor's office or give him one to look over in the car if we had a bunch of errands to run.  
 
 
I was going through some math supplies and found them again.  So Kay had a fun time quizzing him on them :)


To make {This Little Project} you need:

3 pieces of brown construction paper
6 pieces of white paper
6 pieces of colored paper
a stapler
an exacto/craft knife

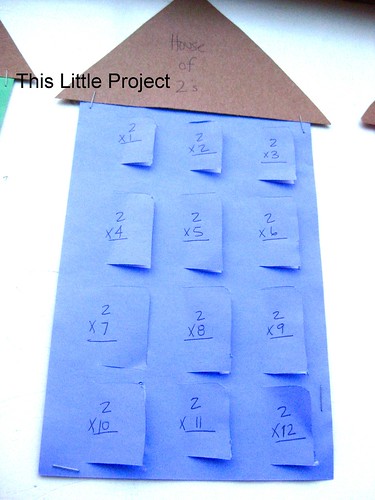
1-Start by cutting the white and colored pieces in half so they are half sheets of paper (8.5x 5.5.)  These will make the front and back of the "houses."


2-  Cut 12 triangles of brown paper to fit your "houses."

3- Use your craft knife to cut "doors" into the colored pieces of the houses.  I just eyeballed this and then used the first one as a template to make the others.  Remember to just cut 3 sides of the door.  You need 12 doors on each "house."

4- Now staple the white papers to the back of the colored "houses" and staple the roof on.

5- Title the houses (1-12) and write the problems on the outside of the "doors" and then the answers inside the door.


Your child can quiz himself and check to see if he is right.  Or his little sister could too!


I love it when learning gets a {little} easier :)


Good Morning Happiness!


I kid you not, this is what my eggs did when I cracked them into the bowl.  They were smiling at me!

I couldn't believe it and had to show my kids and grab my camera!

We all had a good laugh!

That's when you know it's going to be a happy-good-morning-kind-of-day!


Wishing you a HAPPY day!

Legos: Organization and Ideas


With Christmas coming, I've been thinking about gifts.  This is partly because I have a baby due at the beginning of December and hope to be ahead on it this year :)

Jay has had 6 years of Lego gifts.  And they have been collecting.  But not getting as much use as I thought they would.  Jay loves to build, but would choose other toys instead.

I started to wonder if it was simply because of the way the {little} piles of legos were stored?

With a fresh installment of legos from last Christmas and his birthday last year I decided to do change how the legos were presented and see if it made a difference.

And now that it's been 9 months I thought I would share the results of what I found out from {this little project}.
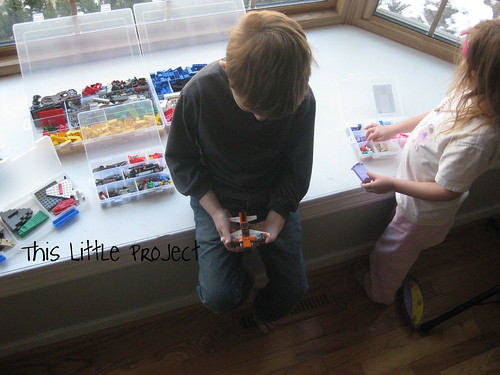

I'm not a neat freak. I like things organized.  But I'm quite "right-brained" and if things are too organized it feels too sterile to me.  But on the flip side of that, chaos does not stimulate creativity.  It prevents it.  So I try to find a happy place in between the extremes in our home.

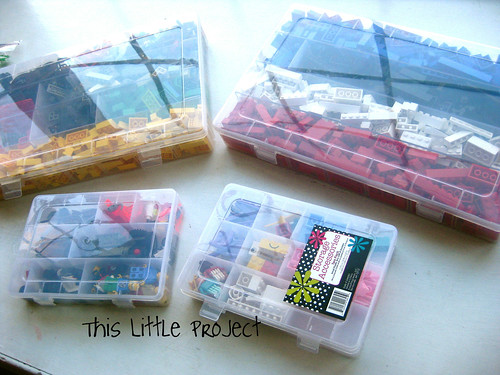
Our legos were stored in a clear container, but just jumbled together.  I decided to get some shallow bins with dividers and group like colors together like this:


And like this:


I put Kay's pink legos in her own bin too.  The thing I like about these bins is you can change the dividers in them.  So we can re-group as needed when their collection changes.  

The small bins are great for the{little} lego guys/girls and all their accessories!
 

I picked up these organizers at Michael's.  They go on sale for 1/2 price pretty often.  The fact that they are not deep bins has made all the difference!  It's much easier to find what you are looking for.  And they are clear so you know if you have the right box.
 Jay and Kay can see their pieces at a glance and they play with them all the time now!

I was worried that Jay and Kay would not want to clean up their legos if they had to really put them away in the right spot.  But, they put all the colors and pieces away where they go just fine when they are done playing and disassemble their work.  And they don't seem mind at all-yay!

We keep a small container out for the {little} legos that don't make it back into the organizer boxes  on time (and are found under the dresser or something) so they can be collected.  Then the next time the legos are out they put those away too.

We have needed to keep them away from Ellie.  And we try to keep the lids closed so they don't get bumped and spilled by her.  But even she has come to respect them and has started to join in the play.

 For organizing and keeping track of instruction booklets I put together a binder with page protectors.  The directions that come with the sets go in there.  But we have a lot of legos that didn't come with a set.  And for ideas of what to build with instructions, we've visited this site.



It has all the building instructions from all the past sets!  You can print any you want!  After choosing what they want to build, I just print, and hole-punch the directions and put them in the binder.  I put tabs in the binder to organize the different kinds of instructions.

We also got Jay this book for Christmas last year.  I liked that it didn't have a lot of directions.  It's just building inspiration.  It gives him ideas and he can use his own creativity from there.  He really likes it and it's just what I hoped it would be.


It's been nine months since I took this photo.  And I'm happy to say that the legos look just the same as they did then, when we started {this little project}.  It's been a long enough test that I thought it was worth sharing the idea with you :)


Happy Building!

MORE Bear Hunt Book Fun!

I'm over at abcand123learning.com today to share Music and Movement ideas that bring the book, We're Going on a Bear Hunt, alive! 

These experiences go right along with the other activities I shared in the B is for Bear Hunt post.  If you have little people at your house, you won't want to miss it!


 abc button


LinkWithin Related Stories Widget for Blogs Add to Technorati Favorites Share/Save/Bookmark