Showing posts with label Father's Day Gifts. Show all posts

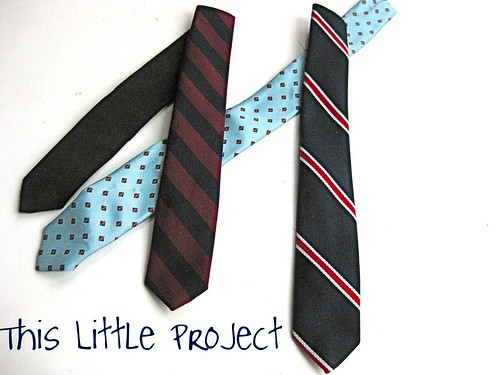
Little Man Ties {easy remake}

If you like to dress your {little} man up
{this little project} is for you!

I know there are a ton of DIY tie ideas out there for little boys.   
But they still require making the tie. 

These {little} ties are WAY EASIER!


These {little} man ties would be perfect for Easter, dressing up like Dad on Father's Day, etc.  

I was wandering through a consignment shop and happened upon a basket of ties. 
I thought: I can chop the end off to shorten this tie and be done with it!

If you put a man's tie on a boy the tail is too long right?  Well, so cut it off and you have your tie.  Done!  I'm pretty sure that most of our hubbys have ties that aren't their favorite anymore.  So now you can give them a new life!

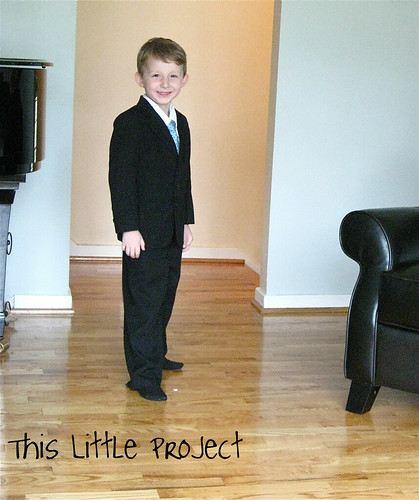
So I bought them ($1 each), had my husband tie a knot in them closer to the front end, adjusted the size for my little Jay to wear, CHOPPED the end off, and hemmed it.

easy!
 
To make these ties {little} boy friendly, we just leave the ties tied.  He just slips them on and tightens them up.  And loosens them when taking them off.  Easy.

Jay was 5 years old when I made these for him and they will last for a long time since they adjust just like Daddy's ties do!

And what do you think I'm going to do with the tails?  I think I'll sew them onto Baby M's shirt to make my two {little} boys match:)


There you go!  A handsome {little} man tie. 
 
Have fun dressing your {little} man up!

Father's Day Photo Baby Announcement

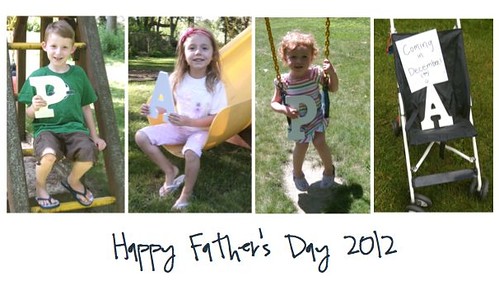
Remember how I said I was working on a {little} Father's Day photo shoot idea that I couldn't share before the big day?

Well, here is what my husband and I both sent to our fathers:

Both grandpas were big fans of their gift!  This gift has been in the oven already for 15 weeks.  And there are many areas of our life that have been showing signs of baby sickness slackerness.  Like how my sidebar still has Earth Day ideas.  And I have taken some long breaks from posting.  There's only so much a mom can do when she doesn't feel good.  Luckily, that part is starting to pass.  
 

Jay, Kay, and Ellie are very excited to have {little} baby coming to our family in December.   Babies are so very small, but they're not really a {little} project!  We can't wait to meet this new {little} person!

I used the My Memories Suite (that we had a giveaway for a little while ago) to create the photo above.  I also recently used it for Jay's solo violin/piano recital invite.  I'm finding it's so much more useful than just for scrapbooking. 
Feel free to use this code (STMMMS60806)
for $10 off when purchasing this suite!

I hope you had a wonderful day celebrating the special men in your life too!


 P.S. Don't forget to enter the Farm Rich Giveaway!  I can't tell you how great these snacks are for when you don't feel like cooking and want to eat something yummy!

Father's Day Gift Ideas

Some of the best gifts are the ones that you can't buy.  Which is why I love this Father's Day/Grandpa's Day Packet at the TpT Store.  It's free to download and the kids can say all their "darndest things" and we can remember them!  It's a fun way to honor Dad and Grandpa.

Father's Day Newspaper Project: My Dad Rules! image 3
 
 
I also love these cards found at Etsy.
 
Father's Day card - Daddy's Little Guy - Father and Son greeting card Father's Day card - Daddy's Little Girl, father daughter greeting card - simple black, white, red heart
 
 
And if you are up for a quick {little} gift, these wallets are easy and quick to make!

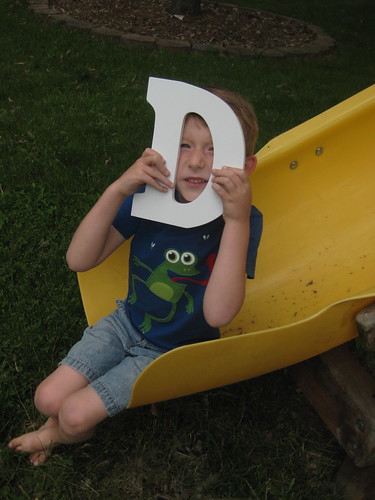
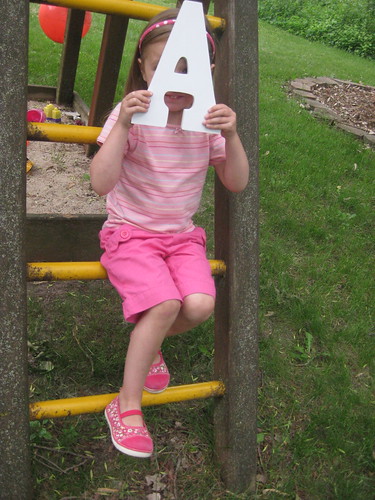
 We did a D.A.D. Photo shoot last year for our Dad with each child holding a letter.  I'm working on a variation of that this year.  But, to keep surprises I'll have to share later!
 
 
For more handmade gift ideas, check out this Father's Day Round-up from the archives.
 
I love having a special day to honor the wonderful men in our lives.  
Our Dad and Grandpas mean everything to us!

Father's Day Photo Shoot

I have some EASY and QUICK ideas to share with you.  
As in 1-Hour Photo quick!

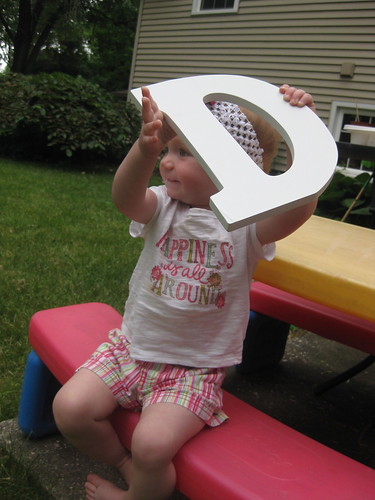
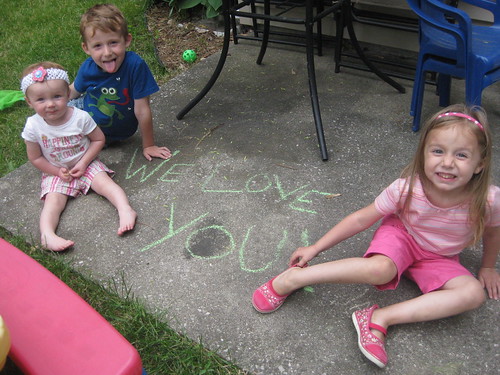
For Father's Day this year I took a photo of the kiddos with the letters D.A.D.  Taking them was hilarious.  Jay, Kay, and Ellie could find all kinds of things to do while holding their letter.  I'll share some of the out-takes with you...you'll get the idea for {This Little Project}!


{Little Project Hint} The letters can be found at a craft store-you only need to purchase one D.


I put these in a frame that will hold all 3 of them side-by-side. D.A.D. 

Sidewalk chalk can make a quick and easy message for your card.  Again, this isn't the "real" one (can you tell why?) but we're sending these to grandpas.  


Just print them quick at the 1 Hour photo (or think ahead so you don't have to!) and then put them in your frame or the mail.  Easy. Meaningful. Done!

Happy Father's Day!


Friday Favorites and Freebies-Father's Day Edition

Well, we're mostly unpacked and loving being homeowners for the first time! I'm coming out of the mess of packing paper and boxes to share some fun ideas for Father's Day with you from around the web. Enjoy!

This is an easy and fun way to do hand prints with your kiddos.

We all know that our men love yumminess. Here is a great recipe for frosting a cake to celebrate the big day.

Try out these sweet versions of hamburgers and fries for a fun twist!

We're doing a variation on this idea for Father's Day-a cute photo holder just for Dad!

I love this T-shirt design for Me and Mini Me. Check it out to order or make :)

Happy Friday!

Gift Idea


Here's a fun gift idea that you can personalize for the special people in your life. We made these for Mothers Day.

Here's how to make {This Little Project:}
1-Go to Wordle and type in the words that describe the person you admire. Keep in mind that if you want some words bigger than others you have to type them in multiple times. So I typed "NANA NANA NANA" to make sure it was bigger than the other words. You can customize the font, colors, or randomize it until you get the look you want.
2-Then print onto cardstock
3- Put it into a frame.

4-If you want to add an additional touch, try this: I also made fingerprints of Jay, Kay, and Ellie in sculpy clay (from any craft store) and then glued them to the frame to let them know that they had "touched" our life in a special way.

It's an easy gift that can be personalized for a special teacher, friend, parent, or for Father's Day coming up! It's a meaningful and inexpensive way to share some love :)

Candy Bouquet-great gift!


A friend of mine made the cutest candy bouquet for me for Christmas, but it is the kind of gift that is great anytime of the year.

For {This Little Project} you will need: bamboo skewers (at least 10), mug, styrofoam that fits inside the mug, cellophane, and your choice of candy bars and treats. You will also need hot glue or tape to secure the treats.

To make yours:
1-Place the styrofoam inside the cellophane and put it down into the bottom of the mug.

2-If you want some variations in the height of your skewers, you will need to cut some of the skewers shorter.

3-Tape or glue the candy wrappers to the skewers. If you are sneaky about hiding the top of the skewer under the wrapper it looks even better :)

4-Poke the skewers into the styrofoam to create a bouquet look.

5-Add a little ribbon and note-and YOU'RE DONE!

These sell for about $18 each at a nearby store. You just made a great gift to share (for a lot less)! What a FUN Little Project! Enjoy!

How to Remake a Wooden Puzzle


For Father's Day we made a Wood Photo Puzzle for Daddy. It's so fun to have a puzzle that means something to YOU. You may have an old puzzle laying around the house that the kids don't want to do anymore.  They will want to use it again after you finish This Little Project :)
Here is how to make your own:

For This Little Project you need: a wood puzzle (we picked one up from the dollar store or you could recycle an old puzzle your kids don't use anymore), an photo (we used 8x10), modge podge, pen/pencil, brush, xacto knife and/or scissors.

Here is what our puzzle looked like BEFORE:

This puzzle turned out to be a Little more than a Little Project for me. But you can learn from my mistakes. The first thing you will do is trace the puzzle onto the back of the photo. Use a SHARP pencil to get As close as possible to the actual size of the puzzle pieces. Then use scissors or an xacto knife to cut out each piece.

{Little Project Tip:} you want the pieces to be as close as possible to the actual size of the puzzle pieces. This was the hardest part for me. I checked each piece to the actual piece I was gluing it to BEFORE gluing. If it wasn't a perfect fit I trimmed it down. You may loose a tiny piece of your actual photograph, but it is worth it. Your puzzle won't fit together if your photo hangs over the sides of the puzzle pieces. It is worth it to do this step (even though it takes awhile!)

I traced each layer at a time like this:

Next, put a layer of modge podge on each puzzle piece with your brush. Let it dry. Then put another layer on and attach each piece of your puzzle picture to the corresponding pieces of the puzzle. Let it dry.  I didn't put a layer of modge podge over the top of the photo yet.  I'm going to see how it holds up.  But you may want to just to seal it.

Here is what our puzzle looked like AFTER:
This was a Fun Little Project.  It's fun to enjoy at home or to give as a gift!

How to make Shatterproof Frames (mailable or for kids)


You know that idiom, Necessity is the Mother of Invention?
Well, it's true. I discovered an easy and inexpensive way to frame art that has the perk of being shatterproof- and it even looks pretty! You may remember back to Mother's Day when I was working on doing some sillouettes of my kids to send off to grandparents. Well, I had a problem: I didn't want to send them in frames that might brake in the mail, and I felt lame telling them to go buy their own frame for it :)
Since then, I've determined that these frames are awesome for mailing (think mailing a portrait of Grandpa for Father's Day that your child did) AND  they are also a great way to frame kid art in a kid-friendly way ie: shatterproof. You know how it is: your child loves the art work he made and wants you to hang it up. But he also wants to carry it around and show everyone what he did. Well, now he CAN :)  
Bonus: They are easy (and inexpensive) to make!

Here is what you need to make your Shatterproof Frames: Ribbon, scissors, xacto knife, electrical tape (I used black for this project but different colors would be really fun for kids' art work), punch tool, foam board (cheapest I've found is at Dollar Tree), glue stick, craft/tacky glue, Transparency film or laminating sheet, and piece of thin cardboard cut to size.


1 - Cut the cardboard to size for your piece of art work. I used the thin packing kind.  I think cereal box cardboard would work too.  
2- You need to punch 2 holes (be sure to measure so the are equal apart) in the back and then thread ribbon through and glue.

3- Cut your foam board to size for your art work and use a little glue stick to attach the art to the foam board.  Here's Jay's silhouette glued on:
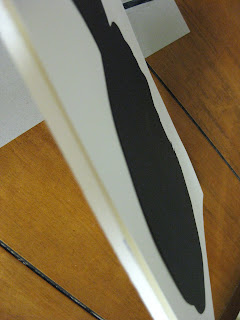
4- Then glue the cardboard piece to the back of the foam board/art work.  
{Little Project Tip:} The side of the cardboard you saw in that first photo is the side that you should not see when it is glued to the foam board.

5- Now cut your transparency sheet/laminating sheet to size for your art work.  

6- Then cut 4 pieces of black electrical tape corresponding to the size of the edges.  This next part is the trickiest because you want it to be STRAIGHT when it sticks. The electrical tape should only be covered part-way.  Leave the other half still sticky (see the photo).  The best method I found was to lay the black tape on the floor sticky side up.  Then put one edge of the plastic sheet down at a time being careful that it was lined up straight.  I only had to take it off and try again a few times :)
When you're done, it looks like this:

7- Now you line up your art work with the sides of the plastic.  The black sticky edges of the tape should be extending past the edge of your art work.

It looks like this:

8- Now you just fold up the edges of the black electrical tape and they stick to the sides of the foam board and trim the corners so they lie flat.

9- Since the tape won't wrap all the way around the foam board, I cut 4 more pieces of black electrical tape corresponding to the size of the art work to secure it better.  Just match one edge of the tape along the table that the art is sitting on so that it goes on straight, like this:

10- Here's what it looks like on the back after you have pressed down all of the sides.  I should mention that you will have to trim the corners so that they lie flat.


These ended up looking very classy (you can't tell from the photo).  I should have taken some shots with them hanging but I had to get them in the mail! 

They may not be heirloom quality, but that was ok for this project :)  They were nice and sturdy, had a cover on the front that looked like glass if you weren't up close and had a frame that you could not tell was just electrical tape.  
In other words, an invention success!

After I made these I had the brilliant idea of making a frame that is interchangeable so your child can decide that he has a new favorite that he would like you to hang up.  It's the same basic idea with a little twist.  Let me know if you want directions and I can put them up.
 Enjoy This shatterproof Little Project!

Father's Day Handmade Gift Round-up

Father's Day is coming up quick! Here are some fun ideas to show Dad and Grandpa how much you care.  I'll be back tomorrow with some of the handmade gifts we made for our Daddy (so come back tomorrow and let's hope he doesn't peek!)

Let's be honest here: Guys are harder to shop for than Gals.  The coupon idea really gets used a lot on Father's Day.

 If the man in your life is handy, this little coupon idea mixed with a tool kit idea is perfect for your kids to make and really easy to personalize!


Here are a few more free printable coupons (note there are a couple that aren't G rated)


These shirts would make a cute gift, or may be easy to make too...I'm thinking really cute on a onesie :)


We made some fun cards.  This shirt card is an easy folding one.  
Here is another version of the shirt card.  And this one is an easy printable shirt card that is great for the kids to color for Dad or Grandpa.


There is a sweet "I love you Daddy" poem at Kaboose. It would be sweet accompanied by a cute photo.

Here is a pattern to make your own homemade box to hold a little treat.

This box pattern is an easy printable to hold your gift for Dad.

For more ideas, check out these Little Projects from the archives as well:
Yarn Cards are great for the kids to make.

These Personalized Photo Frames are SO easy and inexpensive to make.

You can also make a fun wordle (see link on right sidebar) with names of family members or things that he loves (sports, fishing, etc.) The more times you type a word in the wordle, the bigger the text gets for that word. You can adjust the colors too. Print, add to a card or frame it and you're done!

See ya tomorrow with new Little Projects to make for Father's Day!
LinkWithin Related Stories Widget for Blogs Add to Technorati Favorites Share/Save/Bookmark