Showing posts with label Felt. Show all posts

{Heart} Bookcase Garland

 I have a {little} thing for books.  I think they are so fun and I love to have my favorites up on the shelf.  They sit there and are like old friends--it makes me happy just to see them!
 
But I thought it was time to dress them up a {little}.


 These are just simple felt hearts stitched together.  
 
I used the pinking shears on some of them, for a {little} extra fun!


I tried them across the mantel too.  
But I love how they hang down on the shelf so much better.

 
It's fun to have this bookcase garland hang down and go across a shelf and then hang down the next shelf too. 


This bookcase garland is nothing fancy at all, but it fancies those books up just right ;) 


Felt Farm Playmat (For Horses)


For Ellie's 2nd birthday I wanted to make her a gift to celebrate all the new things she is learning and will be mastering this coming year.  One thing that she is in LOVE with is horses, or "neigh neighs."  

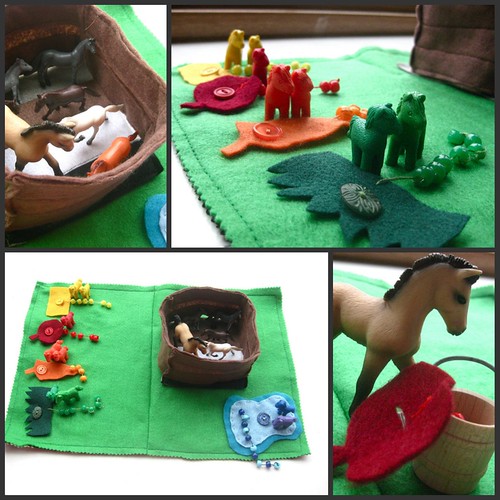
So the day before her birthday (while Ellie was napping) I whipped up {this little} Felt Farm Playmat.  You could use this idea with any favorite animal--or all of the farm together.  But we were throwing Ellie a Pony Party and so that's what you'll see below ;)


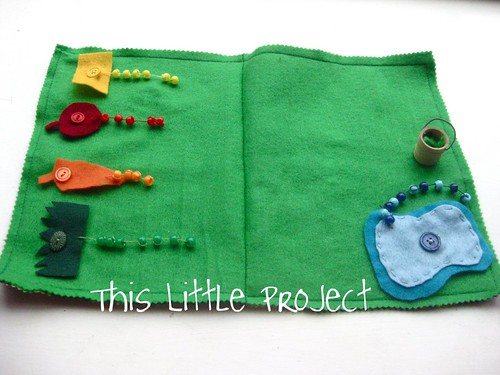
I started out with 2 pieces of felt and some buttons.  Ellie will be learning how to do buttons this coming year and this will be a fun way for her to practice them:

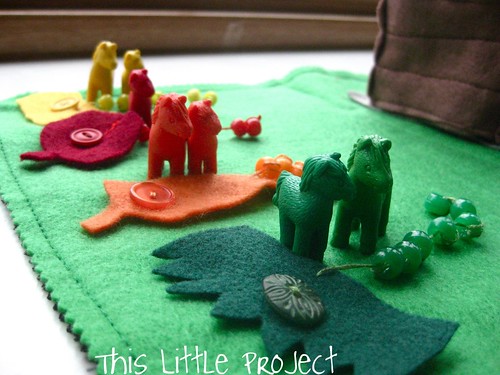
Each button color on the farm playmat coordinates with a kind of food that her horses eat (hay, apples, carrots, water, and grass--which is hay, I know!).  Since she's also learning how to count, I attached a different number of colored beads to each "food" for her to count.


I always use 3 strands of DMC floss (half of the whole strand it comes in) when I'm making something for my kids.  It's thicker than thread and holds up to play so much better than regular thread.


To attach the beads I just wrapped each one through twice and then went to the next one, stitching it to the "food," and tying it off at the end.

Ellie can unbutton the "food' and put it in the {little} bucket for the horses to eat:


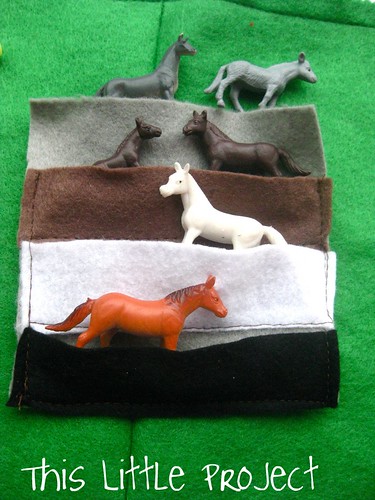
Ellie loves to sort {little} things right now and she's getting good with her colors.  So when I made the floor of the barn/corral I made it different colors.  And I didn't sew the whole color on, just the sides and bottom of it, turning it into lots of {little} pockets, which she also really likes right now.  

So now she can sort her "neigh neighs" into the pockets:


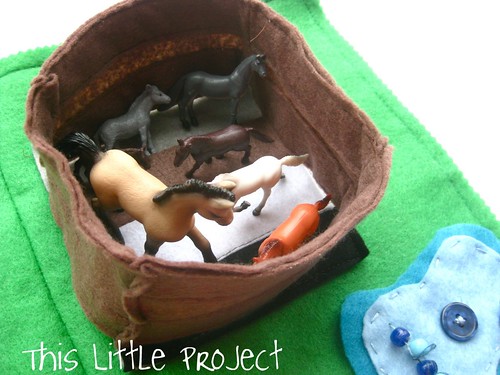
Or she can stand the animals up in the barn/corral.  For my 4 walls/fence I used a double layer of felt on the top and bottom to make it more sturdy.  Sewing all the edges of the felt together gave it a "wood" look.


Ellie also got these {little} horses for her birthday to play with.  They are perfect to sort with and fun to count with too.


You can find them here:


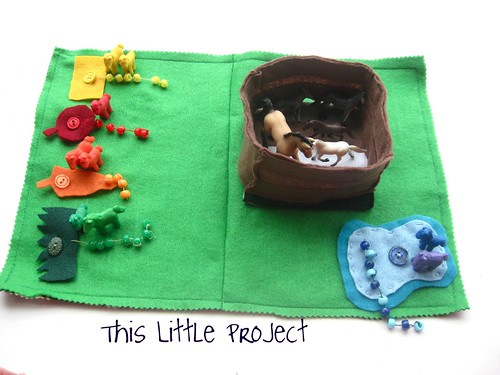
So this is what {this little project} looks like altogether:
I always love it when I can sneak a {little} learning into lots of great playtime.

The farm play mat was a hit--she loves it!

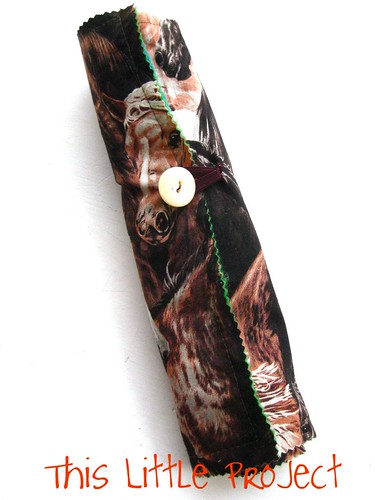
And I made it easy to clean up--it all rolls up into this, with the corral, food, and pond inside.

And it's portable.  All the horses and the bucket go into this cute {little} "neigh neigh" bag her grandma sent for her birthday (thanks Mom!)

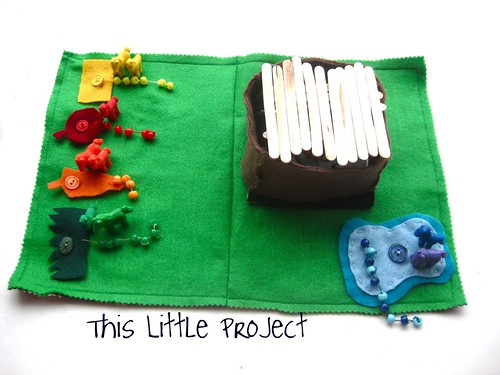
And Jay and Kay's contribution (other than active support while I was putting this altogether) was gluing a {little} roof together for the barn!

I'm totally in denial that my baby is two, and yet looking forward to all the fun we're going to have doing "little projects" together this year--I can't wait!


p.s. just a reminder that the Shabby Apple Dress Giveaway ends Sunday night!

Felt Turkey Toy

I have wanted to make this one for a while. Jay insisted that our turkey had a wing and not just feathers to button on. I used different colors of buttons to match the feathers so it's a matching game too. It has been a great manipulative for building fine motor skills and a fun way to enjoy turkey :)

Tom turkey in all his glory!

Make Some Flower Power


We made some of these Flower Power Rings and stems to send to my Grandma a few weeks ago when my Grandpa passed away. We wanted to send flowers that wouldn't die and this is what we came up with. They are also perfect for May day and Mother's Day too (and would be a fun sleepover or birthday craft too!)

You might remember that we made some of these little hand candies back in Februrary for Valentine's Day too.  If you want to see how to give them some bling, check out that post HERE.

Here are a couple of ideas for your flower designs.  You can make them whatever size works for your project-some are shown with the middle cut out-but DON'T DO THAT for making this project :)

To make the Flower Power Rings you will need: chenille stems, buttons, scissors, and felt (jewels and hot glue are optional-see Valentine's post above)

After you cut out your felt flowers you will use the scissors to cut small slits on the left and right side of each flower.  Then thread the chenille stem through the felt slit and the button like this:

After you are about half way through, put the stem through the other side of the button and then through the other slit in the felt flowers like this:

Here is what it looks like if you add a green leaf to the ring:

Now just wrap the remainder of the chenille stems around your finger (we did spirals) and there is your Flower Power ring-perfect for welcoming SPRING!

To make them into flowers instead, you only need to cut one slit in the middle of each felt flower.  Thread the chenille stem back down the same slit and wrap the end around the stem of the flower to hold it in place.  

{Little Project Tip:} You can kind of tell from this photo (I tried!) that I thread the green stem down through the felt leaves and then up through the lower one again and pull it tight to hold the leaves in place. Otherwise they slide around and can fall off.

To make a display of your beauties just put some pinto beans in a little pot and arrange your flower power stems.  They will brighten up any room (and can be made to match your color of decor if desired) and they won't die.

Grandma loved This Little Project, hope you do too :)

Snowflake Party!


My friend Andrea invited me and the kids over for a Snowflake Party yesterday. Since my little boy is still sharpening his scissor skills we did some practice snowflakes the day before. I found a bunch of great ideas to share about snowflakes and how to make some really fun designs. 

We made a great big mess (standard with any of our little projects) both at our house and at Andrea's.  Bonus: a snowflake party makes its own confetti too! Add some hot chocolate and you are in for quite the treat. It was so fun-thanks Andrea for the great idea and all the fun! Also, in all this snowflake making I made some fun SNOWBALLS! Look for a tutorial coming soon!

Have you wondered about how snowflakes are made?  Here are some fast facts.

This snowflake curtain makes a perfect backdrop for your winter wonderland! There are paper snowflakes for kids. And then there are paper snowflakes for adults. I've included links both so that everyone gets to have fun :)

These are the WOW! kind. Make one of these for a friend and their jaw will drop. There is a tutorial Here. For added inspiration check out the flickr "The Great Paper Snowflake Group"


We had fun creating colorful paper snowflakes by using double-sided scrapbook paper. It is a fun twist on the traditional white ones. Here are some patterns for the kids to get you started. And a VIDEO tutorial.

If you love crochet, you will love creating this kind of Winter Wonderland


Here is a fun way to do homemade snowflake window clings
.


If you want to add some 3D snowflakes do these with beads, pipe cleaners, and pom poms! The kids could help you make these snowflakes. Hang them from the ceiling for a fun affect.


This is a fun tutorial for a snowflake garland cut from newspapers!


Wouldn't you just love to have these snowflake soaps beauties in your soap dish!


We had a fun time creating a winter wonderland with This Little Project, hope you do too!  Look for the snowball tutorial soon!  

For your Little Pumpkin


Aren't these adorable Little Pumpkins! Pattern Bee is offering a pattern to make these DARLING pumpkins for FREE! Yes really! They would be darling as a table decoration for that upcoming turkey dinner. Or give one to your favorite little pumpkin and tell them thankful you are for them.

LinkWithin Related Stories Widget for Blogs Add to Technorati Favorites Share/Save/Bookmark