Showing posts with label Thanksgiving. Show all posts

Thanksgiving Blessing Mix Printable


I've shared our family's favorite Blessing Mix before. It's a treat we love to give to family and friends. This year I made a printable to go with it. 

 I finished {this little project} weeks ago but with all our baby preparations and being on partial bed rest I haven't shared it here. 
 Luckily, we can be thankful all year long :) 
 

 Below are files in color and black and white of the Thanksgiving Mix Printable: Thanksgiving Blessing Mix Printable 
B&W Thanksgiving Blessing Mix Printable 
Wishing you and your family a WONDERFUL Thanksgiving! 

Thanksgiving Tangrams (free)

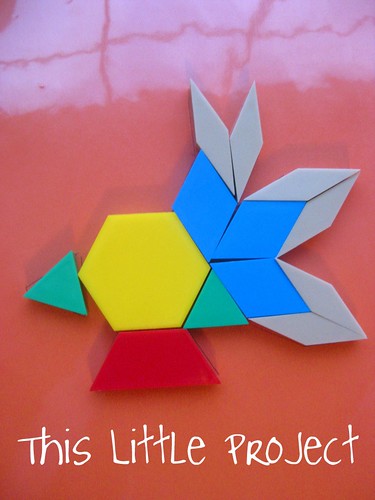
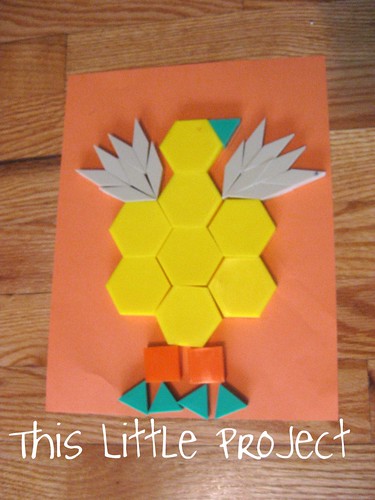
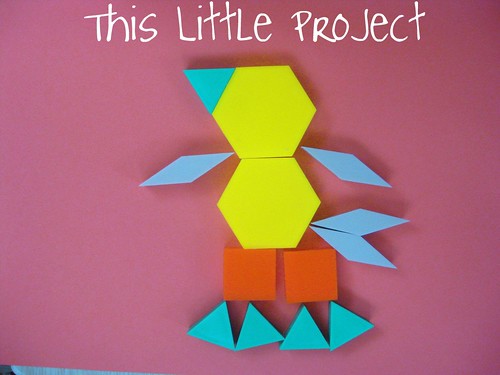
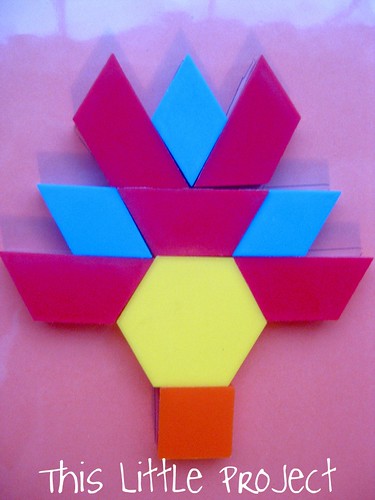
We have been having a lot of fun designing some Thanksgiving tangrams in our math work this week.  I started out making {this little project}, but Jay quickly took the lead.  I love watching {little} people at work.  It gives a glimpse into what's on their mind.

Since there aren't many Thanksgiving tangrams available for use on the web, I've included pictures for anyone else wanting to do {this little project}.  I was going to upload the printable patterns, but my scanner isn't working.  Hopefully the photos will be inspiration enough to get you going.

No offense intended in any of these depictions.  After all there's only so much detail you can do with simple shapes.

My turkey:


Jay's turkey:

See what I mean?  I love it!

He also made a {little} baby turkey:


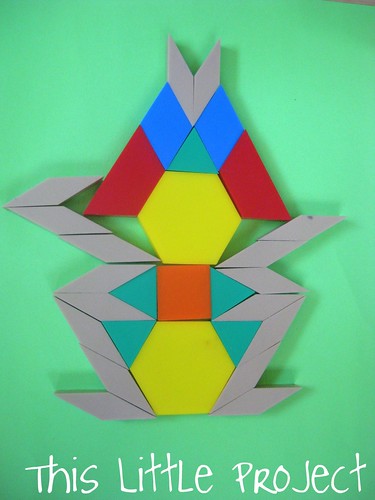
A Native American headdress:


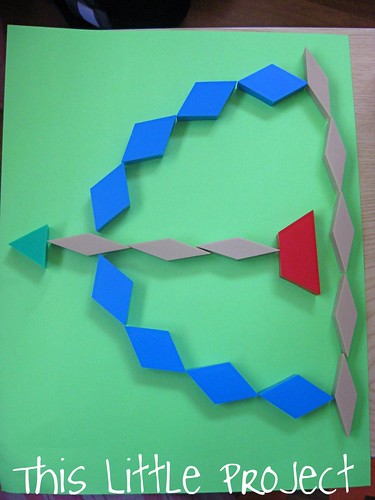
A bow and arrow (this was Jay's idea all the way):


Native American sitting:


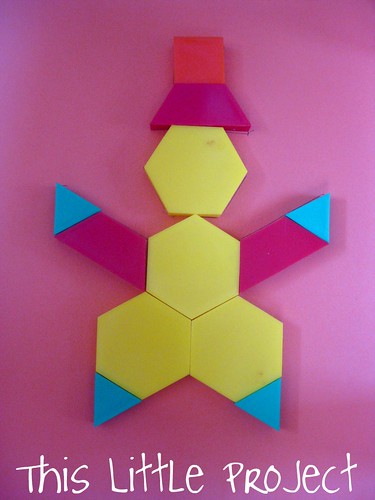
Pilgrim:


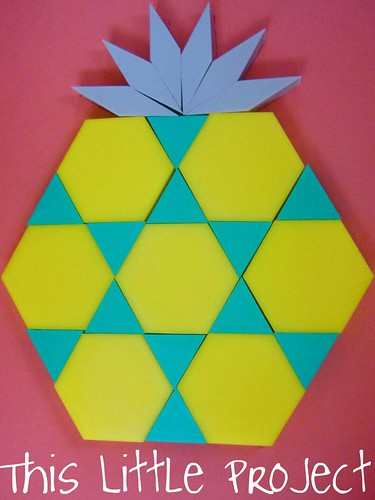
Pineapple?  I know, it's not really a traditional Thanksgiving idea.  But trying to make corn turned into pineapple.  Oh well!

And after we finished ours, I looked on the web and loved the ones we found here, especially the mayflower.  We'll have to try that one now!

This is what we use to create our tangrams:

If you have kids coming to your Thanksgiving dinner, challenging them to create their own Thanksgiving tangrams should keep the the {little} people busy for awhile!


Note Card Caddy

Sometimes I'm a sneaky mom.  
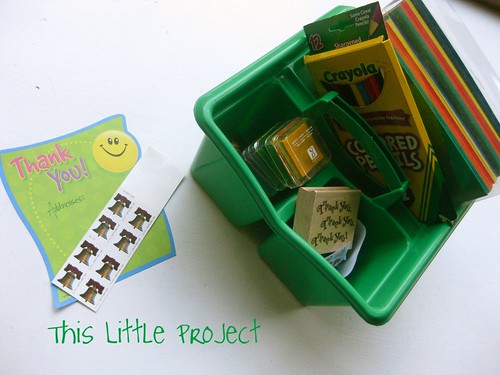
{This little project} looks like a box of fun stamps, cards, stickers, etc. 

But it is a disguise for teaching my kids how to write thank you notes and practice their handwriting and spelling.
We've been using it for a few months and they don't know it yet!

Even though I made {this little project} for the kids I decided that I had to make one for me too!  

At this time of year we take a little extra time to be grateful.  
{This little project} has made it a little easier 
to say "thank you" all year round.


Just today one of our neighbors gave Jay a plant (he loves plants!) when he came home he said, "Mom I should write her a thank you card."  That's music to a mom's ears.  

To make {this little project} 
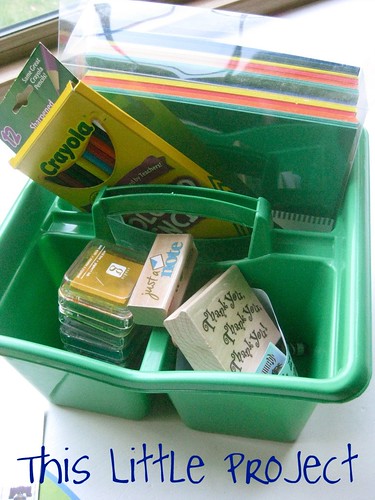
I used a cleaning caddy because I love the handle and that it naturally separates all of our supplies.

Our Note Card Caddy has:
blank cards and envelopes (we send a lot of happy birthday cards too)
stamps and ink pads
colored pencils
stickers
addresses
postage stamps
crayons/markers

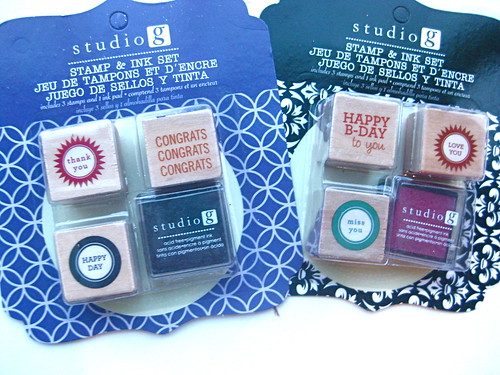
And just this week I picked these up for $1 each at Michaels.  With these six stamps you pretty much have every occasion covered.

And if you are nervous about kids and stamps/ink, here is a {little project tip}: I keep a couple of my old t-shirts near this box.  The kids can slip it on over their clothes and slip it back off when they are done.  easy.

We also wet a paper towel to stamp the extra ink off of the stamp.  I love watching them learn to take responsibility for their things.


Actually, this Note Card Caddy is an extension of {this little project} from the past.  
There's nothing like a pen pal for making writing fun!


Even with all our technology, there's nothing like getting a hand-written note.

Thanks for stopping by today!

Mr. Potato Head Turkey


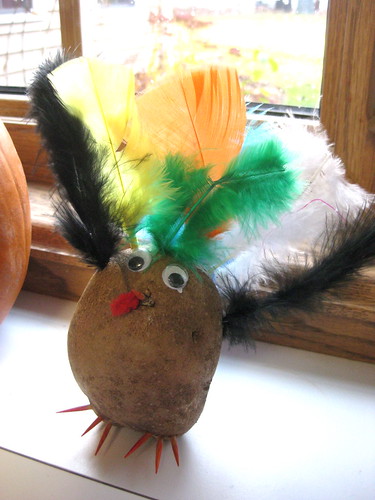
Jay came home from his art class with this potato-head styled turkey. It was so cute I had to share.
He's so proud of himself for making it (toothpicks and feathers-including one in the back to help him stand) but doesn't think it's funny when we talk about cooking him up for Thanksgiving!


My Favorite Pie Recipe

Whenever I get the chance to make pie I go for this one:
Sour Cream Apple Pie.
The recipe comes from an old friend of my mother's. Every time I serve it people ask for the recipe. So here we go!
(I'll give you an easy pie crust recipe to go with it too-down at the end.)

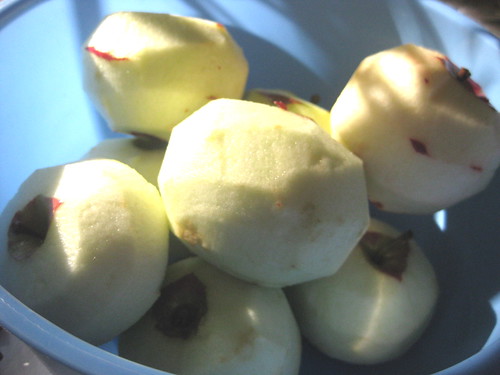
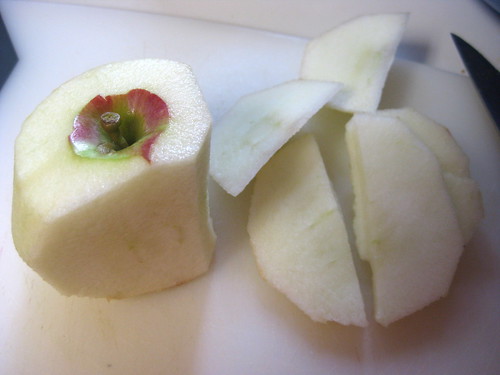
You need 3 cups of apples-peeled and cored. {Little Project Tip:} If you don't have one of those handy little things the slicing and coring for you just cut around as you go-see photo. It's faster than cutting into 4's and slicing the seeds out. Plus you end up with nice small pieces.

{Little Project Tip:} I think it's easier to peel the apple in one long peel going around and around. But that's just me. I love adding such a cheery bit of color to the compost pile-but that's just me too!


Sour Cream Apple Pie Recipe:
2 eggs beaten
1 cup sour cream
1 cup sugar
2 T flour
1 tsp vanilla
1/4 tsp salt
3 cups apples (peeled/cored and sliced)

Crumble for top of pie:
3 T. butter
1/4 cup brown sugar
1/4 cup flour
Directions: Combine eggs and sour cream. Add sugar. Then add flour, vanilla, and salt. Apples go in last.
Pour into an unbaked pie crust (see recipe below) and bake for 15 minutes at 375 degrees. Then sprinkle with the brown sugar crumble and finish baking 20-25 minutes


So many people are afraid of making pie crust. I love this recipe because it always turns out and it's so EASY!

Pie Crust Recipe:
2 1/2 cups flour
1 cup shortening
1/2 tsp salt
1 egg
1 T white vinegar
1/4 cup water
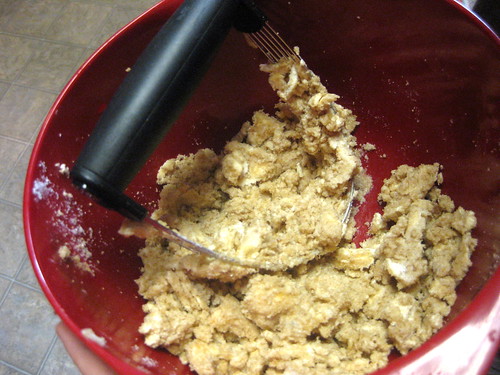
Just throw all the ingredients in your Kitchen Aid or Bosch and it turns out great.
(makes three 9 inch crusts or four 8 inch)

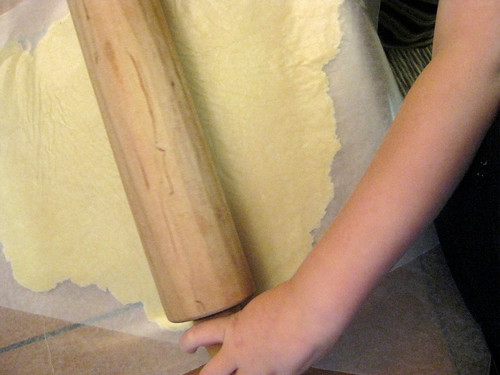
To roll it out, start with a ball of dough and sandwich it between two layers of wax paper. Roll and then release each side of the paper and roll again as needed. If it sticks too much to the wax paper sprinkle a tiny bit of flour. It gets easier each time you do it.
One other {Little Project Tip}: I use enough wax paper that I have some extra hanging over the edge of the table or counter so that I can lean against it to keep it from moving around as I roll.

Enjoy This YUMMY Little Project! It's best served warm, but it's great the next day too :)
Trust me, it's the best!

Thanksgiving Kid's Crafts

We've done a couple more kid's crafts that would also be fun the day of if you are hosting a big group with kids for Thanksgiving so I thought I would share them with you.
This paper plate turkey is easy to make and also great for little fingers to practice their coordination with the clothespins.
I used packing tape to wrap the end of each feather onto a clothespin and they've held well. Then just have the kids draw their turkey face on the plate.

Thanksgiving is a great time for This Little Project's Doodle Rubbings. If you haven't seen the past post on these, check THIS out. They are EASY to make and cost next to nothing too.

We rubbed Happy Thanksgiving (you only need to make one rubbing sheet since the kids can share that)
Then traced our hands in the middle and turned them into turkeys by coloring the feathers.
Then glued colored fruit cereal on with elmer's glue.
Set aside to dry.
Easy and fun! I'm hosting Thanksgiving for the first time this year and finding that it's a whole lot of {Little Projects}. Wishing you and your family a VERY Happy Thanksgiving!

My Little Turkey (T-shirt)

I whipped this little shirt up in no time for my Little Turkey (aka Kay) to wear. It had a stain on the front and I love that she can wear it again now thanks to the turkey and all its feathers. I included two pink "feathers" because I knew she would never wear it otherwise-she is such a silly turkey!

To make yours, use 3-4 inches of ribbon for each "feather" and the turkey is made of orange knit (cut from an old t-shirt) roughly the shape of a drumbone. I used french knots for the eyes and stitched a little beak too before pinning the turkey to the shirt. Use a pin for each ribbon and they won't move on you. For a feathered look, use pinking shears around the turkey's body once you have the shape cut out. A cute little zig zag stitch is the perfect touch to sew it on with. EASY if I can do it-you can too!

Then let your favorite Little Turkey wear it :)

Thanksgiving Kid's Game

I'm getting some games and crafts together got a kid's Thanksgiving party this week and made this game board. It is just a variation on one of our VERY FAVORITE games: "Don't Eat Pete."

We love this game because any age can enjoy it. Even little Kay has it totally down.
The images are from the internet-they aren't mine so just use them for home use :) Just click on the image to see it full size and then print. You will want to print it on heavy paper, laminate it, or use a page protector.

How to play "Don't Eat Tom Turkey"
Cover each of the turkeys with a small snack or treat (cereal, trail mix, m&ms, etc.)
One person in the group goes out of the room.
One of the Turkeys on the game board is chosen by the group to be "the Tom Turkey."
The person comes back in the room and chooses a snack and eats it from off of each turkey. When they get to "the Tom Turkey" that was chosen by the group, everyone else yells, "Don't eat Tom Turkey!!"
That person's turn is over and a new person goes out of the room to repeat the game.
You can play as many rounds as you like, or print off multiple boards if you have a big group.

This would be a great game to play to keep the kids busy on Thanksgiving day. Since they each take turns, no one will get to full of snacks :)

Thanksgiving Blessing Mix

I love treats with meaning (probably because I don't feel so guilty eating them!)
This Thanksgiving Blessing Mix is perfect for your candy dish, a family get together, or gift for a friend or neighbor.

Here's what's in the Blessing Mix: (If I was super photoshop smart I would make this all cute so you could print it out cute on a card...but I'm not :)

Bugles: Cornucopia or Horn of Plenty: a symbol of our abundance

Candy Corn: Sacrifices of the Pilgrims' first winter. Food was so scarce that the settlers survived on just a few kernels of corn a day.

Pretzels: Arms folded in prayer, a freedom sought by those who founded our country.

Sunflower seeds: Promis of a future harvest, one we will reap only if seeds are planted and tended with diligence.

Cranberries: Harvest gifts of our bountiful land.

M&M's: Memories of those who came before us to guide us to a blessed future.

Enjoy a tasty reminder of how blessed we truly are!

Felt Turkey Toy

I have wanted to make this one for a while. Jay insisted that our turkey had a wing and not just feathers to button on. I used different colors of buttons to match the feathers so it's a matching game too. It has been a great manipulative for building fine motor skills and a fun way to enjoy turkey :)

Tom turkey in all his glory!

Gratitude Tree


Thank you all for your caring words. My husband was able to come home after 5 days at the hospital. The day before his emergency (unable to breathe) I was working on our "Gratitude Tree." I cut it out of fabric (a 25 cent thrift store shirt-I love repurposing!) so that we can use it from year to year. The idea is that we would be able to write things we are grateful for on the leaves of the tree. I had no idea that the tree would not go up because of a near-death experience, but it seems all the more meaningful now. My first leaf on the tree was "Daddy is home." What a great BIG blessing!

Here's how the Gratitude Tree came to life:
1-Brown light-weight shirt

2-Cut out tree top from newspaper (free hand) and lay it on brown shirt. I did have to cut the shirt arm seams to get the fabric to lay straight enough.

3- Here is the top of the tree

4-I used left overs to piece the trunk together. The sleeve cuffs are the "roots."

4-Here it is on the wall. I just used some handi-tac (you know that rubber/gum feeling stuff that you can use instead of tape) to stick it to the wall.
The letters are yarn made like our yarn cards.

5- Jay decided that since we had seen so many birds lately we needed some in the tree. I just used cereal boxes for our pattern and we went crazy with the birds. I'll try and get the pattern up for you to use...

6-Then we added our leaves with our blessings written on them to the tree. We'll add a few each day this month.
This little tree has been a bright spot in our home. It's certainly a reminder of how precious life is. I'm grateful for you who stop by to say hello. My family and our Little Projects fill my life with fulness and joy. Enjoy counting your blessings!

A Mobile For All Seasons


I have had the idea for this mobile for a long time and I FINALLY sat down and made it-and just in time to put these funny turkeys on (my son has been BEGGING for this!)

My big plan is to make something for each season/holiday to hang on the mobile. Be sure to check back for Christmas hangings. If you have some fun ideas for hangings, please do share too!

My favorite part is how inexpensive this Little Project was! Just a few wooden embroidery hoops (mine were 50 cents each) and some clear nylon thread (I wanted it to hang from thin air :)

I bought my little turkeys at the dollar store a few years ago, so no tips on that. But really, if my son weren't so intent on them, I think I would hang some of those cute little pumpkins I posted about.

To make your Mobile For All Seasons you need:
nylon thread
glue gun
scissors
3 different sized embroidery hoops
I used Pooch yarn for the fun texture for the hangings.
(you can disregard the plastic circle in the photo. I ended up not using it :)


Each embroidery hoop comes with 2 pieces. You actually only need one of the hoops from each size. I used the one without the metal piece.
I tied 2 pieces of nylon thread across each hoop so that they crossed in the middle evenly.  It basically looks like a hoop with a big + sign in the middle of it.
Then I tied a length to the middle of each of the hoop crosses. The nylon thread is slippery and moves even after you tie it. It is important to make sure that it is centered first (hold it from the thread and see how it hangs) and then put a dob (if that is a word) of hot glue to hold it centered in the hoop. It is important that it hangs LEVEL. So be sure to do this step!! After it is hanging level tie the other end of the length to the other hoop of the next level
Repeat for each level. You can make them as far apart or as close together as you please, depending on how high your ceiling is.
I used the Pooch yarn to attach my hangings (in this case turkeys :) Note: The Pooch yarn can unravel. Just knot it to stop it. The knot fits right in with the fun texture.

I used the wood embroidery hoops. You could also cover the hoops or paint them the color of your choice.

I think this would also be a fun little project for a mobile in the baby's room. I think I might try that next :)


Fun how they hang in mid-air, don't you think? :)

LinkWithin Related Stories Widget for Blogs Add to Technorati Favorites Share/Save/Bookmark