Showing posts with label Music. Show all posts

Patriotic Geography Learning

Originally shared as a Music and Movement guest post at abcand123learning.com

 With Independence Day coming up, we've been working on learning our country's geography in one of our favorite ways: with music and movement!

I have a four-year-old and she goes around the house singing the names of all 50 states in alphabetical order.  I love the magic that music gives children!

Here is the song she's been singing:

I love how this video shows the shapes of the states.  It helps her to "see" the state she is singing about and now she can point to and name all her states on a map too.


My six-year-old son already knows his states so he's been singing along with this song that is about each state and the order they joined the union:


This song is fun for learning or reviewing the state capitals:


One game we like to play with the US map is the, Map Munching Game AND the"Don't eat the State" games!  This is a really fun way to review and learn new state geography.

Another game we like to play is with an inflated globe.  We call it "Where in the U.S. is....?"  or "Where in the world is....?"
I hope these movement and music ideas make learning even more fun for you too!

Happy Fourth of July!


Cinco de Mayo and Mexico Learning

Originally shared at abcand123learning.com as part of the Music and Movement Series.

One of the things that I love about being a musician and a dancer is that it brings me full circle in what I am learning about. It's one thing to read about a place in a book. But if you really want to get to know a people you've got to listen to their music and language and watch (and try!) the movements of their people's dance. That's where you will find a true reflection of a people's traditions and culture.

I hope that you will enjoy traveling around the world-in the comfort of your own home-to learn about cultures as well as the joy of music and movement and dance with your children and students!

To celebrate Cinco de Mayo, today we will be learning about the music and movement in MEXICO!

Mexican dance is done in character shoes (shoe with a heel) for girls, and a cowboy boot for boys.

To get started, watch this video that shoes some of the different styles of Mexican Dance:


In this clip you will learn about the costume that the women wear when they dance.  You can also see the character shoes:

This lets you see some of the dancing up close!  The dance is "percussive" which means that the shoes are not just for dancing in.  They are also to make sounds with.
  You might like to try making sounds with your feet too!

Mariachi music is the style of music that we often think of when we hear Mexican music.
The word mariachi refers to the musicians now commonly seen in restaurants or strolling the streets, dressed in silver studded charro outfits with wide brimmed hats playing a variety of instruments which include violins, guitars, basses, vihuelas (a 5 string guitar) and trumpets.

This is a song we often hear in Spanish, the language spoken in much of Mexico with the mariachi style of music.

Mariachi songs speak about machismo, love, betrayal, death, politics, revolutionary heroes and even animals (one particularly famous song is "La Cucaracha").

Mexican dance is also for boys!

Now YOU Try!

Some things you really have to try to appreciate or understand them.

These activities will help you do that!

La Cucaracha song with the words in Spanish.  Try singing along!


Here is a child dancing with her skirt.  Try dancing like her!


Have you heard of the Mexican Hat Dance?  Try dancing it along with these children!

Make your own maracas 
out of your left over plastic eggs from Easter with the instructions: HERE


Link to Mexican flag coloring page: HERE
Coloring page flag Mexico


Link to coloring page of mariachi players: HERE
Coloring page Mexican musicians

Try making music with
  Mexican musical instruments with the game HERE

Now you will be all ready for Cinco de Mayo!


Good Luck Treat Tag Printable

This past week was a {little} extra busy around here.  We had our Nana here, celebrated Ellie's birthday, and all my piano students completed a major national piano test.  I'm a nationally certified teacher in piano performance and {LOVE} teaching.  But this test was not for the faint-hearted!


This test pulled out all the stops with testing in performance, sight reading, theory, transposition, technique, and ear training.  I've never heard so many talented pianists in one day before.  These kids were amazing and worked so hard.  It was more of a {little} by {little} kind of project, since it added up to a big day!


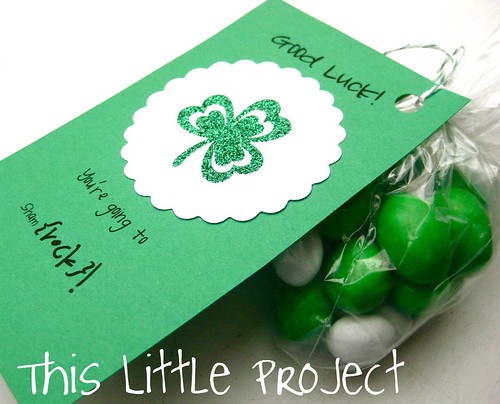
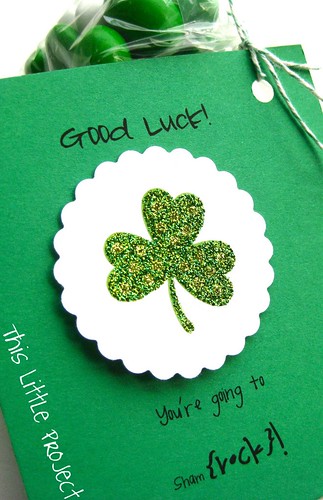
I wanted to send my students with a {little} extra luck so I sent them home with {this little} good luck treat at their lesson.  


Here's a little money-saving tip: I love to buy extra bags of m&m's after Christmas when they are on sale.  I pull out the red ones for Valentine's Day and the green ones for St. Patty's day.  This year I got extra bags of mint m&m's and there were white and green together in them.  I knew they would be perfect for {this little project} in March...and don't worry, the expiration date on those bags of yummy Christmas m&m's isn't even close yet!


For {this little project} I used the "fonts for peas" fonts by Kevin and Amanda on the gift tag.  They are some of my favorite fonts and they are free to download!  


March seems to be a busy month with all kinds of reasons to send some good luck vibes so I'll share the tag so you can send some good luck too!


These {little} tags are simple to make: punched circle, sticker shamrock, green baker's twine, and a printed green tag (above), with green and white m&m's.


Have fun sending someone some extra luck!

Practice Abacus--Abracadabra!


I'm excited to share something we've enjoyed a lot in our home.  {This Little Project} is perfect for back-to-school music practicing too.

It's magic! really!
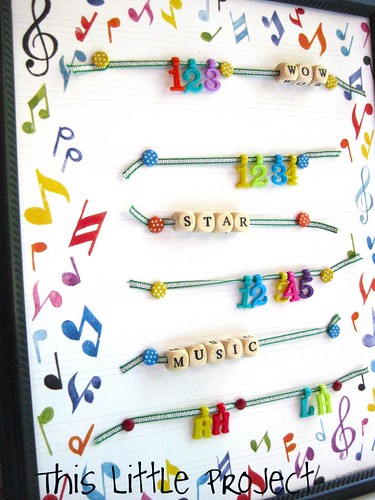
I call it the Abracadabra Practice Abacus.

You remember what an abacus is, right?  It's kind of an old-school calculator--with the beads you move around to count things.  


Well...
Sometimes when I'm trying to encourage my kids with their music practice, we need a little magic to make it all happen--otherwise practicing is no {little project}.  That's where the Abracadabra Practice Abacus comes in.

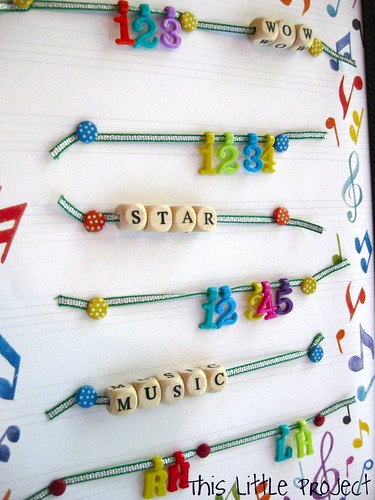
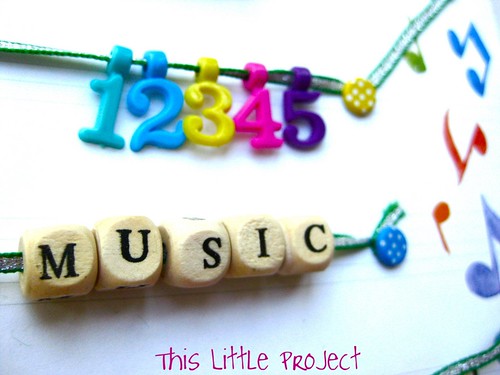
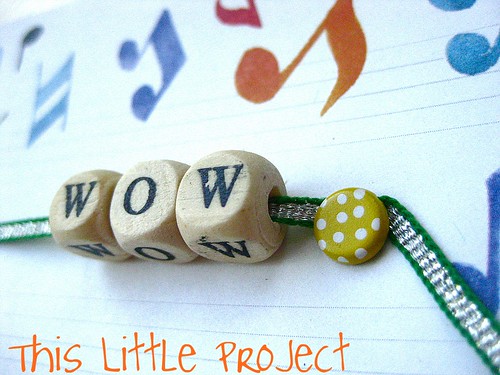
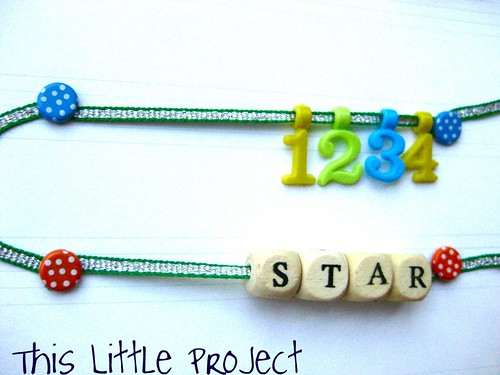
Each string has a number of beads or beads that spell a word.  Want to know why?

Because: repetition is magic.  

Kids like to do things once. But things don't improve much with one try.  But give it a few consecutive tries and you'll get some nice progress!  It's kind of like magic.


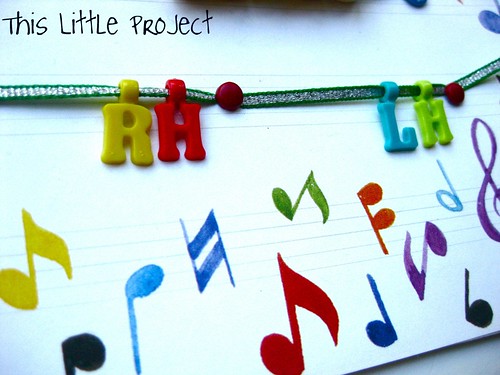
So, on the Abracadabra Practice Abacus you will find places to count 5 repetitions (see above), 4 repetitions, 3 repetitions, and 2 repetitions (rh/lh).  That way there is a fun way to keep track of those repetition and make the magic happen!

Need some magic a your house?  
{This Little Project} might be your magic wand!


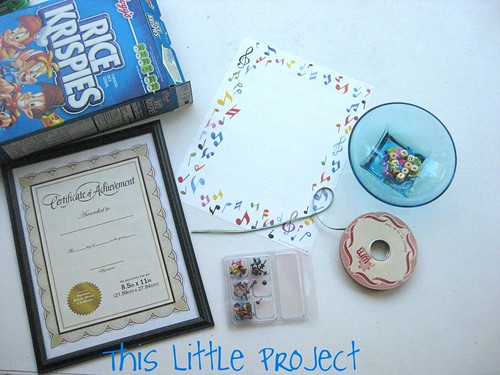
To make {This Little Project} you need:

a cereal box

a frame (matches the size of your mounting paper)

1/8 inch ribbon


Scissors

Brads

a piece of paper to mount it on (that fits your frame)

glue stick

binder clips

optional: overhead projector sheet (plastic) 


Directions to make {This Little Project}:
(hint: read all the directions before you start--I'm hoping this makes sense!)


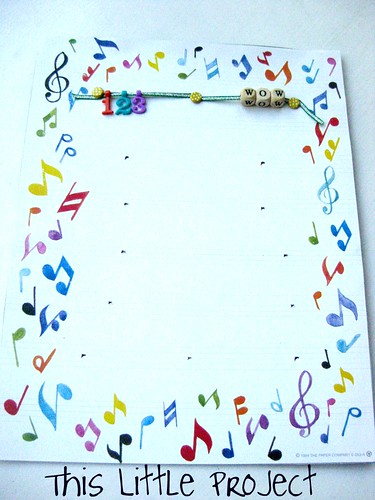
First- cut your cereal box to the size of the paper you are mounting. Glue the paper to the cardboard.

Then decide where your lines of beads will go and mark the paper where the brads will go in.


If you think your Practice Abacus will get a lot of use you may want to put a overhead projector sheet over the top of the paper to mount the beads and brads on.  It's kind of like laminating it.  Use the binder clips to hold it on while you punch the holes.

I punched the holes with my scissors, but a different tool might be nice.

Cut your ribbon lengths at least 2 inches longer than they need to be to go across the paper because you will wrap the brads.  You can trim the extra at the end.


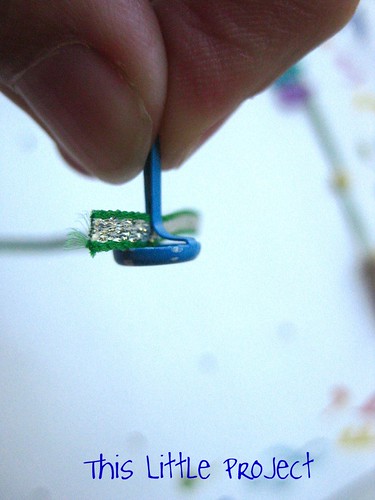
The brad will hold the ribbon in place on the abacus.  First thread it through the middle of the brad like this:


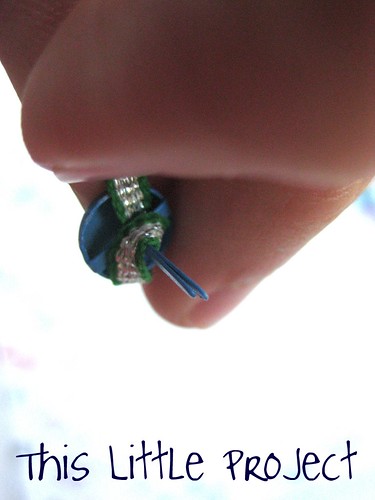
Then wrap it around the brad once like this, before putting it through the hole you created on the left side of the paper.  Spread the brad open on the back of the cardboard to secure it.


Now just decide how many beads you want on that line of your abacus.  
Next thread your beads on the ribbon.

If you have room, you can put a brad in the middle of the paper (not just on the sides) so that you can have two different counters that move on the same ribbon line, like this one.


The RH/LH line we use for when Jay needs to do 2 repetitions of something on each hand.

The reason I did 2 different counters of 4 each like the one below is so that Jay can either count the word out or count with the numbers.  He can also use it for doing 4 on one hand and 4 on the other hand.  It's nice to be able to track how many and it's fun too!


Continue putting brads into the holes you marked until you have the number of counters you would like.

For my Practice Abacus I put the "3's" at the top, then the "4's", then the "5's", followed by the 2 (RH/LH) at the end.


Abracadabra, it's done! 

 Now watch the magic happen at your house as you use your Practice Abacus!

Music at my House: Organizing the Music


Have you ever lost a music book at your house?  I've taught music lessons for about 15 years.  And it seems to be a common problem.  

At our house I like to use "Montessori-Inspired" organization.  In other words: accessible to my kids so they can practice taking responsibility for themselves in addition to practicing their music.  

Right now I am loving these:

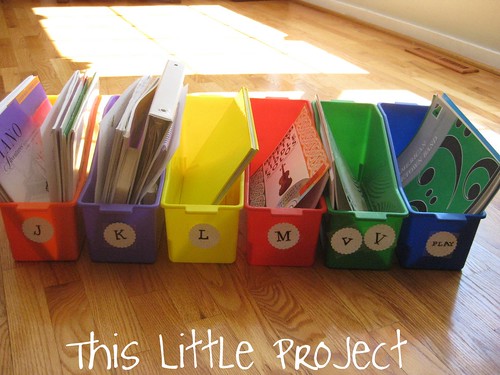
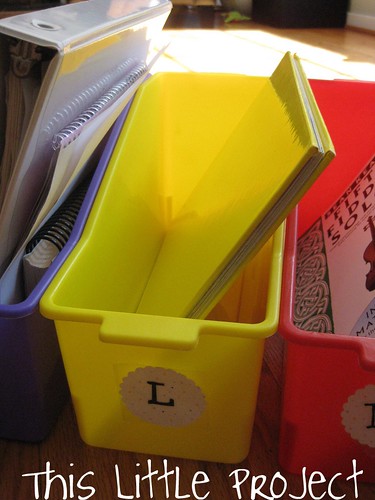
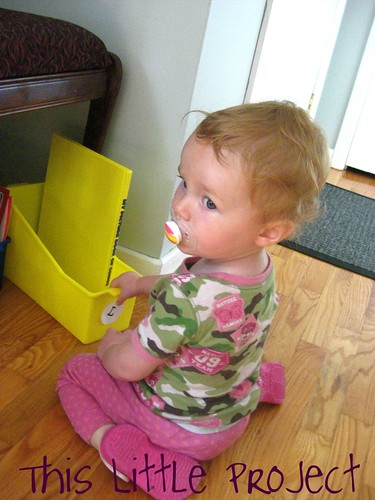
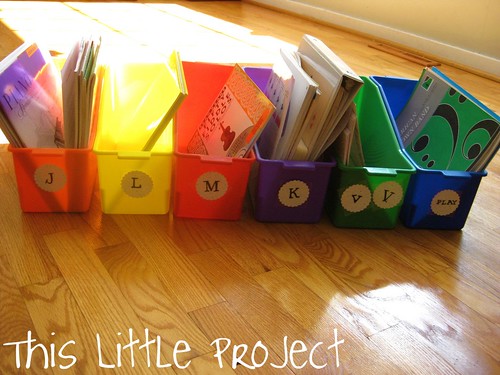
I recently got these bins from the Target dollar spot (for $2.50) with the back-to-school things.  The tag on them says they are "locker bins" but when I saw them I thought, "Wow-those would be perfect for our music books!"  

So I bought 3 to try them out.  They are the perfect size and since they are longer than they are tall, they don't tip over like regular magazine box storage--which would be very frustrating for kids.  Also, they are heavy duty plastic and will hold up to daily use.  I went back and got three more-one of every color!


To label them I just punched paper, stickered on a monogram and did lazy laminating (packaging tape covering the paper punch) and they were ready to go. 

 Ellie likes taking her tag on and off.  These are kid friendly  :)  
Ellie doesn't take lessons yet.  Her book and bin is to remind me to play and sing to her!

These bins keep everything in one place: lesson assignments, practice records, music magazine, theory exercises, listening CDs, history reading, manuscript paper, as well as their books of music.   It's  also very easy for the kids to see what is inside these kinds of boxes so they like using them.


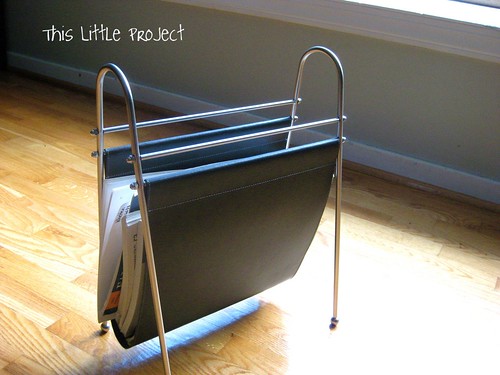
To give you some more ideas, I also love my steel and black leather magazine holder.  I've had this for about 7 years and it is my favorite thing to keep right next to the piano for all the books that I use most.


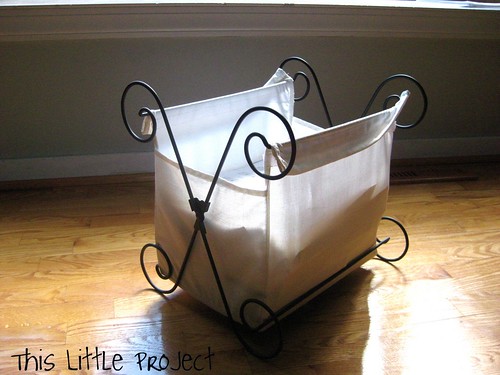
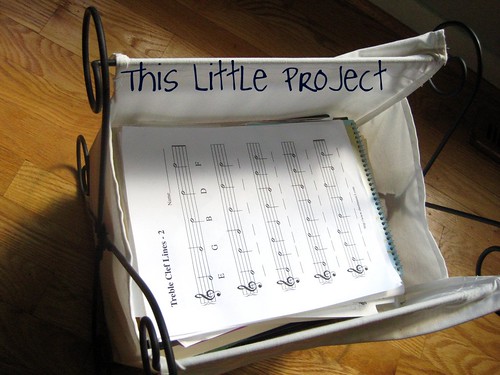
This is the other bin that I keep near the piano.  It's metal and cloth.  It's the perfect size for music books.  I like it because the books can either stand up in it or lay flat.  


It's from IKEA--about a year ago.  I looked on their website and couldn't find a link though.  So I'm not sure if they still carry this.  If you live close to an IKEA store, now you have a good excuse to go shopping and find out  ;)


It's nice to have a clear place for everybody's things.  Here's to no more lost music books and fewer music books stacked all over the piano!

Talking about France Today


I'm over at ABCand123learning.com today.  


abc button


Come on over. I'm writing about Music and Movement in France for kids.


Violins for Little People


This is Jay holding his cardboard box violin.
A lot of our projects have to do with music and I thought I would share this one with you.  I graduated in Piano Performance and Pedagogy and I also played the violin growing up.  At our house we believe that little people can do big, wonderful things.  We love music around here and the fact that there are students coming for lessons everyday at our house means my kids think that music lessons are something that everyone does; so normal.

While I have been teaching music and piano lessons to Jay since he was 2, we decided that it is time for him to start violin lessons.  He tries to play the violin with any 2 sticks he can find.  The photo above is of him with his box violin that I made from a Rice-a-Roni box (it was the perfect size) and a ruler, covered with orange paper.  

The foot positions he is standing on are crayon traced on a brown paper bag.  He loves it!  He feels so big holding it and practicing the things he knows.  He really loves making music and is so excited....

Because this past weekend we picked up his 1/16 size violin.  That's the size our little 3-year-old-boy fits.  It seriously looks like a toy (to me) because it's so tiny.  After we picked it up he told me, "Mom, the violin is my favorite."  I'm sure I will remind him that he said that one of these days when he would rather not practice :)  But for now, he is mesmerized by the idea of learning to play!  

We drove 2 hours to go pick it up.  Jay wouldn't put it down.  He had to hold his violin all the way home. It's only 2 hours...
Do you have any tiny musicians in your family or circle of friends?  I would love any tips :)  I am excited to start this journey with Jay.  He is already telling Kay that when she is bigger he will share his violin with her.  Such a nice big brother he is!

I just ordered this book: 


And this book:
   
to get us started, since I will be his teacher for now.
They came highly recommended to me and I will review it on my other blog, in case you would like the details.  I'm never sure who all stops by, so if you would be interested in learning about what we are doing with music on a basic level so you can do more with your kids at home do a shout-out and leave a comment below.  I would be happy to share more of our music project fun with you!

Wish me luck-this tiny violin stuff is all new to me!

How to Make Homemade Maracas

As usual, we look forward to an excuse to have a little fun around here. Being that today is Cinco de Mayo, we went for some homemade maracas (from plastic Easter eggs) and a skirt made from 2 place mats (from the dollar store) and quesdillas for lunch (of course).

To make some noise and celebrate, here are some easy directions for homemade maracas (being a music teacher, I'm excited to add these to our collection!)

You need: Plastic Easter eggs, beans, rice, flour, water, salt, crepe paper, modge podge or other sealer.

Put some rice and beans into your plastic egg and then close it. (of course, you may choose anything that is noisy. Beans and rice were handy and appropriate for the day.)

For the "glue" you need one part flour to two parts water. I added about 1.5 teaspoons of salt. The amount of mix will vary depending on how many you make.

Cut your crepe paper (I used the kind that you can make streamers with and comes on a roll) into pieces. Dip the pieces of crepe paper in the "flour sauce" and put them over your plastic egg. Cover it with a couple of layers and let it dry.

When it is dry put a layer or two of modge podge to seal it so it will last through lots of fun noise making.

Play, shake, and listen!
I put a few more flowers hair clips in the shop so you can crown your princess with flowers too :)

I've had this white trim for awhile and it seemed like the perfect thing to dress up a skirt I made from 2 dollar store place mats. Little Kay loves it!
Happy Cinco de Mayo!

Lovin' These Tunes


Thinking of how to describe this children's CD, the words that come to mind: beautiful, peaceful, fun, reverent, soothing, folksy, friendly, contagious, again.

It's called, "You Are My Little Bird" by Elizabeth Mitchell.
You can preview some of the songs if you go to amazon, put the title in the search, and then scroll all the way down to the player.
We listen to this CD over and over again. It's a children's CD that you will love to have in your home.

If you are looking for a beautiful children's book to look through while you listen, try out A child's day : an alphabet of play by Ida Pearle.

Have a beautiful Little Project day!

LinkWithin Related Stories Widget for Blogs Add to Technorati Favorites Share/Save/Bookmark