

You know that idiom, Necessity is the Mother of Invention?
Well, it's true. I discovered an easy and inexpensive way to frame art that has the perk of being shatterproof- and it even looks pretty! You may remember back to Mother's Day when I was working on doing some sillouettes of my kids to send off to grandparents. Well, I had a problem: I didn't want to send them in frames that might brake in the mail, and I felt lame telling them to go buy their own frame for it :)
Since then, I've determined that these frames are awesome for mailing (think mailing a portrait of Grandpa for Father's Day that your child did) AND they are also a great way to frame kid art in a kid-friendly way ie: shatterproof. You know how it is: your child loves the art work he made and wants you to hang it up. But he also wants to carry it around and show everyone what he did. Well, now he CAN :)
Since then, I've determined that these frames are awesome for mailing (think mailing a portrait of Grandpa for Father's Day that your child did) AND they are also a great way to frame kid art in a kid-friendly way ie: shatterproof. You know how it is: your child loves the art work he made and wants you to hang it up. But he also wants to carry it around and show everyone what he did. Well, now he CAN :)
Bonus: They are easy (and inexpensive) to make!
Here is what you need to make your Shatterproof Frames: Ribbon, scissors, xacto knife, electrical tape (I used black for this project but different colors would be really fun for kids' art work), punch tool, foam board (cheapest I've found is at Dollar Tree), glue stick, craft/tacky glue, Transparency film or laminating sheet, and piece of thin cardboard cut to size.

Here is what you need to make your Shatterproof Frames: Ribbon, scissors, xacto knife, electrical tape (I used black for this project but different colors would be really fun for kids' art work), punch tool, foam board (cheapest I've found is at Dollar Tree), glue stick, craft/tacky glue, Transparency film or laminating sheet, and piece of thin cardboard cut to size.

1 - Cut the cardboard to size for your piece of art work. I used the thin packing kind. I think cereal box cardboard would work too.
2- You need to punch 2 holes (be sure to measure so the are equal apart) in the back and then thread ribbon through and glue.

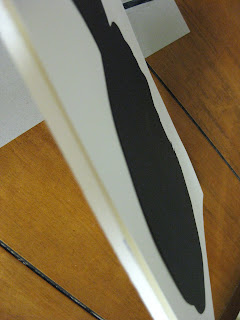
3- Cut your foam board to size for your art work and use a little glue stick to attach the art to the foam board. Here's Jay's silhouette glued on:
 4- Then glue the cardboard piece to the back of the foam board/art work.
 4- Then glue the cardboard piece to the back of the foam board/art work.
 {Little Project Tip:} The side of the cardboard you saw in that first photo is the side that you should not see when it is glued to the foam board.
5- Now cut your transparency sheet/laminating sheet to size for your art work.
6- Then cut 4 pieces of black electrical tape corresponding to the size of the edges. This next part is the trickiest because you want it to be STRAIGHT when it sticks. The electrical tape should only be covered part-way. Leave the other half still sticky (see the photo). The best method I found was to lay the black tape on the floor sticky side up. Then put one edge of the plastic sheet down at a time being careful that it was lined up straight. I only had to take it off and try again a few times :)
When you're done, it looks like this:


7- Now you line up your art work with the sides of the plastic. The black sticky edges of the tape should be extending past the edge of your art work.


It looks like this:


8- Now you just fold up the edges of the black electrical tape and they stick to the sides of the foam board and trim the corners so they lie flat.


9- Since the tape won't wrap all the way around the foam board, I cut 4 more pieces of black electrical tape corresponding to the size of the art work to secure it better. Just match one edge of the tape along the table that the art is sitting on so that it goes on straight, like this:


10- Here's what it looks like on the back after you have pressed down all of the sides. I should mention that you will have to trim the corners so that they lie flat.


These ended up looking very classy (you can't tell from the photo). I should have taken some shots with them hanging but I had to get them in the mail!

They may not be heirloom quality, but that was ok for this project :) They were nice and sturdy, had a cover on the front that looked like glass if you weren't up close and had a frame that you could not tell was just electrical tape.
In other words, an invention success!
Enjoy This shatterproof Little Project!


2 comments:
This is such a great idea! I'll be linking.
Found your blog from ABC-123 learning. I love the shatterproof frame idea since we live away from all of our immediate family. The grandparents would LOVE these. I am interested in what you did to make the frames interchangeable. Do you have another post or can you email me?
Post a Comment