I am in love with tulle right now! I love how versatile it is. I'm excited to share a few {little projects} that have been fun to make with tulle lately. Today's {Little Project} is a Monogramed Dance/Ballet Bag.
My little Miss Kay has been asking about her ballet class ever since she turned three. She wasn't even in a class yet!
For Christmas I got some ballet shoes and a leotard for her and wanted a cute little bag for her to keep everything together in.
What better thing than tulle (think tutu) for a ballet bag?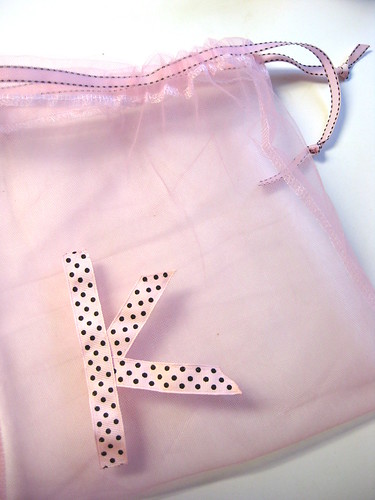 It's perfect because it "breathes" so nothing will get smelly in there. She can see right inside so she'll know if she's got everything.And her K is right on it so she won't lose it.It's versatile. You could just as easily keep legos in it (Jay does in his!)*plus it's quick, easy and inexpensive to make!
To make {This Little Project} you need:
*Tulle in the color of your choice- 2 PIECES of 10.5 inches wide, 24 inches long
*Ribbon (or felt-see below) 27 inches for the top drawstring.
Plus, the ribbon for the monogram ("K" is 5 inches long, 3.5 inches wide)
*Nylon Thread (sometimes called "invisible thread")
*Candle/some type of flame
*Thread that matches the tulle color
*pins
{NOTE} There are a lot of steps below-don't let that scare you-it's really 3 straight lines of sewing for the bag. Then stitching around the ribbon/felt letter! Somehow explaining it just makes it look harder than that...
1st -cut ribbon for "drawstring top" and monogram. A "K" is nice and straight so it's easy to do with ribbon. If your letter is curvy it will be tricky to do with ribbon. Consider cutting it out of felt instead. 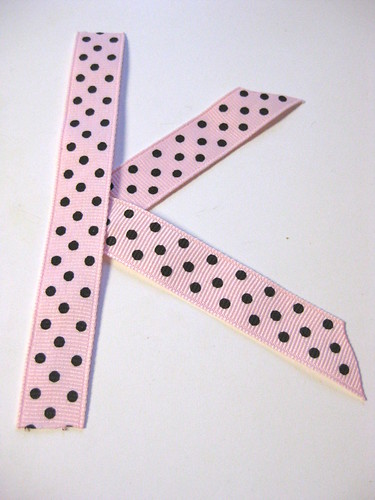
2-Heat-seal all the ends of your ribbon over a flame.
The final bag size is 10 inches across and 11 inches down. Right now, your fabric is 10.5 inches across and 24 long to start with. It will be 2 layers thick to make it more durable.
3-Match the two pieces of tulle up and lay them on top of each other.4- pin them together.5- now fold the piece in half horizontally-it will now measure 10.5 across by 12 long. The fold is the bottom of your bag.6- re-pin so that there are 4 layers together now. 7-sew along the two sides with the coordinating thread using a 1/4" seam allowance. (I used a serger but you don't need to. Tulle doesn't fray) Now you'll make the "tunnel" for the drawstring ribbon:8- There are 4 layers of tulle at the top of the bag right now-2 for the front and 2 for the back. Pin the 2 front layers together so that they stay together.9- Fold those 2 layers out toward you/toward the OUTSIDE of the bag. Pin them down so that you have folded them down an inch-all around the top of the bag. It should look like a bag now :)10- Sew around the bottom of the "tunnel" (an inch from the top of the bag)-see photo :)
11- NOW TURN THE BAG INSIDE OUT. Now it is "RIGHT SIDE" OUT (the way you want it to look when it's done.)
12- Pin your monogram onto the bag.13- Using invisible thread, stitch around the edges of the ribbon. No one will see your stitching if you use this kind of thread-neat huh!14- At the side seam of the bag cut a little hole through the 2 layers of tulle and thread your ribbon through the "tunnel."16- When the ribbon comes around to the start of where you put it in, cut another little hole through the 2 layers to let it come out-about 1/2" from the first hole (on the other side of the side seam from your first hole).17- Knot the ends of your ribbon so they won't go inside the tunnel :)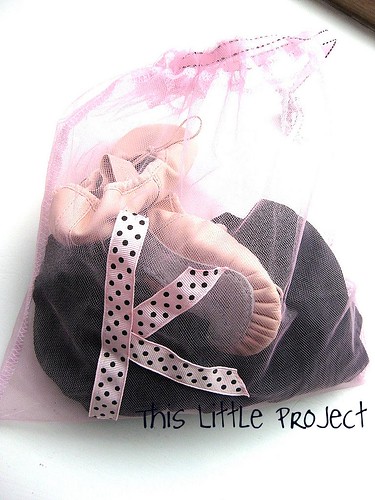
You're done! Yay! Now your little girl's things will be a little more organized :)


1 comment:
adorable!
Post a Comment