I did a guest post for Kierste at
Brown Paper Packages awhile ago and want to share it with you too!
Are you looking for the perfect {Little Project} to chase away winter boredom?
Try a Playdough Party!
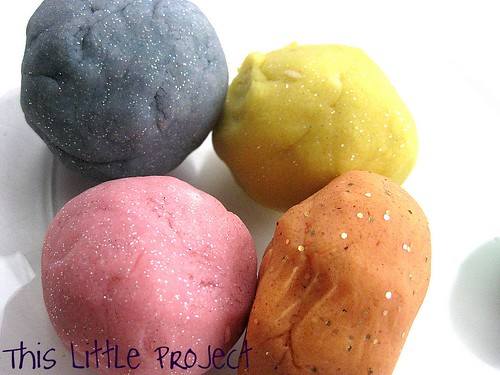
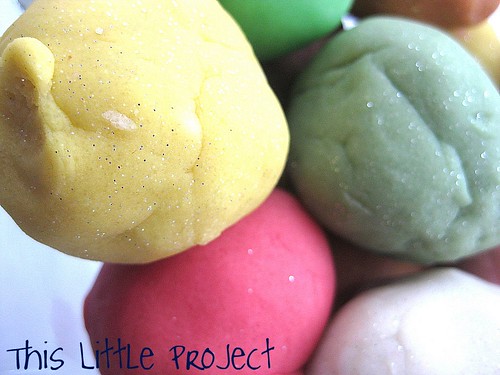
Note: this is NOT the regular stuff.
This playdough
smells
delicious,
and SPARKLES!
{This Little Project} actually started out as a bribe (did I just admit that?) I told my kids that if they finished a (big) chore we would have a playdough party. It took a few days, but it worked! And we've had three parties now. The first time it was just us. The word "party" automatically makes something more fun-right?
But we had so much fun that first time that I knew we needed to share it with friends. Right now it is sooo cold where we live and I thought that a playdough party would be the perfect indoor playdate. But, a bigger group meant we needed A LOT more playdough.
I felt like a kid doing a science project trying a bit of this and that for recipes and made a bunch of different kinds (including chocolate and SPARKLES!) and ended up with some favorites that we used for our playdough party to share with you!
Plus, to go with {This Little Project} I made some easy party favors so the kids could take some playdough home too.
First, the playdough!
To make {This Little Project} you need:
cream of tartar
salt
flour
water
vegetable oil
Plus the "mix-ins" of your choice:
food coloring
glitter
extracts (peppermint, orange, lemon, coconut, almond, etc.)
cocoa powder
kool-aid
and printable recipes below
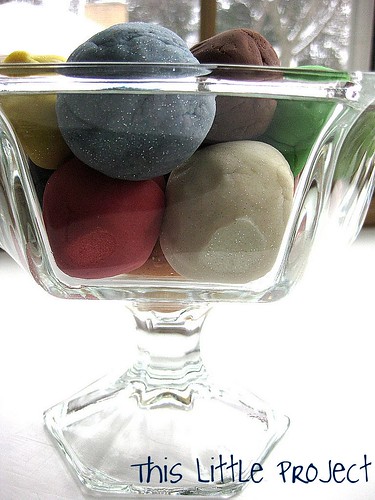
Here are the details of how to make FOUR different kinds of playdough!
Below, are printable recipes for:
Plus, you can combine them and make your sparkle playdough smell like peppermint or oranges!
Chances are you either have little ones at home, grandkids that visit, or little people for neighbors that can appreciate all the squishy goodness of scented and sparkled playdough
so feel free to share them with a friend!
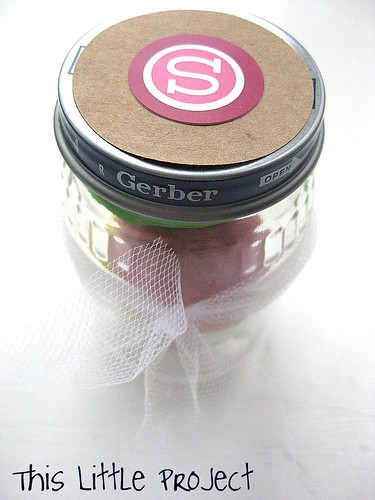
And here are the Party Favors!!
I love to repurpose things and {This Little Project} came right from my "
invention box." These party favors are perfect for sending home some of their favorite "flavors" of playdough.
Plus, the monogram makes it personal. Oh, and I'm in love with tulle right now! Did I mention these are EASY and INEXPENSIVE to make?
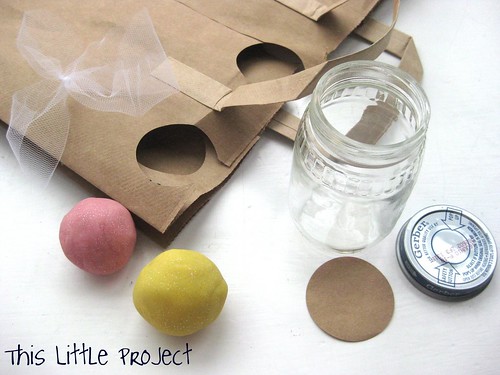
To make {This Little Project} you need:
Stickers or Stamps to make the monogram
paper bag (like from the grocery store)
circle punch (size 1.75" or 2")
tulle (3" by 11")
Tape
Baby food jars (I used the larger jars for 2 or 3 "flavors" or dough. But you could use the smaller jars too.)
To assemble the Party Favors:
Punch your circles out of the bag. Then add the monogram letter for each child coming to your playdough party in the centers of the circles.
Use a little tape under the circle to stick it to the baby food jar.
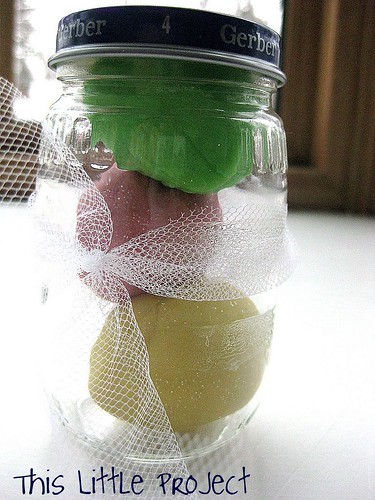
Then roll up a few balls of playdough to fit inside, tie your tulle around the center, and you're done. With these and the printable recipe cards above, you are ready to PARTY!
These baby food jars (the plastic ones would work too)
keep the playdough from drying out but they are
so much cuter than a ziplock bag :)
Let me know if you have a Playdough Party!